In the previous article of our ‘Divi Popup Triggers Explained’ series, we’ve highlighted the power of exit-intent, what characterizes the trigger, and the most common usages for increasing conversion rates.
Today, let’s gradually move to users’ actions on the page and explore actions such as click & hover as powerful popup triggers, as well as how to utilize them effectively to improve conversion rates.
Table of Contents
- FAQs About Using the Click and Hover Triggers
- Why Are Hovers & Clicks Effective?
- User Actions Aspects to Consider
- How Can Divimode Help You
FAQs About Using the Click and Hover Triggers
How can using Click and Hover popup triggers benefit my website’s user experience?
Both triggers offer unique benefits for user experience and engagement:
- Click Trigger Benefits: Click triggers provide more control to visitors, as they actively choose to engage with the popup, making it feel less intrusive. This trigger is suitable for important calls-to-action and offers, as it captures users’ undivided attention.
- Hover Trigger Benefits: Hover triggers can be more visually engaging, as the popup appears when users show interest by hovering. They are effective for providing quick additional information or visually stimulating content.
Can I use Click and Hover triggers simultaneously on my Divi website?
Absolutely! With Divi Areas Pro, you have the flexibility to set up both Click and Hover triggers on different elements or sections of your website. This allows you to deliver a dynamic and interactive user experience, tailoring popups to specific user interactions.
Are there any best practices for using Click and Hover triggers effectively?
To use Click and Hover triggers effectively:
- Relevance: Ensure the content of the popup is relevant to the element triggering it, providing additional information or value.
- Clear Call-to-Action: Use concise and compelling language in your popups to encourage users to take the desired action.
- Mobile Responsiveness: Optimize your popups for mobile devices to provide a seamless experience for all users.
Will Click and Hover triggers work on touch devices like smartphones and tablets?
Yes, both Click and Hover triggers are designed to work on touch devices. For mobile users, Click triggers will activate with a tap, while Hover triggers will appear when the element is long-pressed.
Why Are Hovers & Clicks Effective?
When the whole point is to capture and keep users’ attention on your Divi website, the best way is to do it at their convenience, or in other words, offer them the chance to convert when you know they’re actively engaged on your pages.
Thus, if you want to decide at which stages or website areas you want to display a popup, you must learn how visitors act on your website and meet them at the right place and at the right time.
According to where exactly website visitors are on the customer journey, you can control where you’ll present them a popup based on their actions.
After you collect the necessary data, you can use it to set the right triggers that can help you build better connections and improve your lead generation efforts through the popups that you’ll present.
A good representation of a user action trigger would be the on-click and on-hover triggers.
User Actions Aspects to Consider
Many web designers are familiar with some of the common standards for using popups, such as making sure popups are visually distinctive from the page and obscuring their background, as well as making the popup content accessible to all keyboard and mobile users.
However, you can follow all the popup rules by the book and still end up hurting the UX as a result.
To avoid that, you need to analyze the design of your Divi website and make sure that presenting a popup is the right solution for that particular page. Ask yourself the following:
- Who is my target customer?
- What action should the customer take?
- When will the popup appear?
- Where will the popup appear?
- Why does this require a trigger?
Bottom line, you should only use an on-click or hover trigger for popups if you have a compelling argument and why the popup should be presented with a click or a hover.
How Can Divimode Help You
Divi Areas Pro from Divimode is a premium full-stack popup plugin for Divi that allows you to build and customize different versions of popups for your website, including adjusting and timing the trigger as a part of its extensive palette of features.
Creating On-Click Popup
Let’s create an example exit-intent popup with Divi Areas Pro, step-by-step, just to demonstrate how easy it is to use our premium full-stack Divi plugin.
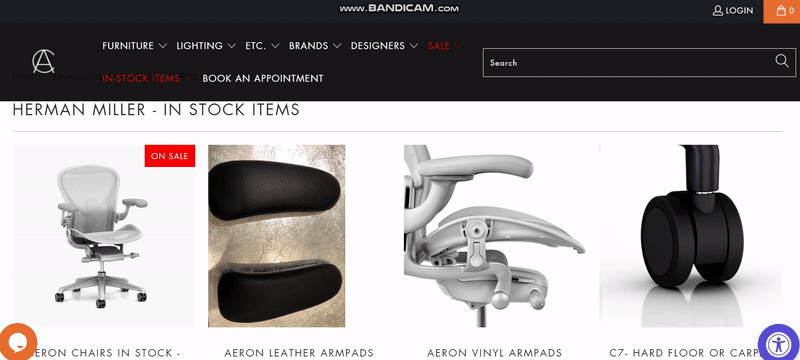
Step 1 – After you’ve downloaded and installed Divi Areas Pro, the first step would be to create the content of your on-click popup with the Divi Builder.
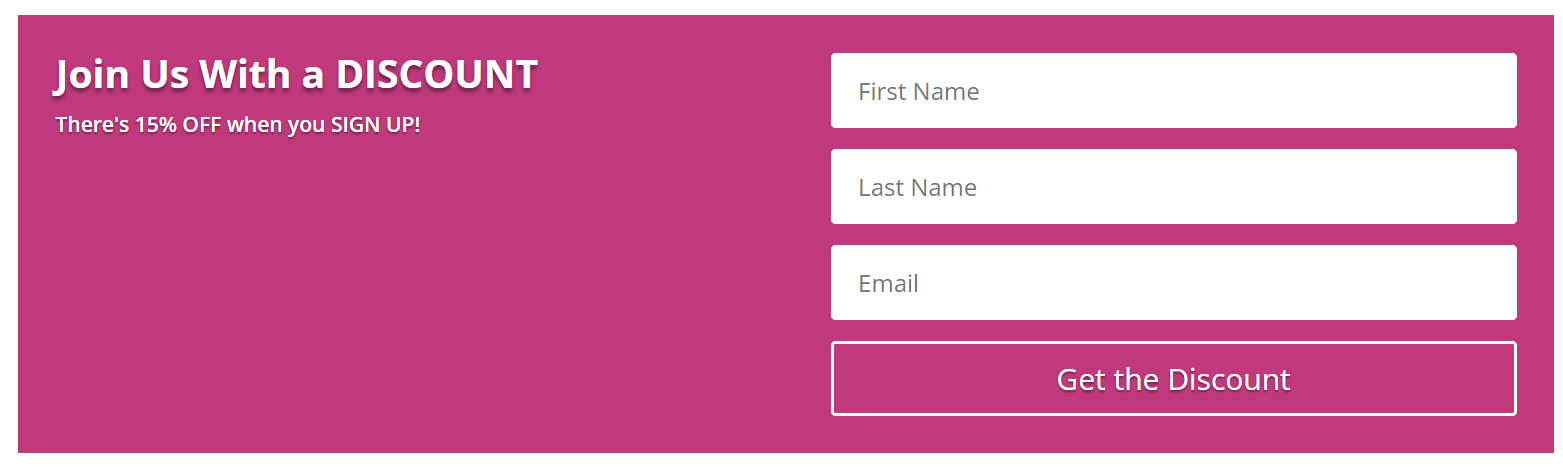
Step 2 – Once that’s ready, you need to navigate to the Divi Area Settings, and choose the Area Type ‘Popup’.

Step 3 – The next thing you would need to do is configure the popup’s trigger that would display the popup after the user clicks on a specific button.
Click on the ‘Trigger’ options and navigate to ‘Automattic Triggers’, then choose the ‘On Click Trigger’ that you will add to turn any Divi element into a Click trigger for the popup.

After confirming the trigger settings, Save the Area and test it on your page. The popup should appear on your Divi website when someone clicks the button.
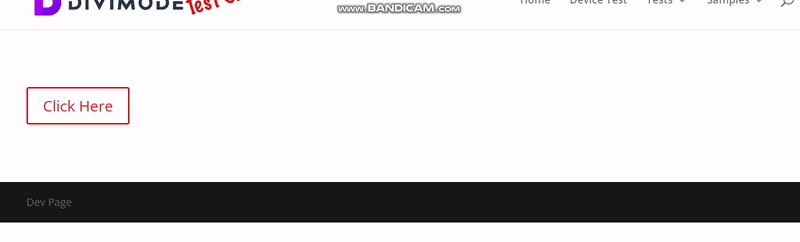
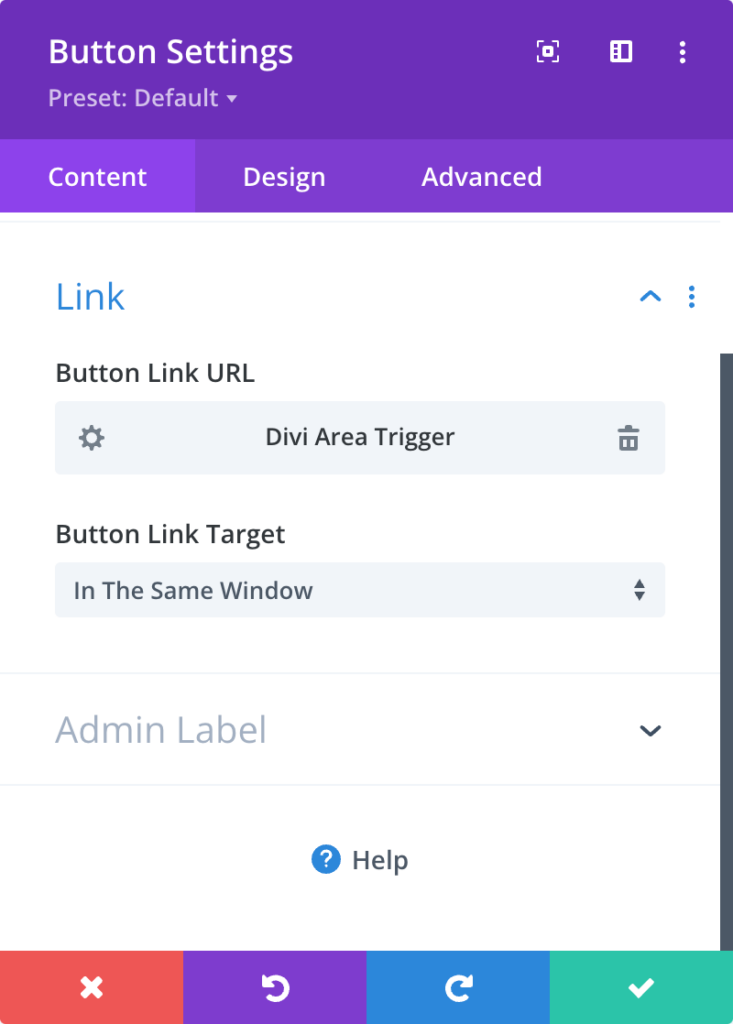
To conduct a quick test, create a simple Divi page and insert a button that should trigger the popup.
Within the button, set the ‘Link’ to ‘Divi Areas Link’, and choose the Divi Area that you’ve created as the Link.

If you’ve done everything correctly, the Divi Area popup should appear after clicking the button.
The above is of course, the preferred way to create an on-click popup with Divi Areas Pro. In essence, with its straightforward workflow, most Divi Areas Pro users utilize this method to add a click trigger to a single Divi Module.
However, you need to always create an Area and then also edit the page/post to add a trigger.
Now, if you want to use a click trigger for an element that has no ‘Link URL’, in Step 3, you need to specify a CSS selector as a Click Trigger. That’s the flexibility of Divi Areas Pro trigger options.
You can add a trigger to many pages at once, e.g. by adding the Trigger Selector button.checkout to modify ALL buttons with the “checkout” class on the website.
You can also target elements that have no Link URL, such as a menu item, custom HTML, etc, and even more beneficial, you can create the Area AND the trigger on the same admin page.
And there you have it, an on-click user interaction popup created in Divi with Divi Areas Pro.
Creating On-Hover Popup
When we are creating the on-hover popup trigger in Divi Areas Pro, we’re basically going through the same steps as we did with creating the on-click popup, except, in this case, when we arrive at Step 3, we set the automatic trigger to ‘On Hover’.
By using a CSS Selector, select “On Hover Trigger” instead of “On Click Trigger”.
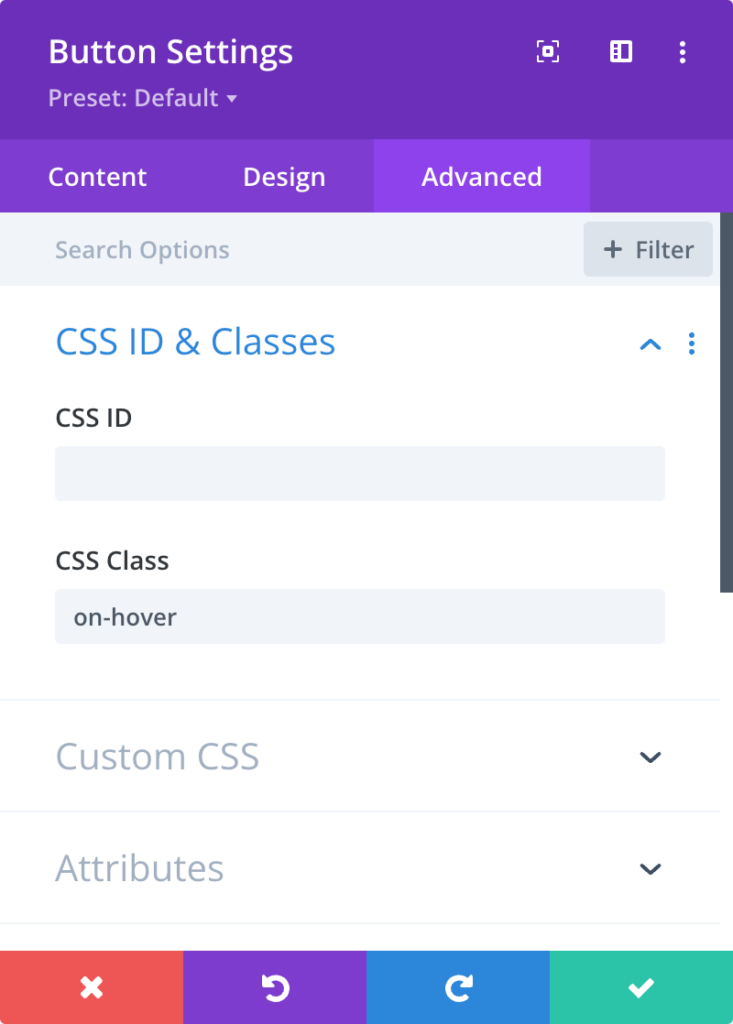
Alternatively, by using Module Link URL, After selecting the Popup, add the CSS class “on-hover” of the module.
At Divimode, we’ve developed a unique UI, that makes it easy and fun to change your Hover Area appearance. To learn more about the On Hover trigger and our Layouts Library, read this blog post that explains everything in broader details.
Try Divi Areas Pro today
Sounds interesting? Learn more about Divi Areas Pro and download your copy now!
Many pre-designed layouts. Automated triggers. No coding.
Click here for more details
Working with Divi Areas Pro is super easy, and the power of your creativity is unlimited. The simplest and most effective way to create a great-looking popup for your Divi website.
With an easy-to-use and intuitive interface in line with the Builder, Divi Areas Pro can help you get more qualified leads on your Divi website, growing your conversion rates in the process.
For any questions regarding the Divi Areas Pro plugin, you can write us a message to our technical support team department or alternatively, visit our knowledge base.
Over to You
There are a multitude of other popup triggers that you need to consider. However, to convert more users to qualified leads and customers, user action is what counts on a website.
Popups can be mighty effective, but often, they’re used without taking users’ actions in mind, resulting in an inconvenient way to insert additional content or offer something to customers.
Instead of creating confusion, you must use clicks and hovers to your and your users’ advantage, aligning with visitors’ motivations behind those actions and proceed creating popups with care.
When users show interest, they actively click and hover on websites, and at that moment, a popup at the right place will help you convert website visitors at the spot!
Try Divi Areas Pro today
Sounds interesting? Learn more about Divi Areas Pro and download your copy now!
Many pre-designed layouts. Automated triggers. No coding.
Click here for more details
More Articles You Will Like