Want to craft a one-of-a-kind Divi header?
In this tutorial, we will provide you with step-by-step instructions on how to create a global Divi header that is both visually appealing and customizable. By utilizing the powerful tools of the Divi Builder and its modules, you can easily design and personalize your own custom Divi headers.
Discover how to unlock the full potential of the Divi Builder and its modules for web design and customization. Our approach will enable you to create an eye-catching and adaptable Divi header that captivates visitors. With our easy-to-follow Divi Global Header Tutorial, you will be able to create a header that is optimized for both desktop and mobile users.
How to create a custom global Divi header
Table of Contents
- How to create a custom global Divi header
- Additional Tips For Creating a Custom Divi Header
- Final Thoughts
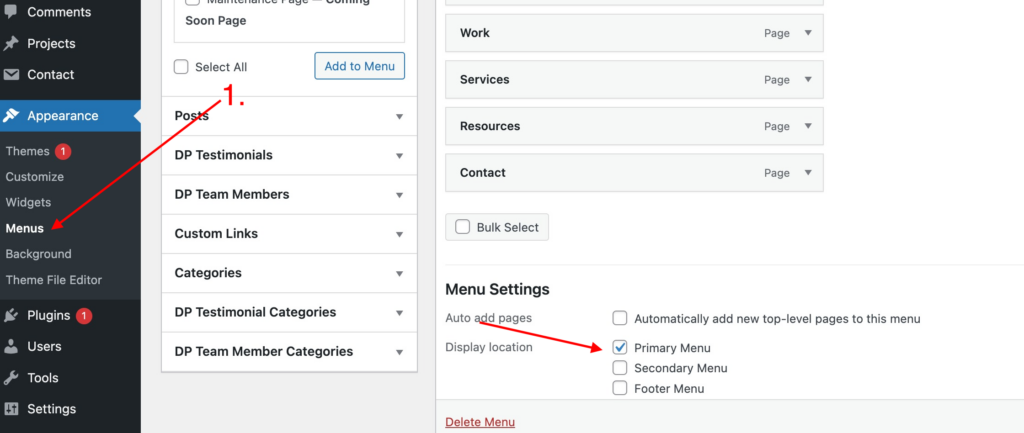
Step 1: Make Sure You Have A Primary Menu Set up
Before you do anything else, you must make sure you have created a primary menu. You will need your primary menu set up so that you can use it on your custom Divi header.
If you don’t know how to create a menu, don’t worry, it is very easy! To start with, navigate to Appearance ➝ Menu ➝ Create New Menu. Remember to set the menu to “Primary Menu” below after you have named your menu and added your menu items.
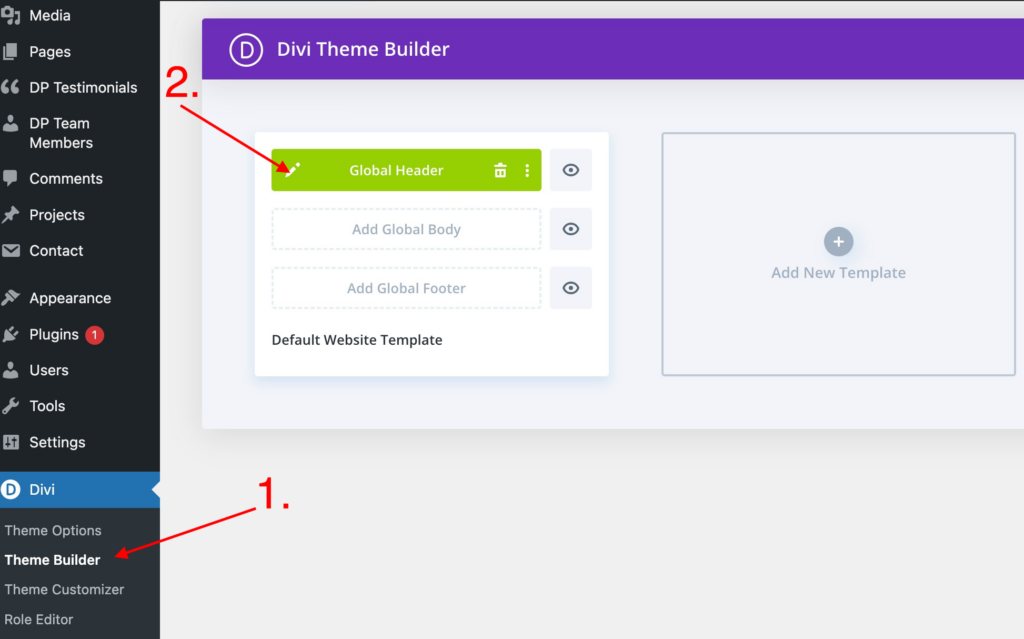
Step 2: Create a global Divi header
Go to Divi –> Theme Builder and click on “Add Global Header”.
*Related Article – How To Customize Your Divi Footer
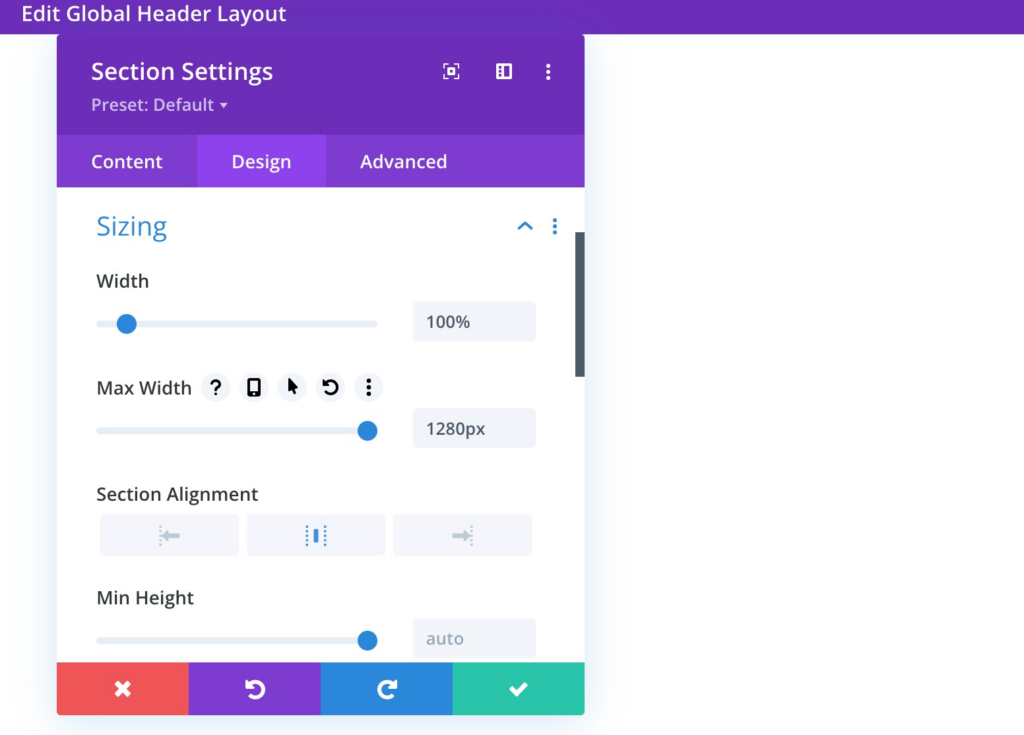
Step 3: Add & Edit Your Section Settings
Sizing
Open the section you can notice on the page, move on to the design tab, and change the width across different screen sizes.
- Width: 100%
- Max Width: 1280px (Desktop), 100% (Tablet & Phone), or whatever size you prefer your header to be.
Spacing
Remove all default top and bottom padding next.
- Top Padding: 0px
- Bottom Padding: 0px
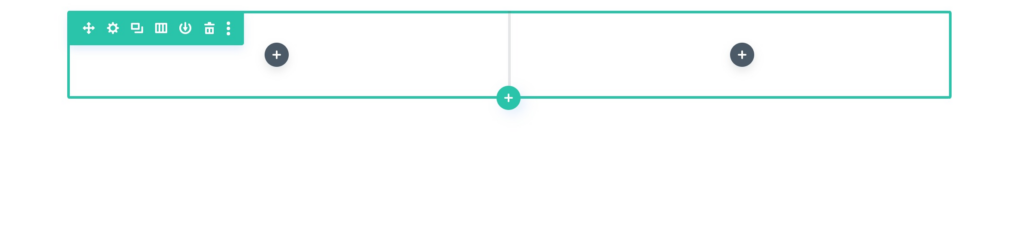
Step 4: Add Rows To Your Header
Now that you have completed the general section settings, you can start adding rows. Depending on the layout of your header, you can choose how many rows you want to add.
Step 5: Add Your Modules
Now you can add your desired modules. This can be a logo, your menu, a button, or whatever you want to add to your website header.
When you’re finished, click on the Save button.
Your header will appear as a global header on your website. This way you have lots of freedom over your header and create your header to fit your website and brand.
Additional Tips For Creating a Custom Divi Header
- Use a high-resolution logo that looks good in all sizes.
- Make sure your menu is easy to use and navigate.
- Use social media icons to connect with your audience on other platforms.
- Get creative and have fun with your design!
Not A Divi Theme User Yet? -➝ Try Divi!
Final Thoughts
We hope this custom Divi Header tutorial inspires you to get started with the Theme Builder right away!
Try Divi Areas Pro today
Sounds interesting? Learn more about Divi Areas Pro and download your copy now!
Many pre-designed layouts. Automated triggers. No coding.
Click here for more details
More Articles You Will Like