
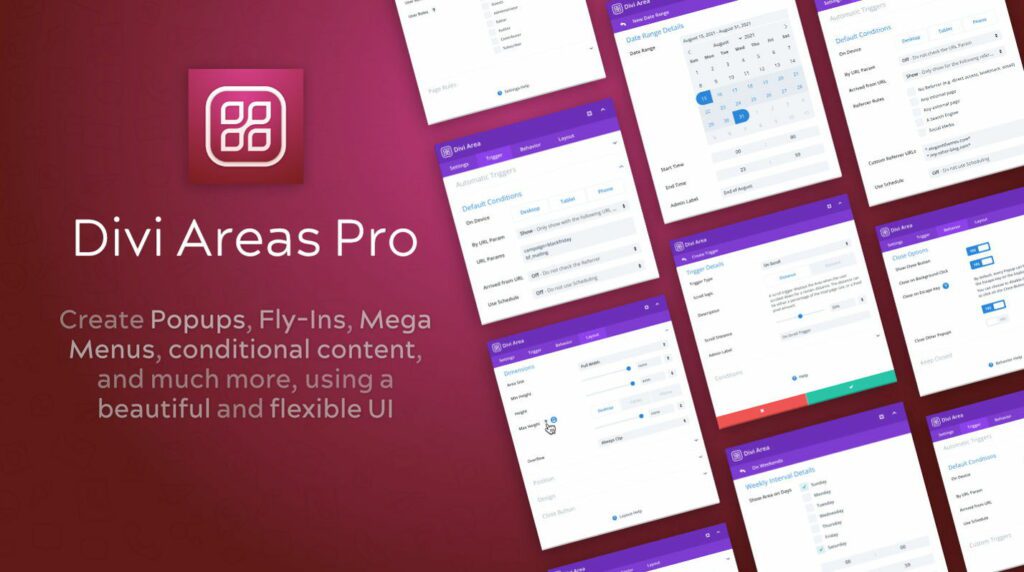
As you might know by now, with the Divi Areas Pro Plugin, you can do so much more than just Popups. Whether you need a popup, fly-in notification, or hover notification, the Divi Areas Pro plugin makes it all possible.
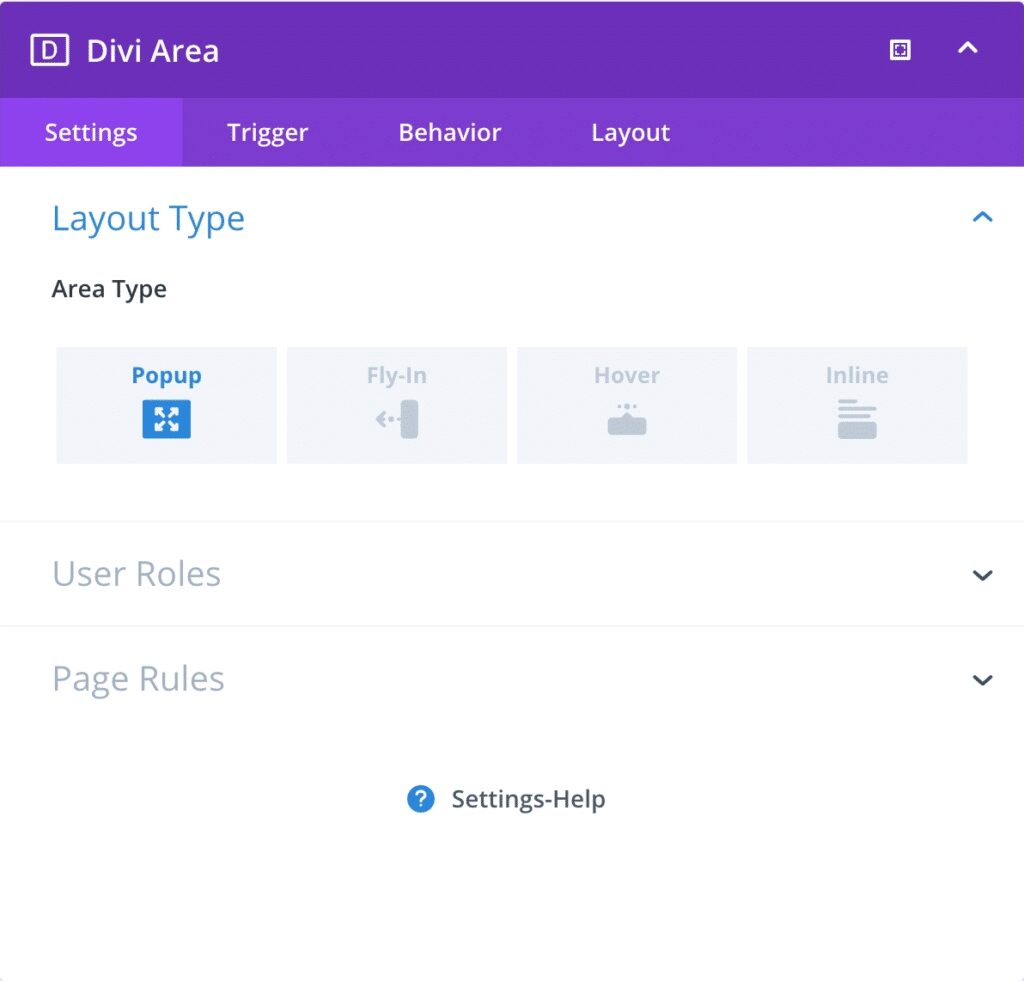
In fact, Divi Areas Pro allows you to create 4 different types of layouts. Without further ado, let’s examine the 4 different types of Divi Areas Pro layouts as integral parts of the Layout Library.
The possibilities with Divi Areas Pro are endless, especially with ready-made templates at your disposal. Let’s learn how to enable our Divi Areas Pro Library and what are the most important layouts today!
Table of Contents
- Divi Areas Pro: A Brief Overview
- Enabling the Divi Areas Pro Layout Library
- Using the Divi Areas Pro Layouts Library
- Popups
- Fly-ins
- Hover Areas
- Inline Areas
- Over to You
Divi Areas Pro: A Brief Overview
Divi Areas Pro is recognized as one of the leading Divi extensions available, offering comprehensive enhancements to every aspect of your Conversion Rate Optimization (CRO) process. It empowers you to effectively grow your email lists, attract qualified leads, and ultimately boost your revenue.
Even if you’re new to Divi, you can easily utilize these features. Additionally, you have the ability to establish display triggers and rules, ensuring that your targeted users encounter your marketing campaigns at the perfect moment.
Since joining the premium plugin market of Elegant Themes, we have distinguished ourselves from the competition by delivering an impeccable user interface and a diverse range of powerful popup options and trigger types.
The standout advantages of Divi Areas Pro that set it apart in the marketplace include:
- Content Interactivity: Move beyond conventional sections and rows. With Popups, Tooltips, Fly-ins, and Dynamic Inline Areas, you can create truly interactive content like never before.
- Content Conditionality: Whether you desire to showcase a Popup on specific pages or display a contact form exclusively to logged-in users, Display Conditions are an integral part of every Divi Area.
- Custom Triggers: Fine-tune the trigger settings for each Area according to your preferences. Whether it’s a timed display, scroll-based activation, exit-intent trigger, hovering over a specific element, or even custom triggers created in JavaScript, the choice is yours.
- Excellent Compatibility: Divi Areas Pro seamlessly supports every Module available in Divi. It works harmoniously with the Divi Builder plugin, WooCommerce, the Extra theme, and more.
- Robust API: The plugin’s foundation is a reliable and highly flexible API that has undergone rigorous testing. You can integrate it into your theme to take your website to the next level.
- Divi Integrations: The user interface of Divi Areas Pro seamlessly integrates with Divi, ensuring a familiar experience for you or your clients. There’s no learning curve, no need to remember CSS classes and no perplexing technical jargon.
- Help and Support: Each plugin feature includes an inline help section. Should you have any questions, our Live Chat support on the website is readily available to assist you.
- Regular Updates: Our roadmap is packed with exciting plans, and we highly value feedback from our customers. Expect prompt bug fixes, stable code, and regular improvements.
With its multitude of advantageous features for popups and campaigns, Divi Areas Pro enables you to create a diverse range of popups for each page, precisely determining when and where each popup should appear. This empowers you to craft relevant and targeted marketing campaigns.
In summary, we have invested significant effort in incorporating every beneficial feature you need to create powerful popups and signup forms for your Divi website.
Enabling the Divi Areas Pro Layout Library
Before you can use our Layout Library, you need to install it and enable it on your Divi website.
Luckily, the process is pretty straightforward:
- Navigate to the Divi Areas Settings page in your wp-admin dashboard.
- On the Settings page, choose the “Layout Library” tab.
- Turn the flag “Enable the Layout Library” to “Yes”.
- Save the Settings and wait a minute or two while the templates are downloaded.
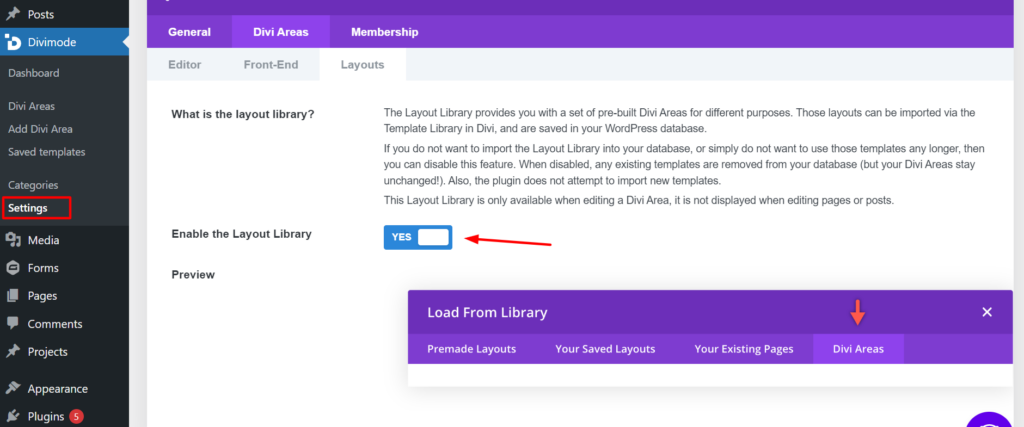
Once the Layout Library is enabled, every available Layout template will be downloaded to your Divi website so you can use them for your Divi Areas.
Try Divi Areas Pro today
Sounds interesting? Learn more about Divi Areas Pro and download your copy now!
Many pre-designed layouts. Automated triggers. No coding.
Click here for more details
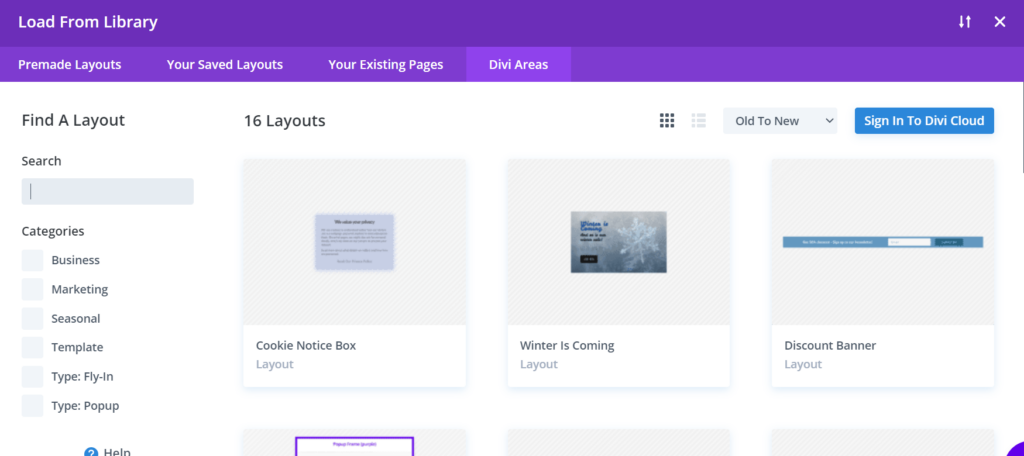
Using the Divi Areas Pro Layouts Library
After you enable the Layouts Library and each of the available templates are installed on your Divi website, go through the following steps to make sure that you’ll be able to use any template:
- Create a new Divi Area (or open an existing one)
- Click on the “Load From Library” button in the Visual Builder header (‘+’ icon)
- Once the Library modal has loaded, you will see the new tab “Divi Areas“. Switch to that tab.
- Now all available templates are visible to you. With a single click, any template can be imported to your Divi Area editor.
- Customize the template according to your needs, double-check that the Automatic Triggers are set, and publish the Area.
Popups
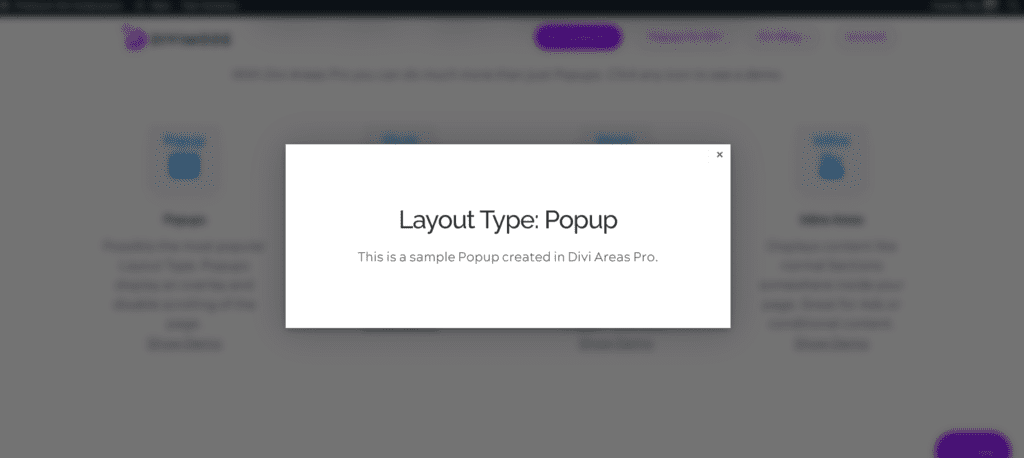
The Divi Areas Pro Popup layout is the most popular layout type, which means that most clients use popups to display important notifications, promotions, and invite page visitors to subscribe for their newsletters.
Fly-ins

People will use a Fly-in for email sign-ups or other notifications. Fly-ins do not show an overlay and do not block the page.
They stick to any side or corner of your screen, and Divi Areas Pro allows you to choose where you want to add the fly-in on your site. Better yet, users will still be able to scroll through the page while the Fly-in is showing.
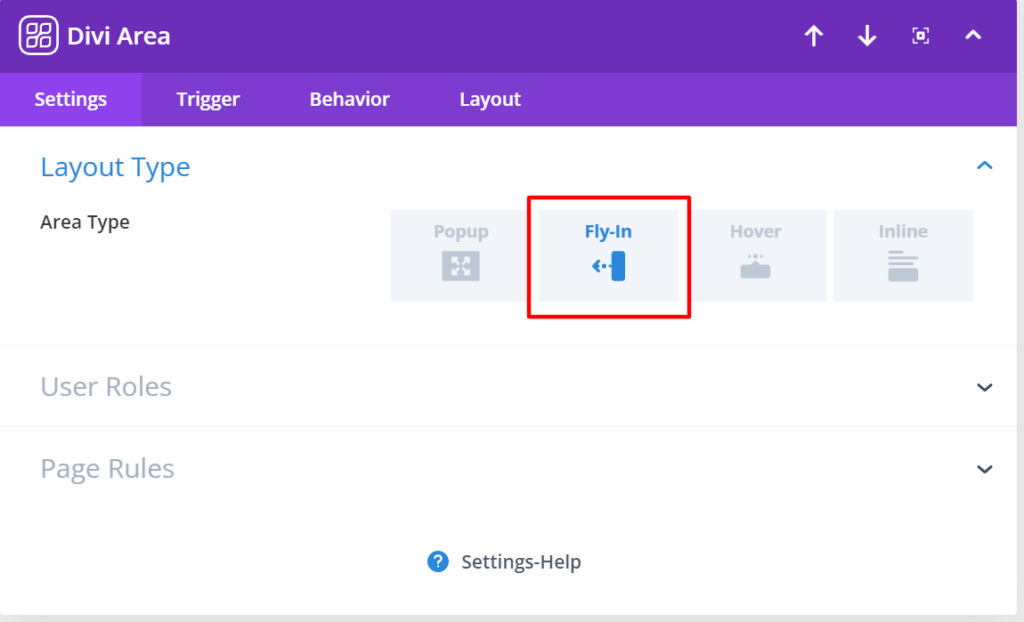
Creating a Fly-In is effortless. Start by creating a brand-new Divi Area, where in the Area Settings, you’ll choose the ‘Fly-In’ layout type:
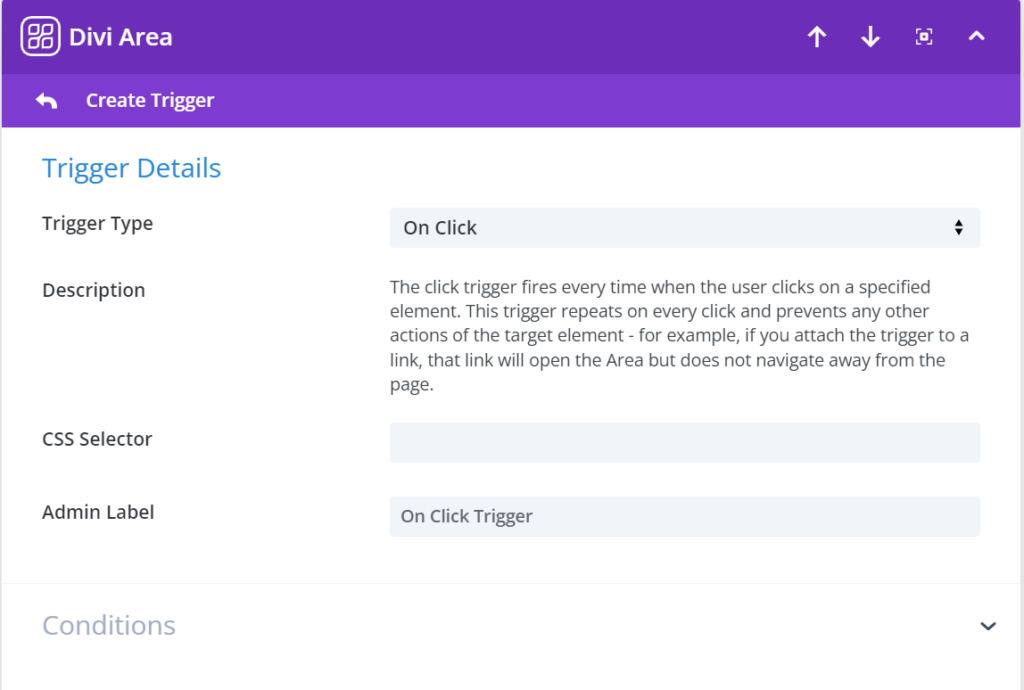
Next up, you need to choose your automatic trigger in the ‘Trigger’ section of the settings, which can be either ‘On Click’ ‘Hover’, or a valid main menu CSS Selector:
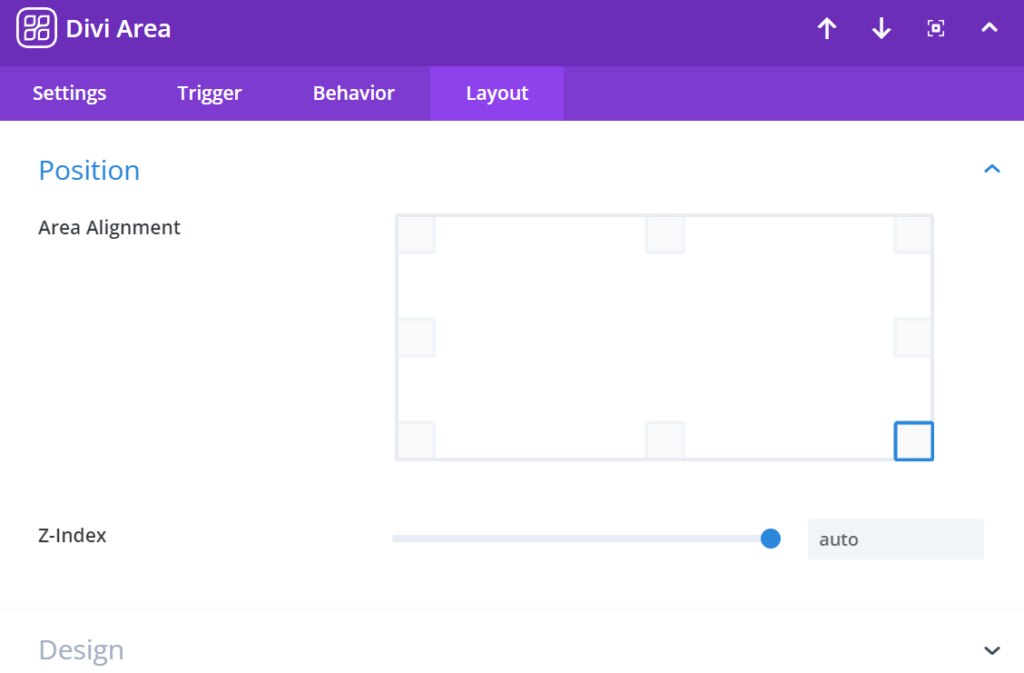
In the Layout settings, you’ll also find the ‘Area Alignment’ feature as well. Here, you can choose on which place on the screen the Fly-In area would appear:
Creating a Fly-In is that easy. All you have to do later is use the Divi Builder to set up the Fly-In design and text elements.
Hover Areas
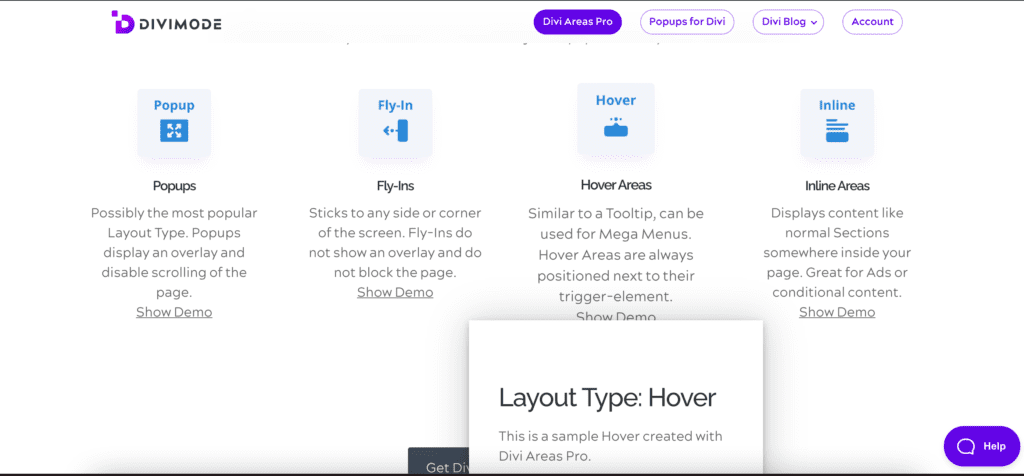
Hover Areas are always positioned next to a trigger element. The Hover Areas layout is similar to a Tooltip, and they can be used for example, displaying mega menus.
To learn more about Hover Areas and how to use them with the Layout Library, read Introducing Hover Areas and Template Library Support.
Inline Areas
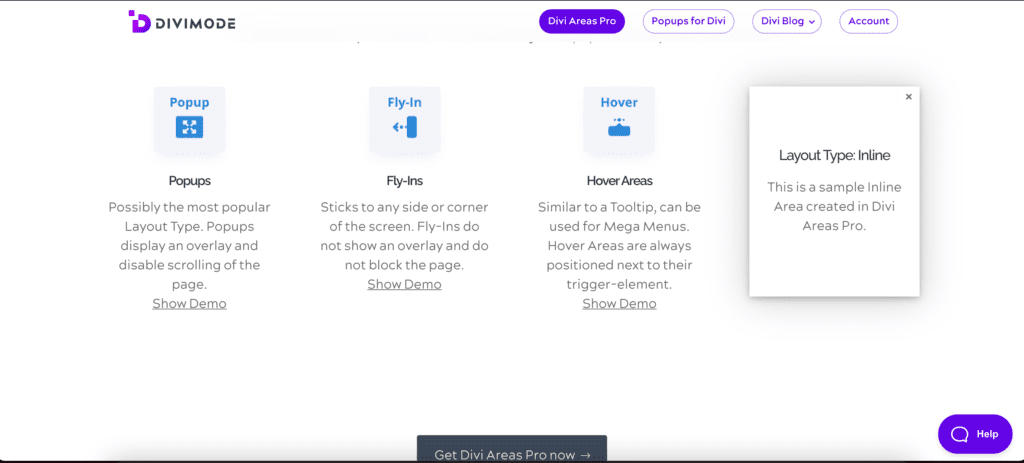
Inline Areas display content in a normal section, somewhere inside a page, and are excellent for positioning and posting ads, or conditional content.
Over to You
There you have it! The Divi Areas Pro Layout Library offers endless possibilities and layouts to grow your website and improve your conversion rate. With only little customization, you can use Areas Pro for any Divi area your heart desires.
Using a plugin such as Divi Areas Pro doesn’t require any coding experience, which means that you can start creating high-converting popups quickly and easily!
Divi Areas Pro is a feature-rich lead generation tool for your Divi website, and its layouts integrate perfectly with your design and end goals. Click here to get started →
Try Divi Areas Pro today
Sounds interesting? Learn more about Divi Areas Pro and download your copy now!
Many pre-designed layouts. Automated triggers. No coding.
Click here for more details
More Articles You Will Like
