You’ve probably hit this point already. A client wants a quote request form that accepts floor plans. A WooCommerce store needs customers to upload reference images before checkout. A support form needs screenshots because plain text isn’t enough. Then you open Divi’s native Contact Form module and remember it still doesn’t handle file uploads out of the box.
That’s where most Divi file upload projects go sideways. People bolt on the first plugin they find, leave default upload paths untouched, and only discover actual problems after launch. Large files time out. Mobile users can’t upload from their phones cleanly. Uploaded files sit in public locations longer than they should. Popup forms look great until the upload field breaks the flow.
A solid file upload in form setup for Divi needs four things working together. The right form plugin. A practical front-end flow. A hosting and storage plan that won’t choke on real files. Security rules that treat every upload as untrusted. If you also use Divi Areas Pro for popups, fly-ins, or content injections, you need one more thing. The upload experience has to feel native inside those interactions, not like an embedded afterthought.
Choosing the Right Tool for File Uploads in Divi
Divi’s own Contact Form module is fine for names, emails, dropdowns, and simple lead capture. It isn’t the right foundation if you need a reliable file upload in form workflow. You’ll spend less time, and create fewer support tickets, by starting with a dedicated form plugin built for upload fields, validation, notifications, and storage handling.
For most Divi projects, three plugins come up again and again. Gravity Forms, WPForms Pro, and Contact Form 7. All three can work inside Divi layouts. They don’t serve the same kind of user.
What matters most for Divi users
When I choose a form tool for uploads, I’m not looking at the drag-and-drop interface alone. I’m looking at what happens after launch.
Key decision points are usually these:
- Ease of setup: Can a designer or site manager adjust allowed file types, required fields, and confirmation messages without editing code?
- Validation depth: Can the plugin handle practical restrictions like file extensions, field requirements, and conditional logic cleanly?
- Large file tolerance: Will it cooperate with custom server settings and more advanced upload methods when the project grows?
- Divi friendliness: Does it embed cleanly by shortcode, module, or block without fighting the layout?
- Maintenance burden: Will future edits be simple, or will every change turn into a support request?
Practical rule: If the form will evolve over time, buy flexibility early. Rebuilding a working upload form later is always more expensive than choosing the right plugin first.
File Upload Plugin Comparison for Divi Users
| Feature | Gravity Forms | WPForms (Pro) | Contact Form 7 |
|---|---|---|---|
| Ease of use | Strong admin UI, good for complex builds | Very user-friendly, fast for common setups | Functional but less friendly for non-technical users |
| Divi integration | Excellent via shortcode/embed | Excellent via shortcode/embed | Good via shortcode |
| File upload support | Strong native support | Strong native support | Available, but configuration is less polished |
| Conditional logic | Mature and flexible | Good in Pro plans | Limited without extra plugins |
| Best fit | Agencies, custom workflows, advanced forms | Freelancers, small businesses, simpler builds | Budget-sensitive builds, developer-managed sites |
| Editing experience | Builder-based and structured | Builder-based and approachable | Tag-based, less visual |
| Developer flexibility | High | Moderate to high | High if you’re comfortable with WordPress hooks and custom fixes |
Gravity Forms for serious form workflows
Gravity Forms is usually the cleanest choice when uploads are part of a broader workflow. Think job applications, onboarding documents, quote requests with attachments, or support forms that route files to different teams.
Its biggest advantage in Divi projects is stability under complexity. If you know the form will later need conditional fields, admin routing, approval logic, or custom storage handling, Gravity Forms gives you room to grow. It’s also easier to justify in agency work because it reduces future rebuilds.
The trade-off is simple. It’s not the cheapest option, and some clients will need a short handoff video to feel comfortable editing it.
WPForms Pro for fast builds and low-friction handoff
WPForms Pro fits well when the site owner wants a visual builder that feels straightforward from day one. For brochure sites, service businesses, or smaller WooCommerce add-ons, it’s often enough.
Its strength is approachability. A client can usually understand the field settings without much training. If the file upload need is basic, such as accepting PDFs, JPGs, or PNGs on a quote form, WPForms tends to get out of the way.
It becomes less attractive when the form logic gets deep. You can still do a lot with it, but agencies building layered workflows often outgrow it faster than they expected.
Contact Form 7 for technical users on lean budgets
Contact Form 7 still has a place. It’s free, widely used, and flexible if you don’t mind working closer to the markup. For developer-managed sites, that can be perfectly reasonable.
For non-technical teams, though, it’s harder to recommend as the first choice for file uploads. The editing experience is less intuitive, and maintaining a polished upload experience often means adding custom CSS, extra validation, or companion plugins. That’s fine if you control the stack. It’s not ideal if the client expects a visual admin experience.
One other practical option in the Divi ecosystem is Divi Form Builder, which includes a File Upload Field and an Image Upload Field for sending files into WordPress media storage. That can suit some all-in-Divi builds, especially when you want form creation closer to the builder experience.
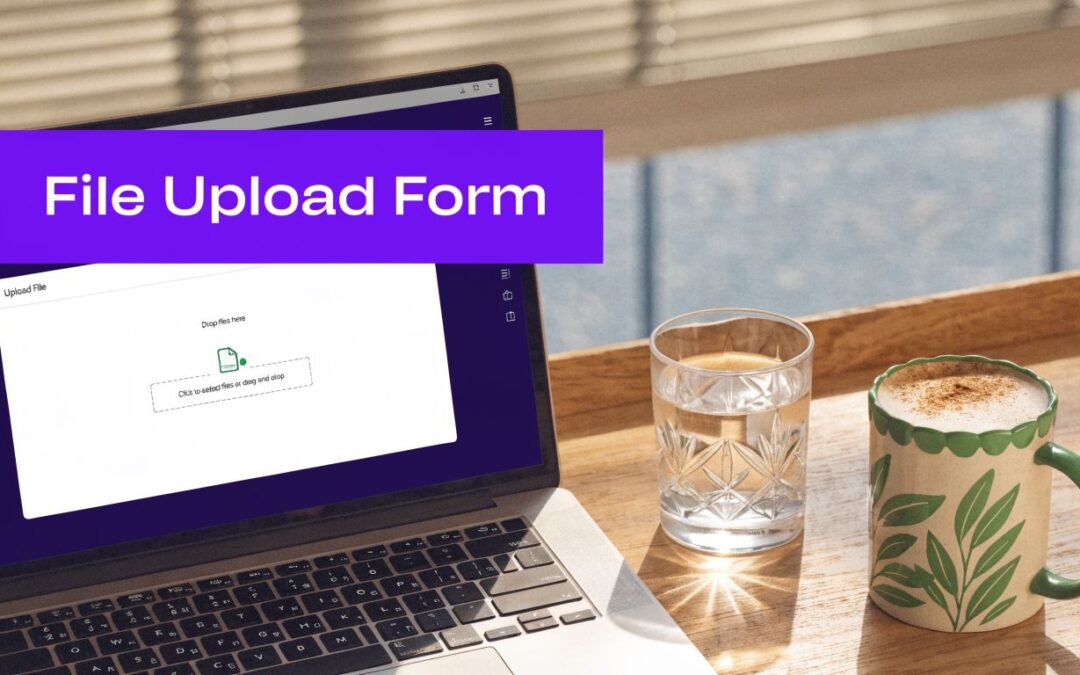
Implementing Your File Upload Field Step-by-Step
Once you’ve picked the plugin, the first goal is simple. Get a reliable upload field working before you style anything heavily. Too many Divi builds do this in reverse. The form looks polished, but the upload rules, required state, and file handling are still vague.
Start with the field itself and the acceptance rules. Then test with a real file. Then embed it in Divi.

Before touching plugin settings, it helps to review a few tips for better Divi forms so your labels, spacing, and field hierarchy stay clear when the upload control is added.
Building the field in Gravity Forms
In Gravity Forms, add a File Upload field from the advanced fields panel. Once it’s in place, open the field settings and define the basics that matter in production.
Set the allowed file extensions first. Keep this narrow. If the form is meant for documents, allow only the document types you need. If it’s for images, specify image formats only. Don’t leave the field open-ended unless you enjoy cleaning up junk uploads later.
Then set the maximum file size based on what your server and workflow can handle. Match the limit to reality, not wishful thinking. If your hosting environment is strict, a smaller limit with clear instructions is better than a larger limit that fails unpredictably.
Also decide whether the field should be required. If the file is essential to process the submission, make it required. If it only helps the team review the request faster, keep it optional.
Building the field in WPForms Pro
WPForms handles this in a more beginner-friendly way. Drag in the File Upload field, click the field, and use the left settings panel to control what the form accepts.
WPForms makes it easy to define:
- Allowed extensions: Use a clean allowlist such as PDF, JPG, or PNG based on the task.
- Maximum file size: Keep it aligned with your hosting limits and user expectations.
- Required state: Only turn this on when the form can’t be processed without the file.
- Description text: Use this to tell users what to upload and which formats are accepted.
That last setting matters more than commonly believed. Users don’t fail because they hate forms. They fail because the form assumes too much.
A short field description prevents more support requests than a fancy upload button ever will.
WPForms also gives you a clean embed path into Divi. Once saved, insert the form with shortcode into a Code module, or use the plugin’s embed method if your workflow supports it.
Building the field in Contact Form 7
Contact Form 7 uses form tags rather than a visual builder, so the setup is less friendly but still workable. Add the file field tag through the form editor, then define the accepted file types and limit inside that tag’s settings.
The important part with Contact Form 7 is consistency. If you allow certain file types in the form tag, make sure your messaging around the field says the same thing. On these builds, I also spend more time testing because small syntax mistakes can leave you with a field that renders but doesn’t behave as expected.
Here’s a video walkthrough if you prefer to see the setup in motion before styling and embedding it in Divi:
Embedding the form inside a Divi layout
Once the field is configured, place the form in Divi using a Code module, Text module, or whichever embed method your plugin supports best. I prefer a Code module for predictable shortcode rendering.
At this stage, test five things before moving on:
- Upload acceptance: A valid file should upload without confusion.
- Rejection behavior: An invalid file type should fail with a clear message.
- Required logic: The form shouldn’t submit if the required upload is missing.
- Email/admin result: Confirm the submission includes the file reference as expected.
- Mobile behavior: Open the form on a phone and test the picker there, not just on desktop.
If any of those fail, fix them now. Styling won’t solve a broken upload pipeline.
Integrating Upload Forms with Divi Areas Pro Popups
A file upload in form setup gets more useful when it appears at the exact moment a visitor needs it. That’s where popup-based delivery changes the result. Instead of sending users to a generic contact page, you can trigger the form from the product page, service page, account area, or support section where the intent already exists.
The key is not to treat the popup as decoration. The popup should shorten the path between user intent and file submission.
Embedding the form inside the popup area
Create your popup area first by following the workflow used to create a popup area. Once the area exists, add the form shortcode inside a Divi module in the popup layout.
Keep the popup body simple. A headline, one supporting sentence, the form, and a clear submit button are usually enough. Upload forms need breathing room. If you cram too much copy, trust badges, and extra fields into a modal, the upload becomes the hard part instead of the helpful part.

Popup use cases that actually fit uploads
Not every upload belongs in a popup. The strongest use cases are the ones where the user already has the file ready.
A few that work well in Divi builds:
- Quote request fly-in: Let users attach plans, sketches, or brief documents from a service page.
- Apply now modal: Add resume and supporting document upload without sending people away from the careers page.
- Support popup: Ask for screenshots inside an account or help section where the issue just occurred.
- Product customization modal: On WooCommerce pages, let users upload reference artwork before adding the item to the cart.
The wrong use case is a popup that asks for too much too soon. If the visitor hasn’t committed to the action yet, a full upload form can feel heavy.
Triggering matters as much as the form
Divi Areas Pro gives you strong trigger control, and that matters for uploads. Scroll triggers, click triggers, exit intent, and page-targeted display rules all affect how intrusive or helpful the interaction feels.
For uploads, I usually prefer:
- Click-triggered popups for quote requests or applications
- Contextual fly-ins on support or account pages
- Targeted WooCommerce triggers when the upload is directly tied to product configuration
Use a popup for file uploads when the file supports a decision the visitor is already trying to make. Don’t use it to force an extra step before they understand why it matters.
Layout details that prevent modal friction
A few design choices make a big difference inside popup uploads:
- Make the close action obvious: If the modal traps the user, frustration goes up fast.
- Keep the field labels outside placeholders: Upload fields need visible instructions.
- Allow enough width: Narrow popups make file names wrap awkwardly and error messages harder to read.
- Test the success state: After upload and submit, the confirmation should feel definitive, not ambiguous.
A lot of Divi popup builds often fall apart. The popup opens nicely, but the upload control, validation message, and success confirmation weren’t designed as part of the same interaction.
Handling Server Limits and Uploading Large Files
The first time a user tries to upload a large PDF, high-resolution image set, or video sample, the form usually tells you the truth about your hosting. A file upload in form flow can look perfect on the front end and still fail because PHP, server timeouts, or request limits are too tight.
The most common settings behind those failures are upload_max_filesize and post_max_size. In plain English, they define how much data PHP will accept in one upload request. If your form allows a file larger than the server accepts, the user loses before validation even gets a chance to help.
Start with the boring checks
Before reaching for advanced tools, confirm the basics with your host or server panel.

A practical checklist looks like this:
- Check PHP upload limits: Compare plugin-level file size limits with the actual server configuration.
- Review timeout behavior: Large uploads often fail because the request takes too long, not because the file is invalid.
- Confirm form messaging: If users hit a limit, the form should tell them what happened in plain language.
- Coordinate with hosting: Some environments let you change limits yourself. Others require host support.
If your site also feels sluggish during uploads or heavy form submissions, it’s worth reviewing broader server performance optimization guidance alongside hosting-level tuning.
Why chunked uploads are usually the better answer
Raising server limits helps, but it doesn’t solve everything. The stronger fix for large files is chunked multipart upload. That means splitting the file into smaller pieces, sending those pieces progressively, then reassembling them after completion.
This works better because the server handles a stream of smaller requests rather than one huge upload that can fail halfway through. According to Filestack’s large file upload benchmarks, chunked multipart uploads have a 92% success rate versus 65% for monolithic uploads on 4G networks, and server crashes drop by 85% when PHP handles data by streaming. The same source also notes that 22% of form abandonments come from poor error UX like timeouts.
That matters in Divi builds because users often upload from unstable mobile or office networks, not pristine developer test environments.
Field note: If the site is expected to accept anything beyond ordinary documents and images, plan for chunking early. Waiting until support tickets pile up is the expensive route.
What chunking looks like in practice
The workflow is straightforward even if the implementation is technical:
- Client validation first: Check file type and obvious rules before the upload begins.
- Split into chunks: The browser divides the file into smaller parts.
- Track progress: The form shows actual movement instead of a frozen button.
- Complete and verify: The server confirms the final assembled file before the form finishes.
For Divi popups and WooCommerce-adjacent uploads, that progress feedback is a major UX improvement. Users tolerate waiting when they can see the upload advancing.
It also helps to trim the page weight around the form. Heavy layouts, oversized scripts, and cluttered product pages make every upload experience feel slower, so this is a good moment to review ways to improve site loading speed before blaming the upload field alone.
When external storage helps
If the files are consistently large, sometimes the right answer isn’t bigger PHP limits. It’s moving the destination outside normal WordPress handling. Cloud storage, dedicated upload services, or direct-to-cloud patterns reduce strain on the web server and make the whole system more predictable.
That’s the point where storage strategy and security start to overlap, which is where most long-term upload problems are solved.
Best Practices for File Storage and Security
Uploading the file is only half the job. Where it lands, how long it stays there, who can access it, and how it gets validated matter just as much. A lot of WordPress sites treat uploads like media assets. That’s fine for blog images. It’s not fine for resumes, customer documents, screenshots with account data, or design briefs tied to commercial work.
The safest storage choice depends on the sensitivity of the file and the traffic level of the site.
The practical storage hierarchy
For Divi projects, I think about storage in three levels.
| Storage option | Good for | Main trade-off |
|---|---|---|
| WordPress Media Library | Simple internal forms, low-risk files | Easy access can become sloppy access |
| Protected server folder | Sensitive files that shouldn’t sit in public media paths | More setup and access control work |
| Remote storage like Amazon S3 | High-traffic sites, larger files, long-term scalability | More moving parts and architectural decisions |
The Media Library is the fastest path, but it’s rarely the final answer for private uploads. It mixes user-submitted files with general site assets and can get messy fast.
A protected folder outside the public webroot is a more disciplined option when privacy matters. It requires more deliberate handling, but it reduces casual exposure and keeps sensitive uploads separate from normal site content.
Remote storage, especially S3, makes more sense when the site handles large volumes, larger files, or needs cleaner separation between the web server and uploaded assets.
When direct-to-S3 makes sense
For higher-traffic Divi builds, the strongest pattern is often direct-to-S3 with presigned URLs. The browser requests a temporary upload URL from your WordPress backend, uploads the file directly to S3, and the backend gets notified after the upload completes.
According to STRV’s analysis of file upload strategies, a direct-to-S3 presigned URL strategy can reduce server compute costs by 70-80% on high-traffic sites. The same source notes that OWASP recommends server-side re-validation of MIME types after upload, because spoofing can bypass up to 22% of client-only checks.
That last part is important. Client-side validation is useful for user feedback. It is not security.
Security controls that aren’t optional
A secure file upload in form setup should assume that every uploaded file could be hostile or mislabeled.
The baseline controls I recommend are:
- Rename files on the server: Never trust user-provided filenames as storage names.
- Validate on the server, not just in the browser: File extensions alone don’t prove what the file is.
- Restrict accepted types tightly: Allow only the formats the workflow needs.
- Use malware scanning where appropriate: Especially on business-critical or public-facing forms.
- Apply authentication and nonces: Don’t expose powerful upload endpoints casually.
- Review broader application hardening: Cleffex has a useful primer on essential web application security best practices that fits well alongside upload-specific rules.
Client-side checks help honest users. Server-side checks stop dishonest ones.
Real trade-offs with S3 patterns
Direct-to-S3 isn’t magic. It introduces state management issues. A client can request an upload URL and never finish the upload. The backend can know an upload was expected without knowing whether it completed unless you add a verification loop.
That’s why the strongest implementations also track upload status after storage events fire and then update the WordPress side only when completion is confirmed. It’s more engineering work, but it prevents forms from pretending a file exists when the transfer failed.
For simpler Divi sites, that level of architecture may be overkill. For busy WooCommerce environments or document-heavy workflows, it’s often worth it.
Optimizing User Experience and Ensuring Compliance
A file upload in form feature can be technically perfect and still perform badly if people don’t understand what to do. This is especially obvious on mobile. Many Divi forms are designed on desktop, tested on desktop, and then fail real users on phones.
That’s a mistake because 53% of global web traffic is mobile, and the same source notes that Department of Labor research found users fail file uploads 40% more often on mobile when forms lack accessible design like touch targets of at least 44x44px. It also notes that missing support for mobile-native formats like HEIC can slow WooCommerce checkouts by 15-20% because users are forced to convert files before upload, as summarized in the OWASP-linked reference on unrestricted file upload and related considerations.
Mobile-first beats desktop-pretty
If your upload field is tiny, hard to tap, or unclear about accepted formats, mobile users will pay the price first. In practice, that means:
- Use large tap targets: Small upload buttons frustrate users immediately.
- Support mobile-native formats when the workflow allows it: Don’t make phone users jump through conversions unnecessarily.
- Test the native picker: iPhone and Android upload flows behave differently enough that guessing isn’t good enough.
- Keep labels explicit: Tell users exactly what to upload and which formats are accepted.
Feedback removes anxiety
Uploads create uncertainty. Did the file attach? Is it still processing? Did the form freeze?
That’s why good upload UX needs visible feedback:
- Preview thumbnails for images where appropriate
- Progress bars for larger uploads
- Clear success and error messages written like a human, not a server log
- Inline validation before the final submit
A silent upload field feels broken even when it works.
Accessibility and GDPR are part of the build
Accessibility isn’t a bonus layer. It directly affects completion rates. Keyboard navigation, readable contrast, visible labels, and understandable errors all matter more on upload forms because the interaction is already more complex than a normal text field.
On the compliance side, don’t collect files without explaining why you need them and how you’ll use them. If the upload contains personal data, make the purpose clear near the field or consent language. Set retention rules internally too. Teams often obsess over collecting files and forget to decide when those files should be deleted.
For agencies, this is the cleaner position: ask only for the files you need, explain why, and don’t keep them longer than the business purpose requires.
Frequently Asked Questions
Can I allow SVG or other blocked file types in a Divi form
Yes, but do it carefully. WordPress blocks some file types for good reason. If you need SVG or another restricted format, don’t just open the gate globally. Limit it to the specific form workflow, validate server-side, and sanitize where appropriate. For public-facing uploads, I’d avoid risky types unless there’s a strong business case.
Why does my upload field work outside Divi but fail inside a popup
Usually it’s one of three problems. A JavaScript conflict, a caching layer interfering with dynamic form behavior, or a popup layout that hides validation and error states. Test the form outside the popup first. If it works there, the issue is usually the surrounding environment, not the field itself.
What’s the fastest way to troubleshoot plugin conflicts
Disable non-essential plugins on a staging copy and test the upload again. Start with caching, optimization, security, and front-end enhancement plugins because they often interfere with AJAX, validation, or modal behavior. Also switch briefly to a default WordPress theme if needed. That tells you whether the issue is plugin-to-plugin or theme-related.
Should uploaded files go to the Media Library
Only when the risk is low and the workflow is simple. For private or sensitive files, use a more controlled storage approach. Media Library storage is convenient, but convenience isn’t the same thing as good file governance.
How do I delete uploaded files automatically after a period of time
Use scheduled cleanup through WordPress cron, your form plugin’s automation options if available, or a custom routine tied to the storage location. The key is to match deletion rules to your privacy policy and internal process. Don’t promise short retention publicly and then leave files sitting on the server indefinitely.
Why are mobile users struggling with uploads more than desktop users
Because mobile upload UX is often under-designed. Small tap targets, unsupported formats, vague instructions, and poor progress feedback hit phone users harder. Test on real devices and simplify the interaction before assuming the issue is user error.
If you’re building interactive Divi sites and need upload forms to work cleanly inside popups, fly-ins, mega menus, or contextual content areas, Divimode is a useful place to start. Its tutorials, documentation, and tools are built around real Divi workflows, especially the kind where forms need to appear at the right moment instead of sitting on a single contact page.
More Articles You Will Like