Customizable countdown clocks are visual timers that do one thing exceptionally well: they create a sense of urgency and scarcity, pushing users to take action right now. By slapping a ticking clock on an offer, you’re tapping directly into the powerful psychological trigger of FOMO (Fear of Missing Out). It’s a simple addition that can have a massive impact on your sales, event sign-ups, or special promotions.
Why Countdown Clocks Are Your Secret Conversion Weapon
Before we get into the nuts and bolts of building a timer in Divi, it's really important to understand the strategy behind them. A countdown clock isn't just a fancy animation; it's a powerful tool designed to influence user behavior. It takes someone from passively browsing to actively making a decision by introducing a hard deadline.
This small change can completely transform how visitors engage with your offers. For instance, a well-placed evergreen timer on a course enrollment page can give every new visitor their own unique 48-hour discount window. This creates personalized urgency that drives more sign-ups. In the same way, a fixed-date countdown for a Black Friday sale makes it crystal clear when the deals are gone for good, leading to a huge spike in revenue as the clock ticks down.

The Psychology of Urgency and Scarcity
So, what makes these clocks so effective? It all comes down to two core principles: urgency and scarcity.
- Urgency makes people feel like they need to make a decision now. It shortens that "I'll think about it later" window and encourages immediate action.
- Scarcity suggests the offer is limited, either by time or by quantity. This instantly increases how valuable the offer seems.
When you combine these two, you get a powerful motivator. It's a concept that's proven to work time and again. The trend is so prevalent that it's even shaping consumer tech. The global smart alarm clock market, which is all about customizable timing, was valued at a whopping USD 0.77 billion in 2023 and is expected to keep growing.
The goal isn't to create fake pressure. It’s about giving users a clear and compelling reason to act sooner rather than later. When used ethically, a countdown timer simply helps customers follow through on a decision they were already considering.
Turning Theory into Practical Results
Understanding the bigger picture of conversion optimisation really shines a light on why countdown clocks are such a go-to tool for improving site performance. Once you master how to build and deploy customizable countdown clocks with Divi, you’ll have a versatile way to drive specific actions.
This isn't just about adding a visual gimmick. It’s about strategically guiding your audience toward the finish line, whether that's a purchase, a sign-up, or an event registration. The steps ahead will show you exactly how to do it.
Getting Your Divi Environment Ready for Dynamic Content
To build countdown clocks that actually convert, you need the right tools in your Divi arsenal. While Divi is a powerhouse on its own, its out-of-the-box modules just don't have the advanced triggers and display rules we’re looking for. This is where a specialized plugin like Divi Areas Pro by Divimode comes into play, turning a good idea into a great one.
Sure, installing the plugin is the easy part. But the real pro move is setting things up thoughtfully before you even think about building your first timer. My go-to best practice? Create a dedicated, reusable layout in your Divi Library specifically for your countdown designs. Trust me, this will save you a ridiculous amount of time down the road.
Think about it. You need the same flash sale timer on five different product pages. Instead of building it from scratch five times, you build it once, save it to the Library, and pop it in wherever you need it. It centralizes all your work, so if you need to update the design later, you only have to do it in one place.
Dialing in the Core Plugin Settings
After you've installed Divi Areas Pro, take a minute to poke around its core settings. It's tempting to skip this, but getting it right from the start is key to making sure everything runs smoothly and doesn't clash with other plugins on your site.
You'll find these settings under a new "Divi Areas" menu in your WordPress dashboard. A couple of things to look at right away:
- Permissions: Who gets to create or edit Areas? I usually lock this down to just administrators or editors to keep things tidy and prevent accidental changes.
- Performance Options: Keep an eye out for settings related to asset loading. Some plugins give you the option to only load scripts on pages where they’re actually being used, which is a fantastic way to keep your site zippy.
Spending five minutes here sets a solid foundation for all the cool dynamic content you're about to build. It's a small time investment that pays off by preventing technical headaches later.
Think of this initial setup like prepping your kitchen before you start cooking. A clean, organized space lets you work faster and more creatively, ensuring every countdown clock you build is both powerful and reliable.
Create a Reusable Divi Library Layout
Alright, let's put this into practice and create that foundational layout. Head over to Divi > Divi Library and hit "Add New." Give your layout a clear, descriptive name—something like "Sale Countdown Banner" or "Evergreen Offer Popup" works perfectly.
For the layout type, make sure you choose "Layout." This creates a standard Divi Builder section that you can design now and pull into any Divi Area later on. Inside this new layout, go ahead and add a section, a row, and any modules you'll need to eventually house your timer.
What we're doing here is separating the design from the functionality. The Divi Library layout will hold the look of your timer, while the Divi Area will control how, when, and where it shows up. With this structure in place, you’re perfectly set up to build your first high-impact timer.
Crafting Your First High-Impact Countdown Clock
Alright, with your Divi setup prepped and ready to go, it’s time to build your first high-impact timer. This is where the magic happens—turning a simple idea into a powerful conversion tool. We'll kick things off by adding the countdown module to a layout and then dive into the different kinds of timers you can create.
First things first: you need to decide where this timer will live. Is it going to be a bold banner plastered across the top of your homepage? A subtle fly-in that gracefully appears in the corner? Or maybe a key element inside a popup? Using a tool like Divi Areas Pro lets you build a layout once in the Divi Library and then trigger it to show up pretty much anywhere on your site. For now, let's just focus on getting the design nailed down inside that library layout.
The initial setup is refreshingly straightforward once you have the right tools. It really just boils down to installing the plugin, tweaking its settings to create the timer, and saving the layout so it's ready to be deployed.
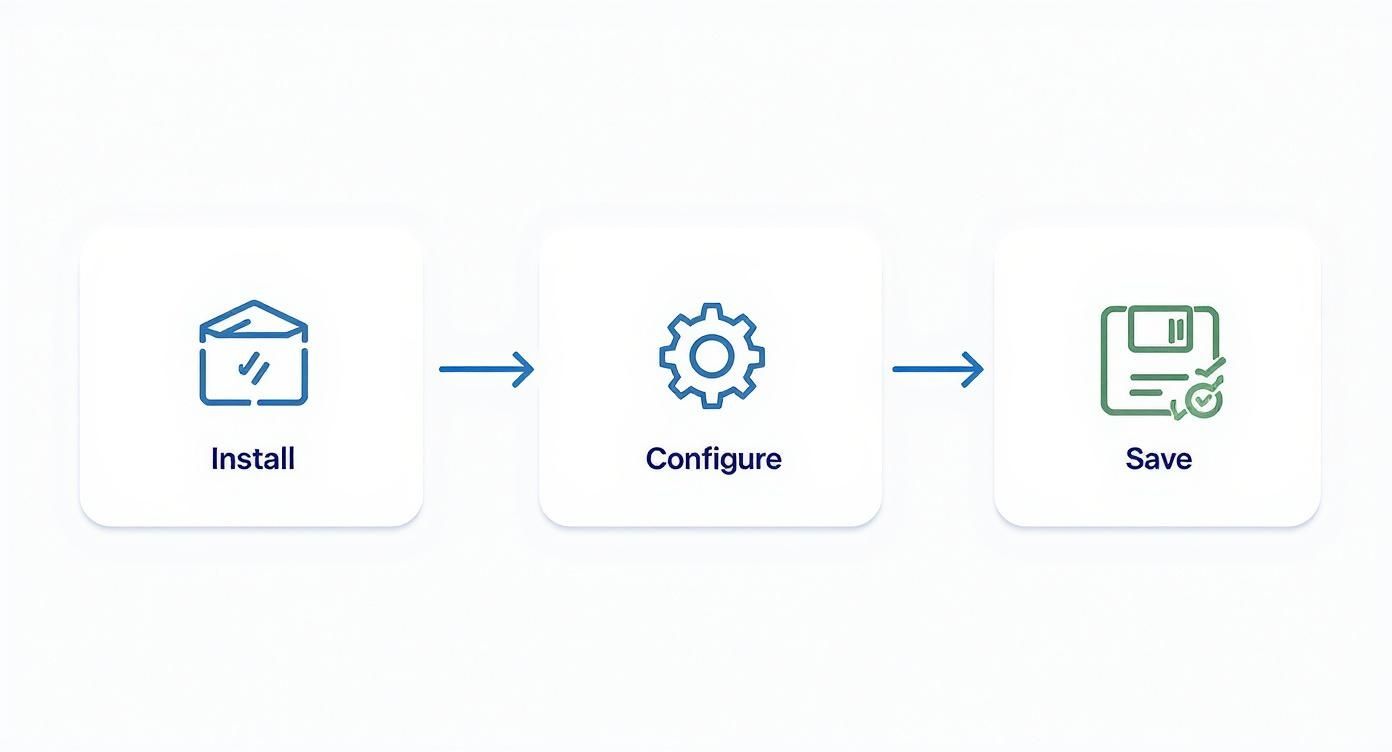
This quick visual breaks down the core workflow, giving you a clear path from installation to a live, ticking countdown clock.
Choosing Your Countdown Type
Not all countdowns are created equal. The type you pick has a direct impact on the kind of urgency you generate, so understanding the difference is key to matching the timer to your marketing goal.
There are three main flavors you'll come across:
- Fixed Date Countdown: This is your classic, straightforward timer. It counts down to a specific, immovable date and time—think the end of a holiday sale or the start of a webinar. It’s the exact same for every single visitor.
- Evergreen Countdown: This one is dynamic and personal. It starts ticking the moment a specific visitor lands on your page, creating a unique deadline just for them. It’s perfect for things like offering a limited-time discount to new subscribers.
- Recurring Countdown: This timer resets on a regular schedule. Think "Happy Hour every Friday from 4 PM to 6 PM" or a weekly flash sale that kicks off every Tuesday.
The real power lies in picking the right tool for the job. A fixed-date timer creates massive, collective urgency for a big event, while an evergreen timer provides a personal, always-on incentive for individual visitors.
To make this even clearer, here's a quick guide to help you select the perfect countdown type for your specific marketing campaign.
Choosing the Right Countdown Clock for Your Goal
| Countdown Type | Core Function | Ideal Use Case |
|---|---|---|
| Fixed Date | Counts down to a single, specific date for all users. | Product launches, holiday sales, webinar registrations, event ticket deadlines. |
| Evergreen | Starts a unique timer for each individual visitor. | Welcome offers for new subscribers, limited-time bonuses on digital products, personalized cart abandonment deals. |
| Recurring | Resets and repeats on a set schedule (daily, weekly). | Daily deals, weekly flash sales, happy hour promotions, regular limited-time shipping offers. |
Choosing correctly from the start ensures your campaign has the intended psychological impact, whether you're building broad anticipation or creating a personal sense of urgency.
A Practical Example: An Evergreen Offer
Let's walk through a real-world example: an evergreen timer that offers a 24-hour discount to any new visitor who lands on a specific product page. We'll set this up to appear in a subtle fly-in that doesn't completely disrupt their shopping experience.
Inside your Divi Library layout, you’ll want to add the Divi Areas Pro countdown module. From there, hop into the module settings, select "Evergreen" as the timer type, and set the duration to 24 hours. That's it. Now, when a new user visits that page, their personal clock starts ticking.
This approach is incredibly effective because the urgency feels genuine and directly tied to that user's specific journey. For a deeper dive into setting up timed triggers and popups, check out our guide on how to create a countdown popup in Divi.
The demand for these kinds of personalized, functional time-based features is absolutely exploding. The global smart clock market was valued at USD 827.89 million in 2024 and is projected to hit USD 5.39 billion by 2033, all driven by our collective desire for integrated, multifunctional devices. You're tapping into a powerful trend. Now that this first timer is built, you're ready to layer in the smart triggers that will make it a true conversion machine.
Using Smart Triggers to Maximize Urgency
A beautifully designed countdown timer is only half the battle. If it pops up at the wrong time or for the wrong person, its impact is completely lost. This is where smart triggers come in, transforming a simple clock into a seriously powerful conversion tool. They make sure your message of urgency lands with maximum effect, right when it matters most.
It’s time to move beyond basic page-load triggers. Instead of just slapping a timer on a page for every single visitor, you can set up intelligent rules that respond to specific user behaviors. This level of precision makes your offers feel way more relevant and compelling.
Targeting the Right User at the Right Moment
Imagine you could show a special offer only to visitors browsing your "Summer Collection." Or maybe you want to flash a unique discount just for people on their phones. With the right tools, these kinds of precise targeting rules aren't just possible—they're actually pretty easy to set up.
This is all about context. A generic, site-wide banner can quickly become background noise that visitors just learn to ignore. But a targeted fly-in that appears based on their specific actions? That feels personal, and it grabs their attention.
Here are a few powerful trigger ideas I've used on real projects:
- Page-Specific Triggers: Display a timer only on certain pages, like a high-value landing page or a specific product that needs a push.
- Device Targeting: Create unique offers for mobile versus desktop users. You can tailor the experience and the offer to their device.
- Referrer Detection: Show a special deal to visitors coming from a specific social media campaign or partner website. It's a great way to reward traffic from a particular source.
The Power of Exit-Intent Triggers
One of the most effective strategies out there is the exit-intent trigger. This cool piece of tech detects when a user's mouse is moving toward the top of the browser to close the tab or navigate away. Just as they're about to leave, you can trigger a popup with a last-chance offer powered by a countdown timer.
Think of it as your final, most persuasive argument. An exit-intent popup can recover a significant percentage of would-be-lost sales by presenting an irresistible, time-sensitive reason to stay and finish that purchase.
This isn't just some random interruption; it's a strategic intervention at the most critical moment in the user's journey.
Real-World Scenario: The Cart Abandonment Rescue
Let's walk through a common and highly effective e-commerce scenario. A shopper adds a product to their cart but gets distracted and decides to leave your site before checking out. Classic cart abandonment.
Using smart triggers, you can fight this head-on. Here’s the setup:
- The Condition: The user must have at least one item in their WooCommerce cart.
- The Trigger: They signal exit intent by moving their cursor to leave the page.
- The Action: A popup appears instantly, offering a 10% discount on their entire order if they check out within the next 15 minutes. A customizable countdown clock inside that popup makes the deadline impossible to ignore.
This single workflow can dramatically slash your cart abandonment rates. It works because it’s timely, relevant, and gives a clear incentive to act right now.
For a much deeper dive into the possibilities, exploring these Divi popup triggers and time-based secrets will give you even more advanced ideas for your campaigns. By combining a well-designed timer with intelligent triggers, you create a system that actively works around the clock to boost your conversions.
Designing a Countdown Clock That Matches Your Brand
A generic, out-of-the-box timer can instantly cheapen your website's aesthetic. It screams "third-party widget," undoing all the hard work you've put into creating a cohesive brand experience. The goal here is to make your customizable countdown clocks feel like a natural, intentional part of your design. This is key for reinforcing brand trust and making the whole experience feel more professional.
Transforming the standard countdown module into a seamless brand element is all about mastering Divi's styling options. You have full control over fonts, colors, spacing, and backgrounds right inside the Divi Builder. The first thing you should do is dive in and align these core elements with your brand's style guide.

This level of detailed control is becoming more and more important. The technology that powers these features is a massive industry; the clock generators market was valued at USD 3.57 billion in 2023. That kind of growth just highlights how critical timing accuracy and deep customization are in modern user interfaces. You can read more about the trends in the clock generators market to see where this technology is headed.
Elevating Design with Custom CSS
While Divi's built-in options are powerful, a few lines of custom CSS can really take your design to the next level. This is where you can add subtle animations and unique visual effects that make your timer truly stand out. And you don't need to be a coding wizard to make a big impact.
One of my favorite go-to effects is a subtle "flip" animation on the numbers. It adds a touch of dynamic movement that draws the eye without being distracting or annoying. You can add this by targeting the timer's CSS classes, either in the module's Advanced tab or your site's custom CSS file.
Pro Tip: Keep animations minimal and purposeful. The goal is to enhance the user experience, not overwhelm it. A simple fade or flip effect is often far more effective than a complex, flashy animation that can hurt site performance and accessibility.
Essential Styling and Accessibility Tips
As you're polishing your design, keep these practical tips in mind. They'll help ensure your timer is not just beautiful but also effective for all users. After all, a great design is one that everyone can actually use.
- Font Consistency: Use the same font families and weights that you use elsewhere on your site. This is hands-down the quickest way to make the timer feel like it belongs.
- Color Contrast: Make sure the numbers and labels have a high contrast ratio against whatever background you choose. This is absolutely crucial for readability and basic accessibility compliance.
- Mobile Responsiveness: Always, always double-check how your timer looks on smaller screens. You'll likely need to adjust font sizes or spacing in Divi's responsive settings to keep it from looking cramped or broken on a phone.
- Label Clarity: Clearly label the "Days," "Hours," "Minutes," and "Seconds" fields. Don't assume the numbers are self-explanatory, especially for users who might be relying on screen readers.
By focusing on these details, you'll create a timer that not only drives urgency but also strengthens your brand identity and contributes to a genuinely positive user experience.
Integrating Countdown Timers with WooCommerce
For anyone running an e-commerce store, injecting a bit of urgency right into the shopping flow is a total game-changer. When you pair customizable countdown clocks with WooCommerce, you're not just slapping a timer on a page. You're strategically placing it where it counts the most—right when a customer is about to make a decision.
This is how you pull off high-conversion tactics that tackle big e-commerce headaches like cart abandonment. A simple, well-placed timer can be the nudge a visitor needs to stop thinking "I'll come back later" and complete their purchase on the spot.
High-Impact Placements in WooCommerce
So, where should you put these timers for maximum effect? Let's talk about two of the most effective spots in an online store. These aren't just random ideas; they are proven methods for boosting conversions by creating genuine, timely scarcity.
- "Reserve Your Cart" Timer: The moment a customer adds an item to their cart, kick off a subtle timer that "reserves" their items for a short window, like 10 minutes. This works wonders for creating an incentive to check out now, especially if you sell products with limited stock.
- Product Page Flash Sales: Running a limited-time sale on a certain product or category? Put a bold countdown timer right on the product page, ideally just above the "Add to Cart" button. It makes the deadline impossible to ignore.
When you tie your countdown clock to a real action—like a customer adding an item to their cart—the urgency feels earned and personal. It's a powerful psychological nudge that encourages them to follow through.
Streamlining Your Divi and WooCommerce Workflow
The good news is that implementing these strategies is surprisingly straightforward with the right tools. Using a plugin that bridges Divi's design power with WooCommerce's e-commerce engine means you can build all of this visually. You can dig deeper into combining these two platforms with tools built specifically for WooCommerce for Divi.
This kind of integration lets you use the Divi builder you already know to design your timers, then apply specific WooCommerce conditions to control exactly when and where they show up. For example, you could create a rule to only display a flash sale timer on products in your "Clearance" category. This level of control is what turns a simple timer into a powerful, targeted campaign.
To really squeeze the most out of your timers in an e-commerce setting, it's worth exploring broader strategies to increase ecommerce conversion rates.
Answering Your Top Countdown Clock Questions
Once you start using customizable countdown clocks, you’ll probably run into a few questions. I see the same ones pop up all the time. Getting these details sorted out from the beginning is the key to making your timers work for you, not against you.
Let's dive into the most common puzzles and get you some clear, straightforward answers.
Will a Countdown Timer Slow Down My Website?
This is easily the #1 concern I hear, and it's a valid one. While technically any new feature adds a little overhead, modern plugins like Divimode are built to be lightweight. The real trick is in how you use them.
You need to be smart about implementation. Only load the countdown scripts on the specific pages where they’re actually running.
A classic mistake is flipping a switch that enables a timer sitewide when it's only needed for a single landing page. That forces every single page on your site to load code it doesn't need, which will absolutely drag down performance. Always use page-specific triggers to keep things snappy.
How Do Evergreen Timers Actually Work?
This one feels a bit like magic, but it's actually pretty simple. People often ask how an evergreen timer "remembers" a specific visitor who leaves and comes back a day later. The secret is browser cookies.
When a user first lands on your page, the timer kicks off and plants a small cookie in their browser. Think of it as a digital timestamp. That cookie just records when their personal countdown started. If they click away and return later, the script on your site reads that cookie and picks the timer up right where it left off. This creates a genuine, consistent sense of urgency for that individual alone.
What Happens When the Clock Hits Zero?
So, the big moment arrives and the timer ends. What now? You have full control over this crucial step, and you definitely don't want to leave visitors hanging. The best approach is to configure a clear "end action" right inside the module’s settings.
You’ve got a few solid options here:
- Hide the timer or even make the entire offer section disappear.
- Redirect the user to a different page, like one that says "Sorry, This Offer Has Expired."
- Swap out the content. This is a powerful one—you could replace a "Buy Now" button with a "Join the Waitlist" form, for example.
Ready to build powerful, high-converting countdown clocks in Divi? Divimode gives you all the tools you need, from advanced triggers to seamless design integration. Get started with Divi Areas Pro today!
More Articles You Will Like