Sometimes you want something different on your website, like a “Fly-in” menu, but you aren’t sure how to create a “Fly-in” menu. Well, with this tutorial, we are going to show you step-by-step, just how easy it is to create a “Fly-in” menu with the Divi Areas Pro Plugin. 🙂
Table of Contents
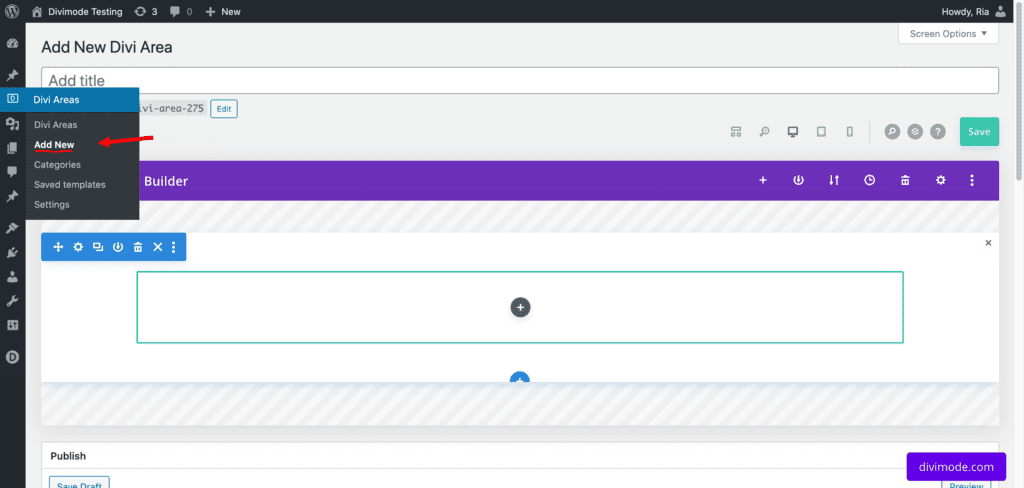
Create a new Divi Area
The first thing you will do is to create a new Divi Area.
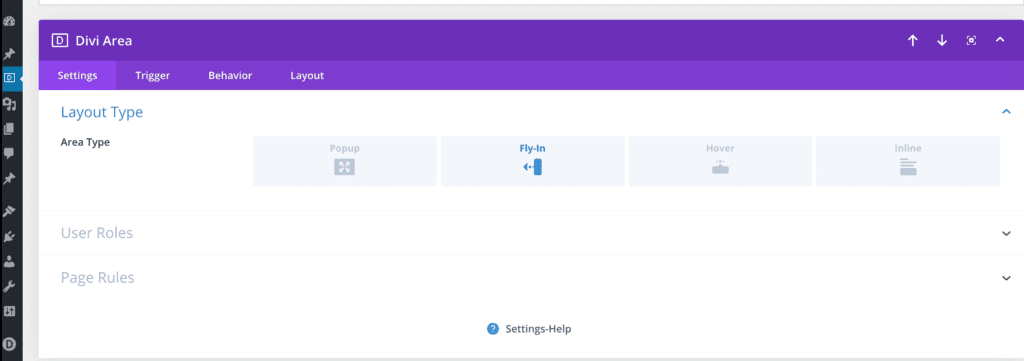
After you create your new Divi Area, you will change the Area Type to a “Fly-In” Popup.
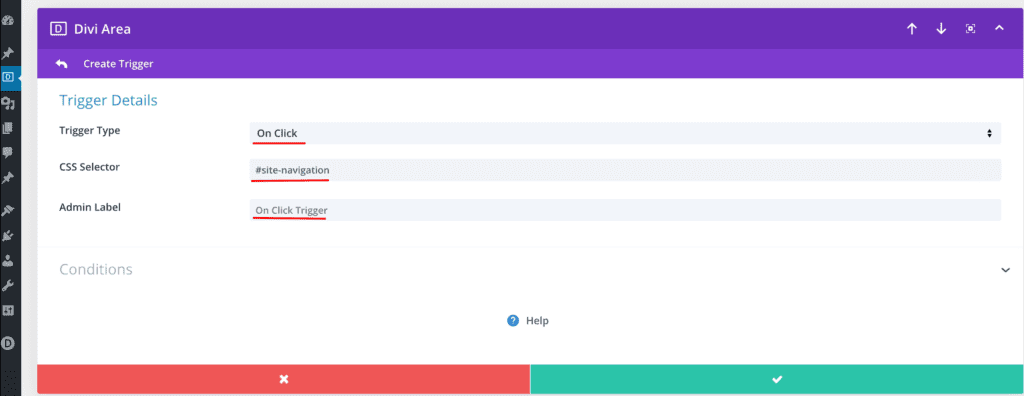
Automatic Trigger Setup
Secondly, you will create an automatic trigger. The Trigger Type you will be adding will be an “On Click” or “Hover” type. You will also add a valid main menu CSS Selector as shown below.
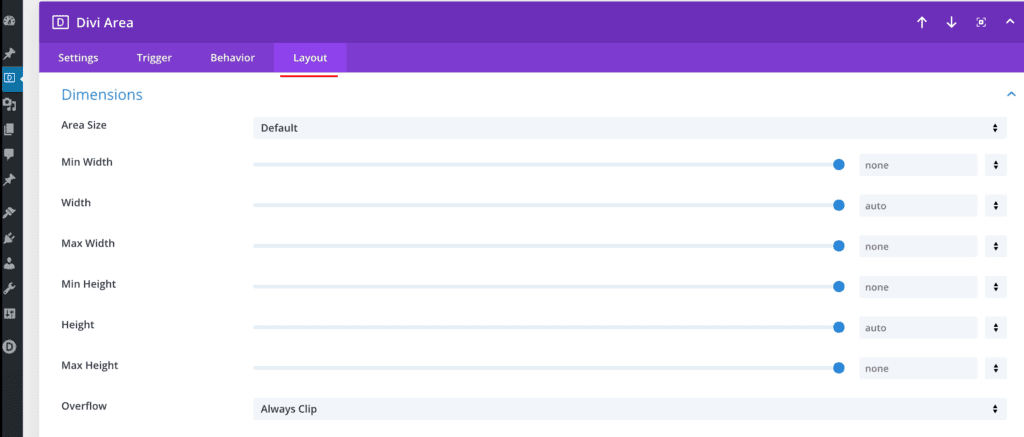
The Layout
Thirdly, you will set up your dimensions for the layout of your Divi Area. The recommended size of the Area should either be “Height 100vh” (for a vertical menu) or “Width 100vh” (for a horizontal menu).
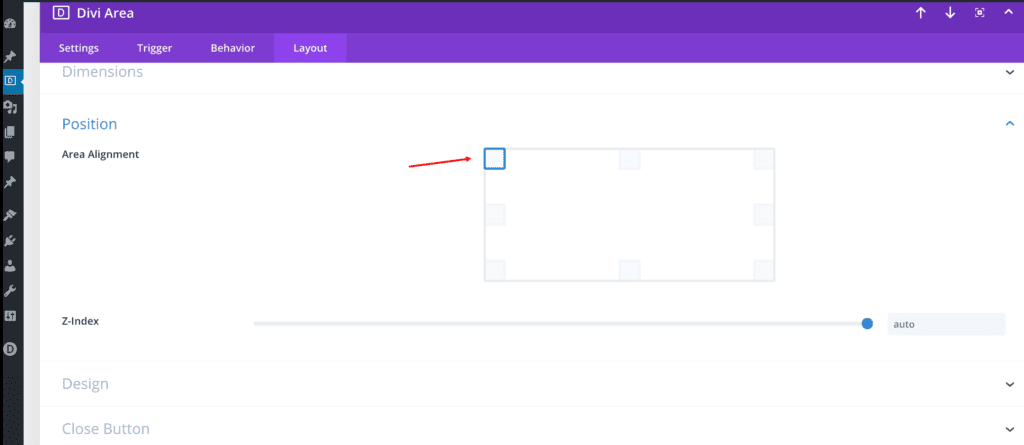
Area Alignment
The last and final step will be to set the Area Alignment of your Divi Area to the “top-left”.
You have successfully set up your Divi fly-in menu with 4 easy steps!
*Related Article – Why Web Developers Should Use Divi
Try Divi Areas Pro today
Sounds interesting? Learn more about Divi Areas Pro and download your copy now!
Many pre-designed layouts. Automated triggers. No coding.
Click here for more details
More Articles You Will Like