The Settings tab defines the type of the Divi Area and decides, which pages or requests include the Divi Area.
🤓 Pro-Tip
Set user-roles and page-rules to generate smaller pages that load faster.
Most options in the “Settings” tab are processed by the server and impact the generated HTML code. Options from the other tabs are mostly processed by JavaScript in the browser.
Layout Type
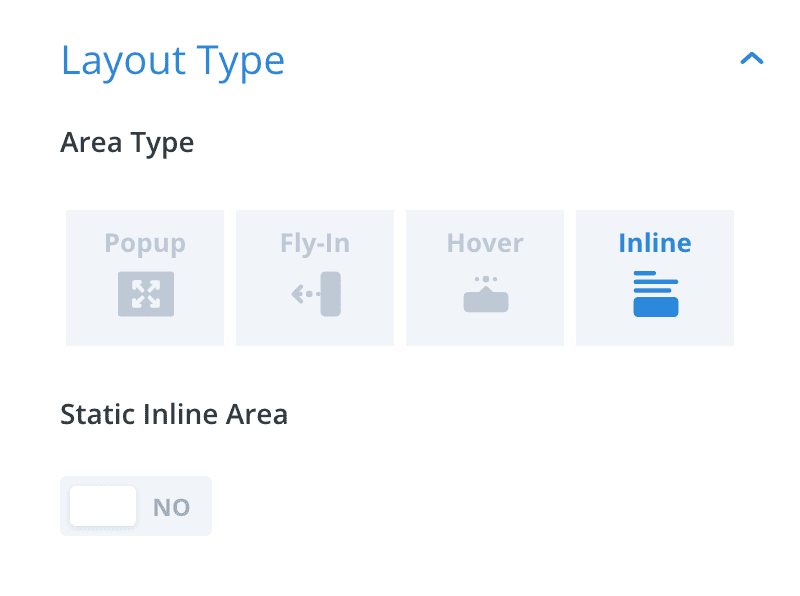
Define the type of Area to create from the four layout types (Popup, Fly-In, Hover, Inline). Each type has slightly different options and behaves differently on the front end.

Options
Area Type
For all Areas
Choose the type of Area you want to design. Each Area type has distinct features, behaves a little differently, and has other use-cases. You can find more about the differences in the Overview of Layout Types .
Static Inline Area
Only for: Inline Areas
An Inline Area can be made static or dynamic (default). Generally, static Inline Areas are better for performance, as the plugin attempts to process them on the server and the resulting page can be cached. Static Inline Areas might impact your SEO, as their content is visible in the HTML code like normal page content.
Note that static Inline Areas cannot be triggered and are visible instantly when the page loads. Also, they can not have a close button and as a result, will be always visible. If you want to use a trigger or allow users to close the Area, make the Inline Area dynamic, which delegates the behavior to the JavaScript library.
When using a static Inline Area, you can use the user-role or page-rule options to decide who can see the Area – for example, you can show a login form to all guests.
User Roles
For all Areas
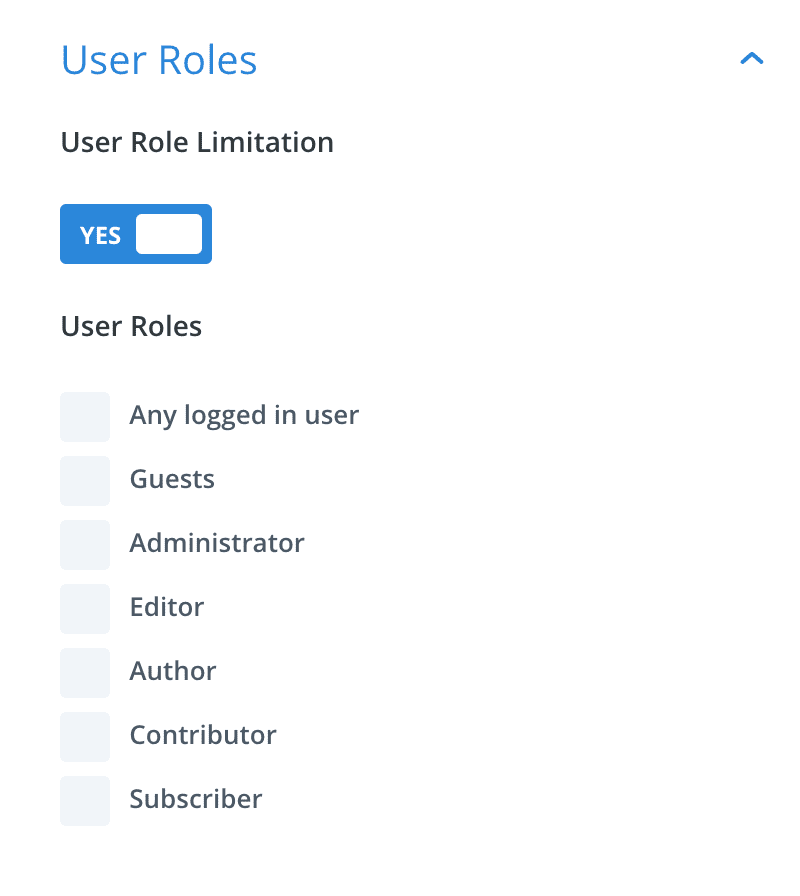
Define, which users can see the Area.

Options
User Role Limitation
By default, any Area is displayed to all users. If your Area should be restricted by the user role, enable this option.
User Roles
After enabling user role limitation you can pick the user roles that will see the Area.
The special role “Any logged in user” matches any user that has a valid session, regardless of the actual user’s role. When this option is selected, you cannot choose other roles, as that would be redundant or result in the same behavior as disabling the user role limitation.
Notes
🤓 Heads-up
The user role limitation is processed by the server and impacts the generated HTML code. Keep this in mind when you want to trigger an Area via the JS API – you can only trigger Areas that are actually present in the HTML code!
Page Rules
For all Areas
Define, which pages or page-types will load the Area.

Options
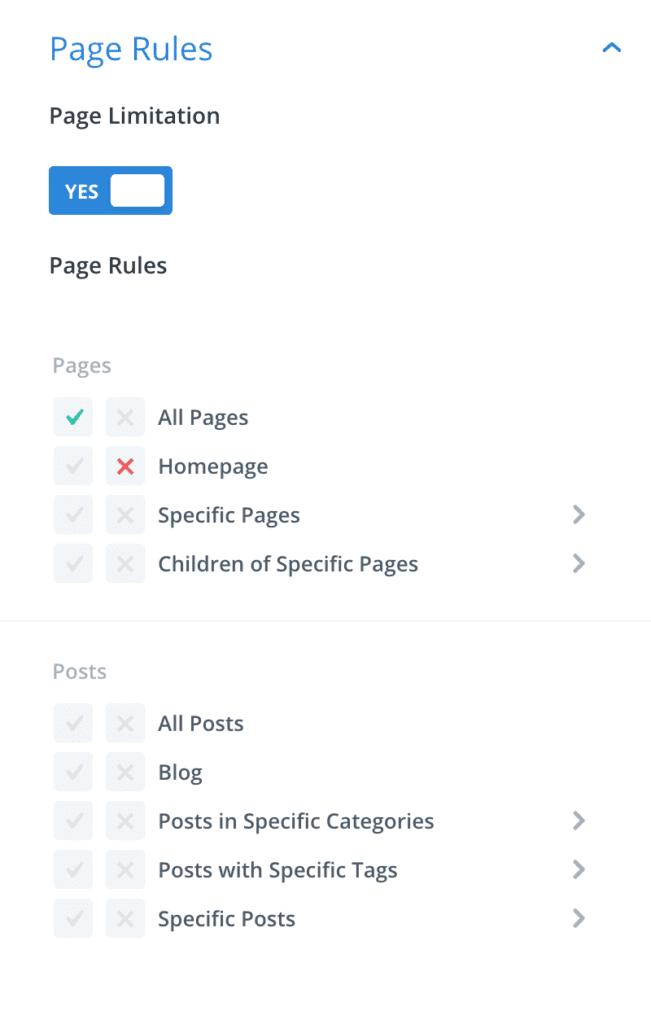
Page Limitation
By default, an Area is loaded on all pages/requests. In many cases, you want to restrict an Area to a list of pages, posts, or post-types that might use an Area.
Page Rules
Select the exact pages that will load the Area using the checkboxes. The page rule selector works very similar like Divis theme builder (and in fact uses Divis internal functions to generate the list):
Include an Area on a page, by checking the green (left) checkbox and exclude the Area from a post by checking the red (right) checkbox. In most cases, you can directly select the pages that should load an Area, but there are some advanced use-cases that you can implement by combining include/exclude options.
For example, include an Area for “All Posts” but exclude it from “Posts with Specific Tag: Tutorial”.
Notes
🤓 Heads-up
The page rule limitation is processed by the server and impacts the generated HTML code. Keep this in mind when you want to trigger an Area via the JS API – you can only trigger Areas that are actually present in the HTML code!
Inline Location
Only for: inline Areas
Define the place on the page where an Inline Area is displayed.

Options
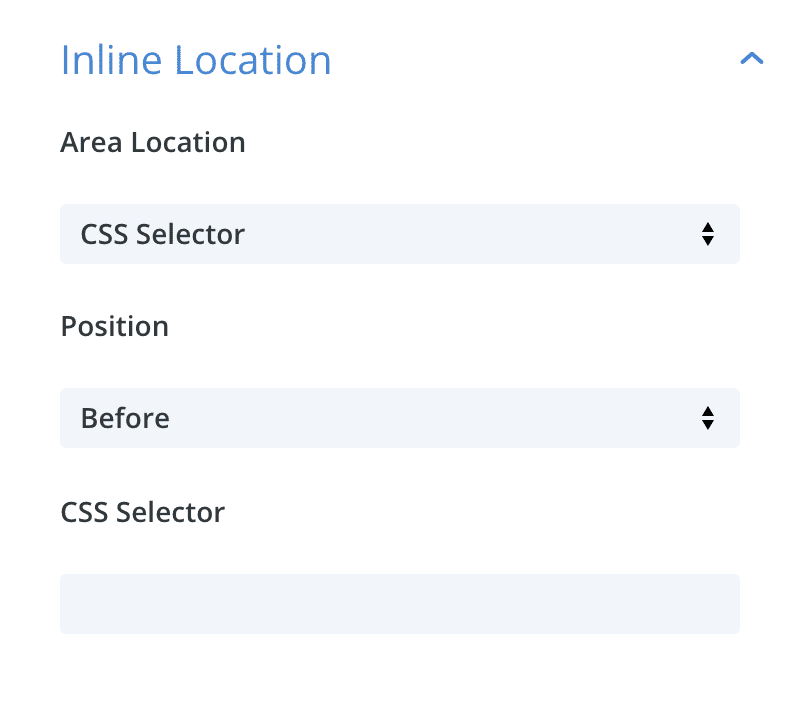
Area Location
Defines the place where the Inline Area appears on the page. You can choose one of the predefined theme-locations or use the “CSS Selector” location to specify a custom location.
Options:
CSS Selector- Specify a custom location using the input field “CSS Selector” below.
Header- Target the entire theme header; also works with custom Theme Builder headers.
- Target the main menu; also works with Slide-In or Fullscreen headers.
Post Content- Target the post content of single pages. This location has no effect on archive pages.
Comment Form- Target the comment form.
- Target the entire theme footer; also works with custom Theme Builder footers.
Position
Specify where the Inline Area should be displayed relative to the Location. Possible values are Before, After or Replace.
Options:
Before– Display the Inline Area before (i.e., above) the specified location.After– Display the Inline Area after (i.e., below) the specified location.Replace– The Inline Area replaces the content at the specified location.
CSS Selector
For Area Location: CSS Selector
Here you can enter a custom CSS selector that specifies the location of the Area. It’s possible to enter multiple selectors that are separated either by newline or a comma – notice, that the Inline Area will only be displayed once: At the first selector that is present on the page. Using multiple selectors is useful to specify different positions depending on the page/post/post-type.
If possible, use a “simple selector” that targets a single CSS class or ID like .section1 or #button-cta. Those simple selectors are processed on the server and are recommended when using static Inline Areas. However, you can also use other selectors for static Inline Areas: Those will be processed via JavaScript by the browser and might not be SEO relevant.
Notes
🤓 Heads-up
The Inline Area is either positioned outside the location element (e.g., before the opening tag of the main menu) or it completely replaces the location element. That means, the Inline Area will not inherit CSS rules of the target location.
🤓 Pro-Tip
When you create a dynamic Inline Area that replaces an element, you can add a close button to the Area. Once the Area is closed, the original content is restored.