This guide walks you through all steps of creating a new Popup using Divi Areas Pro.
Divi Areas UI
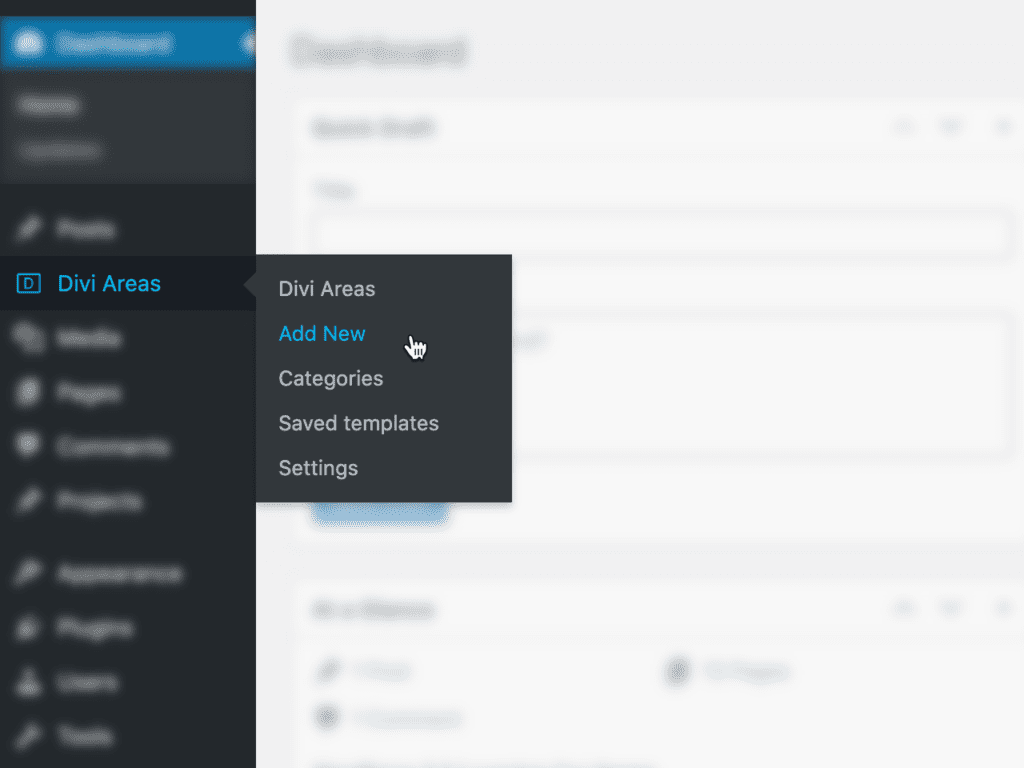
After installing and activating Divi Areas Pro you will see the new menu item “Divi Areas” in the wp-admin dashboard. You create and configure your Areas here, without having to modify any post or page.
What we do
For this article we will create a sample Popup that is displayed only on your contact page, for all users, once per day.
- Create a new Divi Area.
- Set the title to “Contact Page Popup” and Area Type to “Popup”
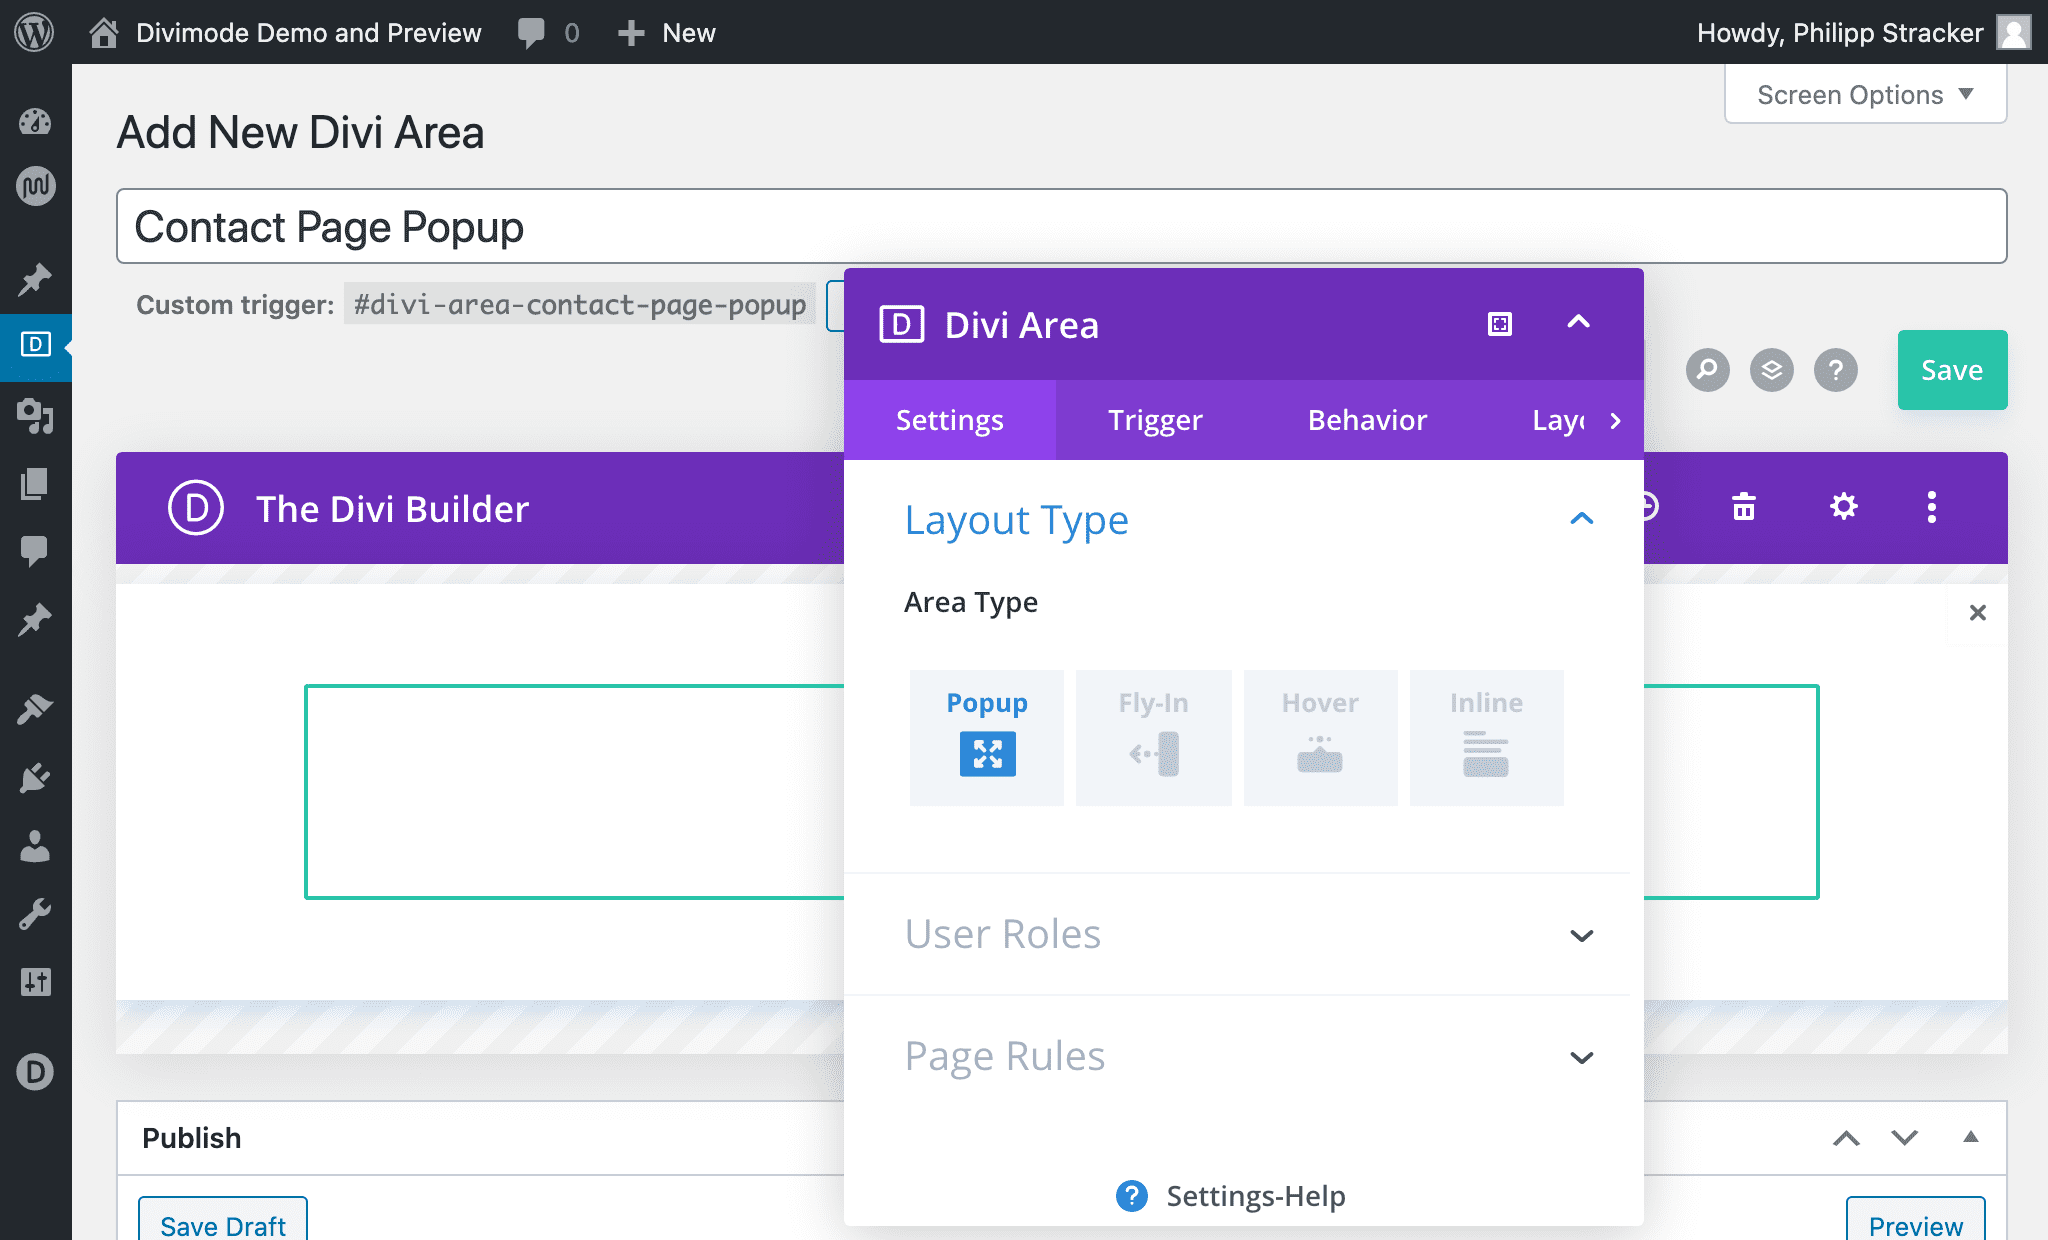
- Scroll to the “Page Rules” section and enable “Page Limitation“.
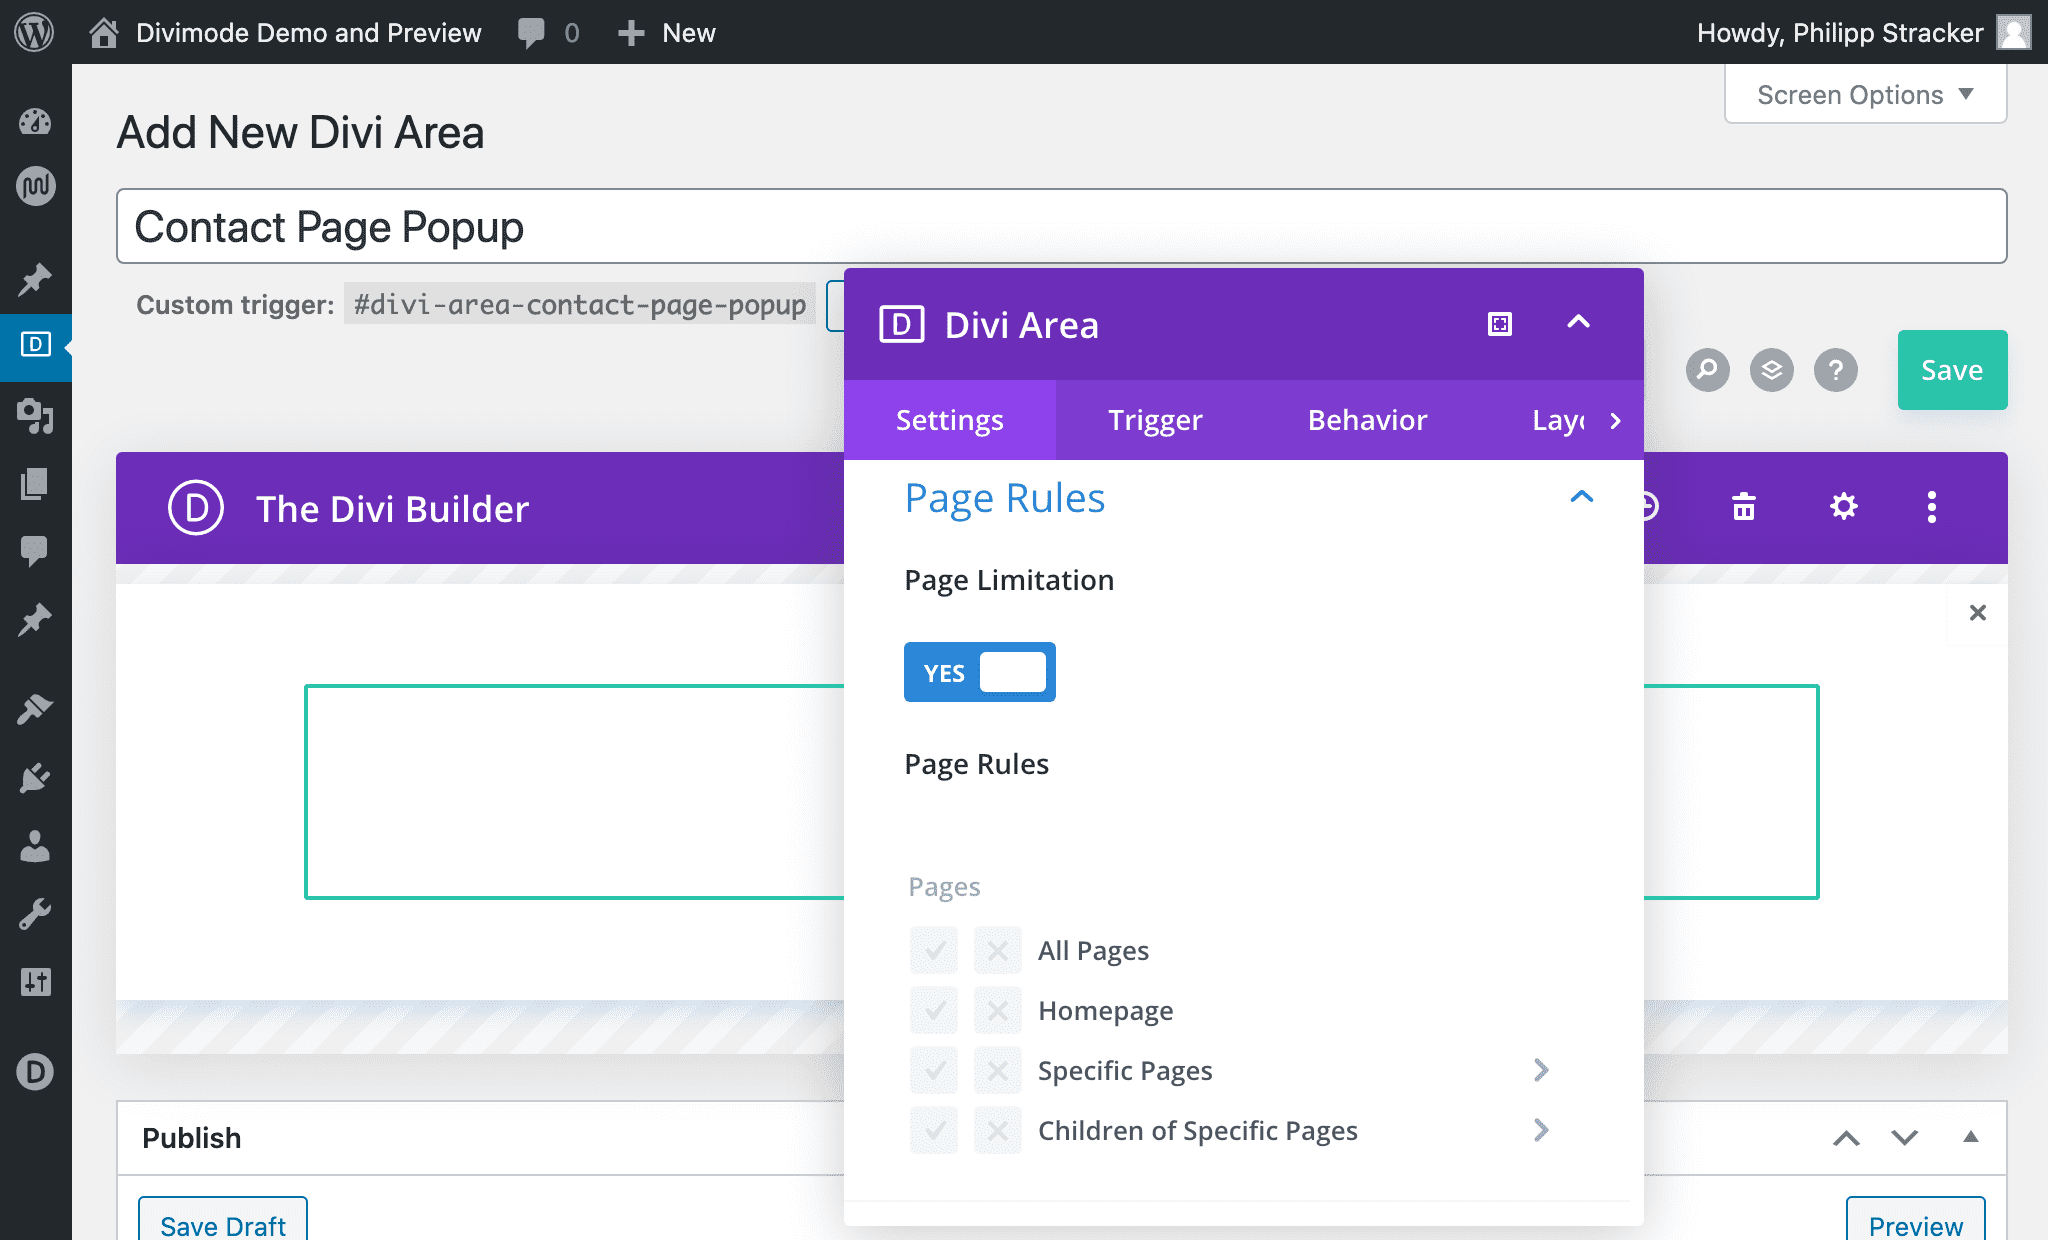
Click on the “Specific Pages” line to bring up the page selector – here I select the “Contact Us” page.
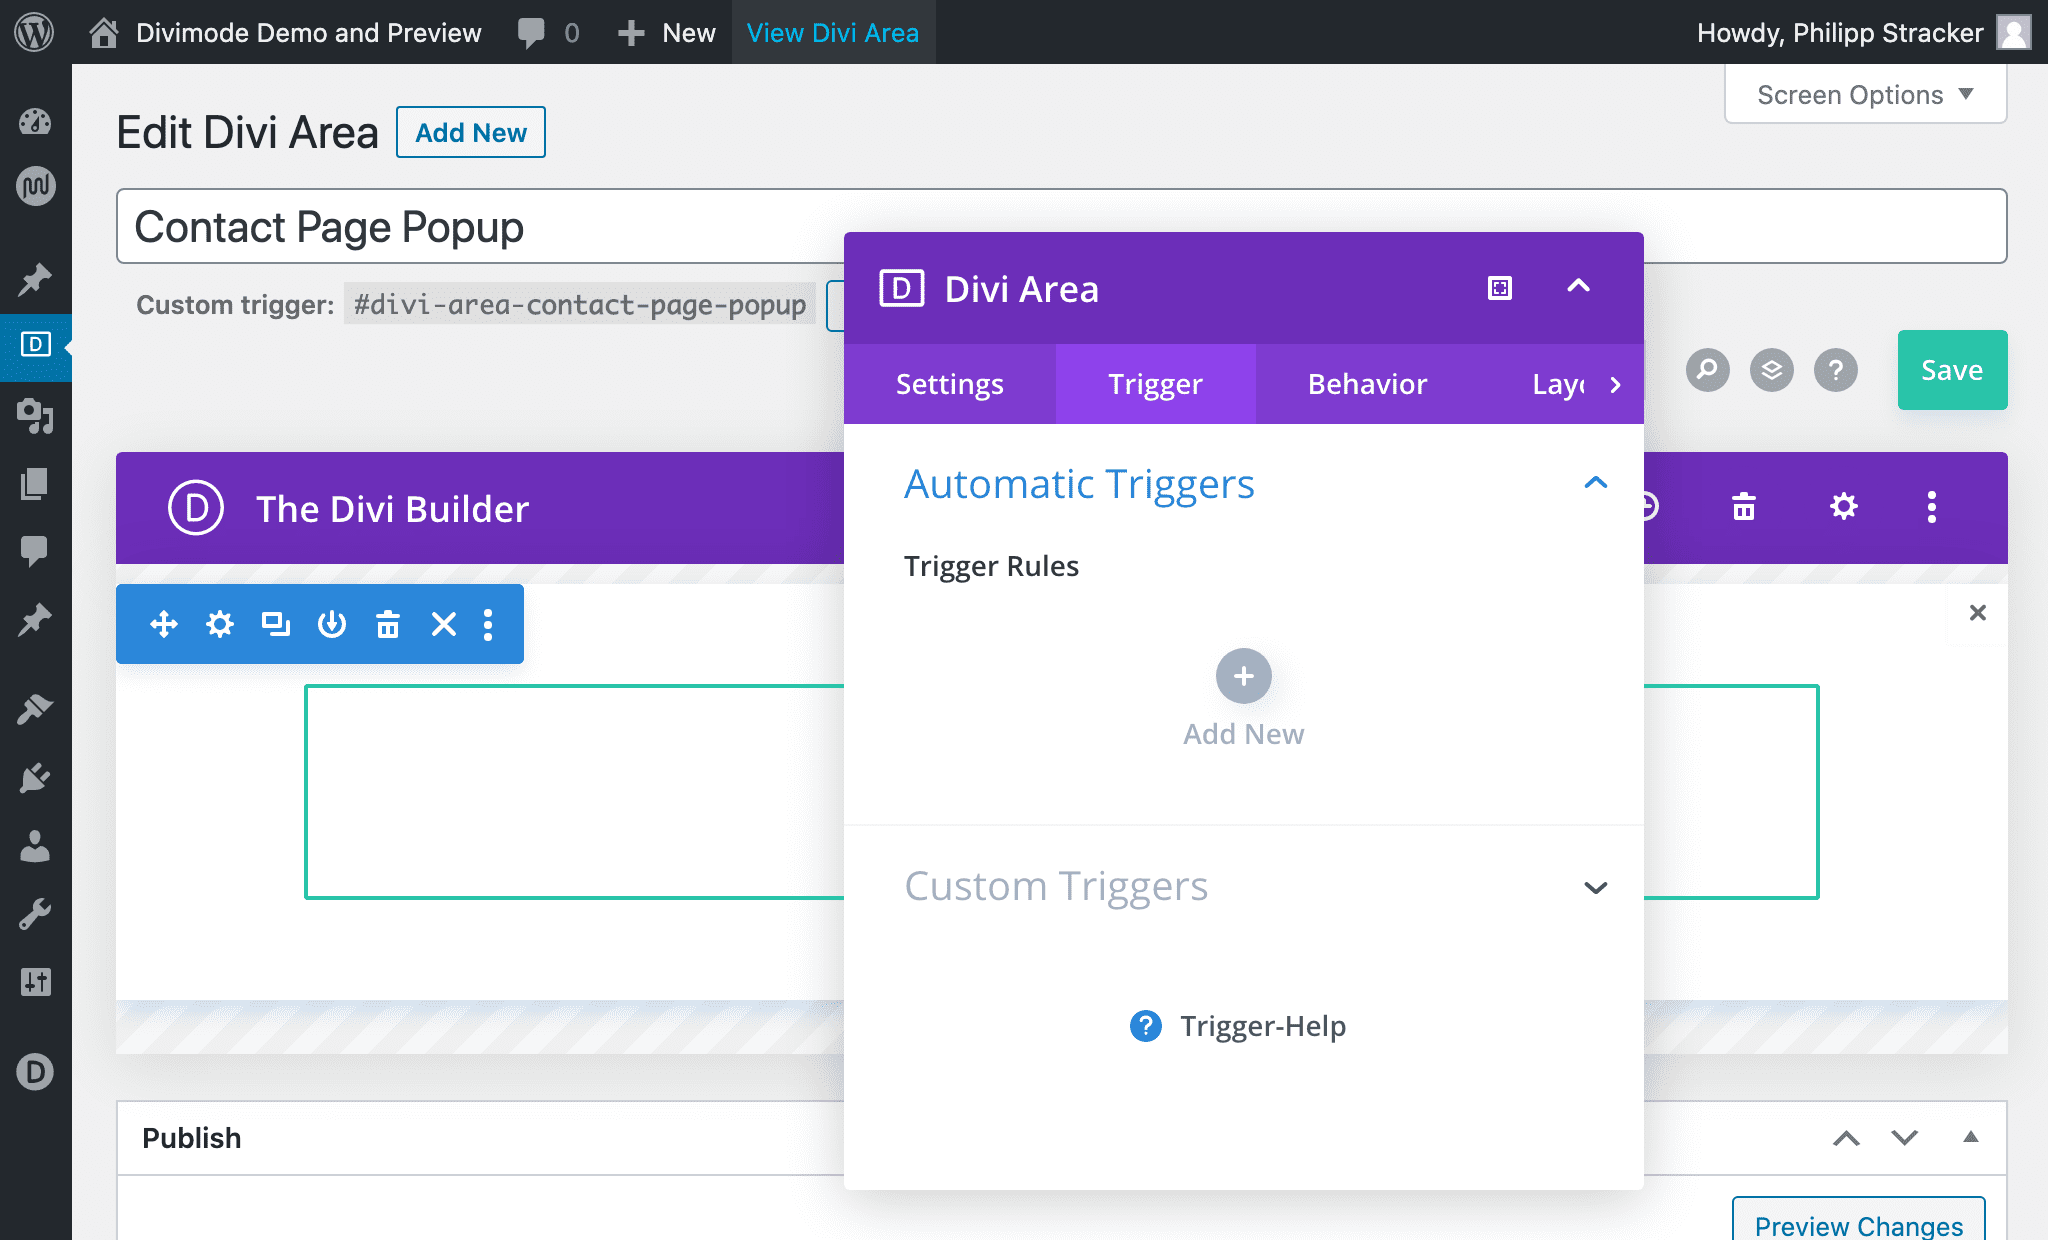
Note: You might first need to create such a contact page, or use a different target page instead. - Open the “Trigger” tab to configure a new timed trigger.
Click the Plus icon to configure a new trigger.
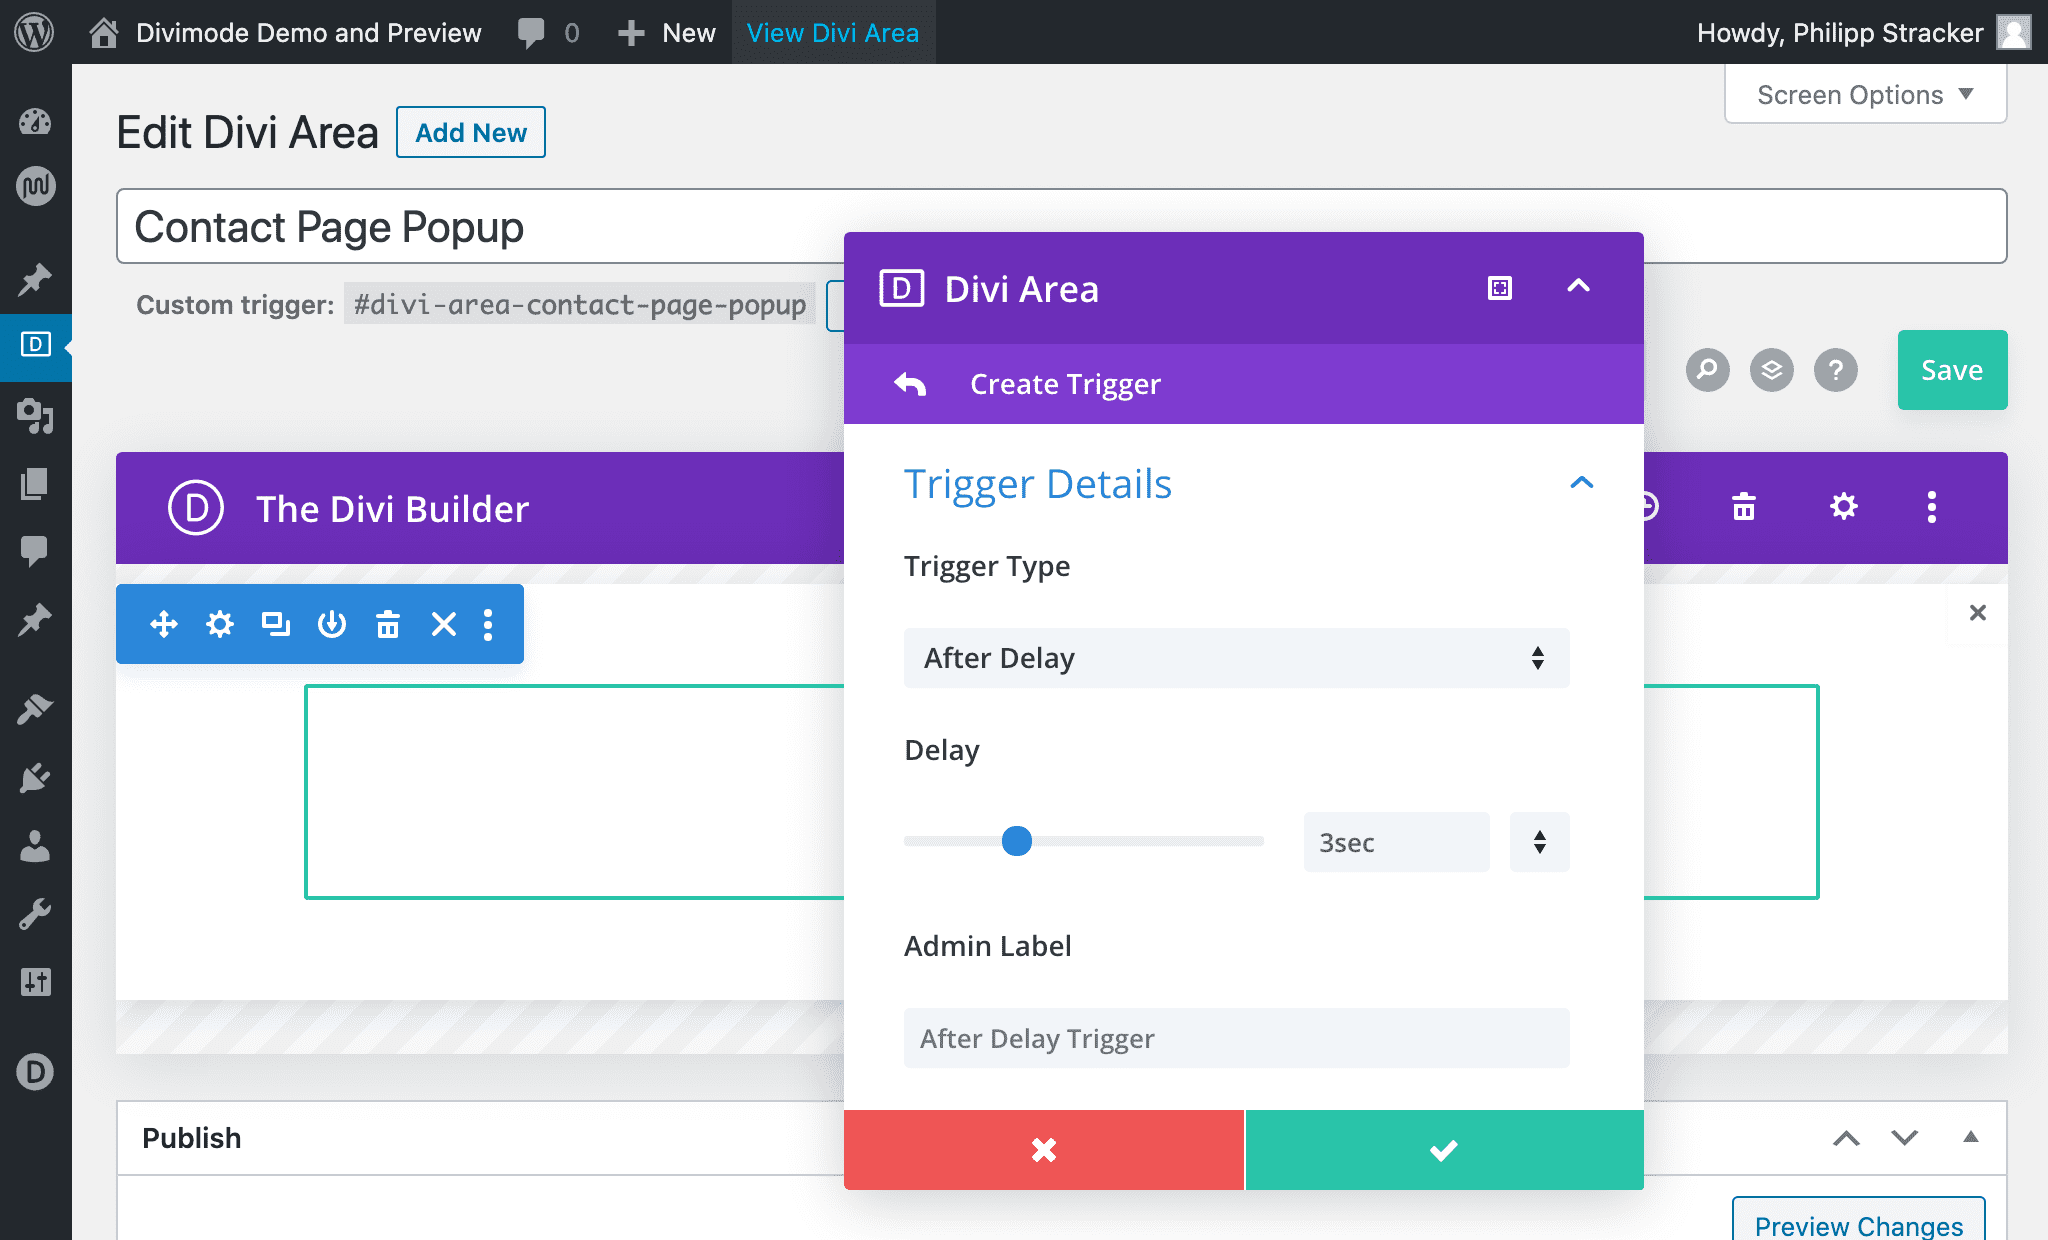
In the trigger editor, choose the type “After delay” and set the delay to “3sec“.
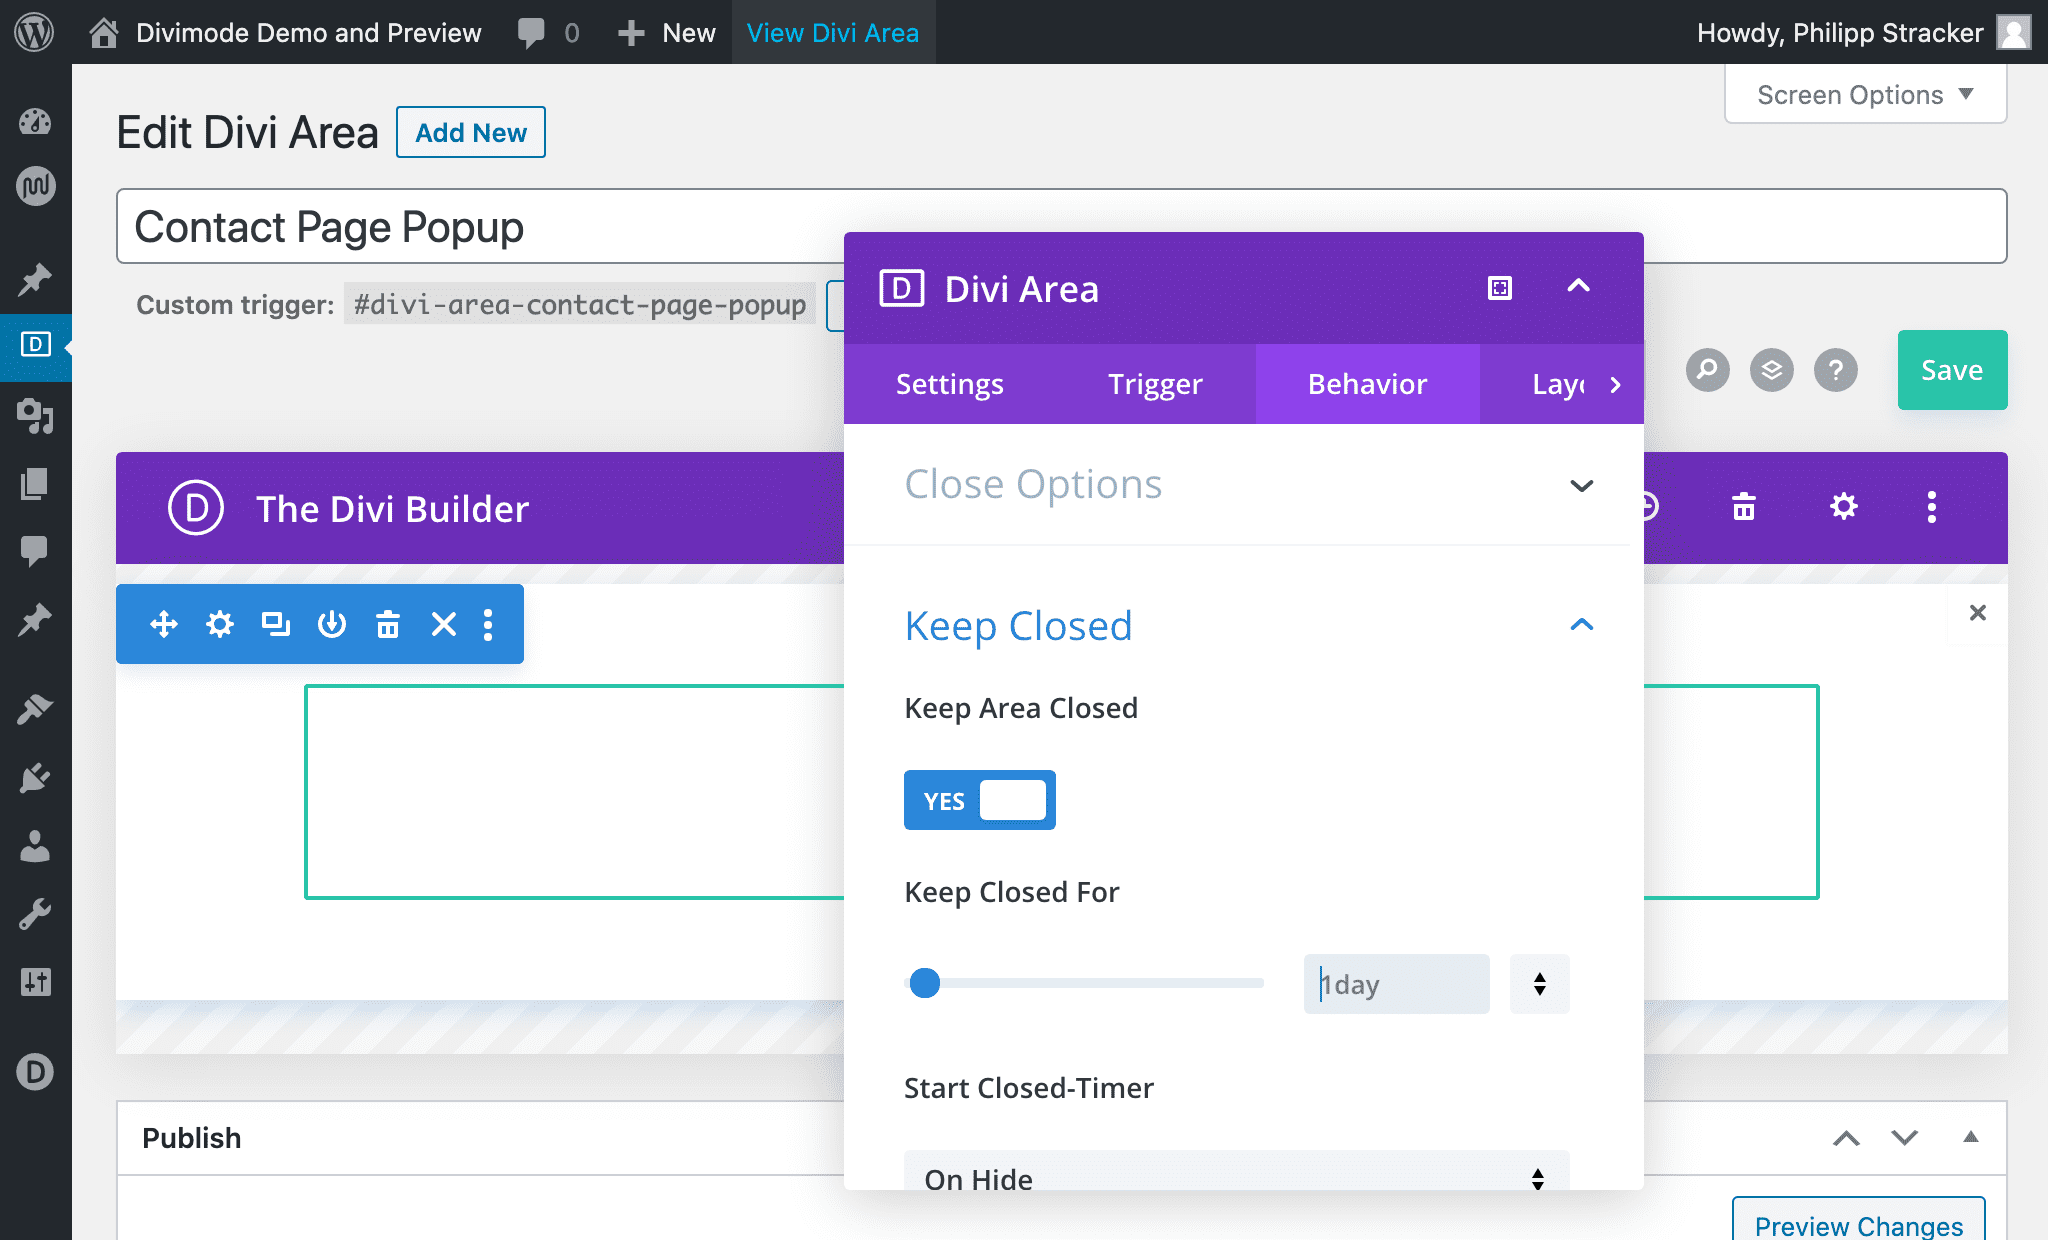
Confirm the dialog with the green button at the bottom. - Open the “Behavior” tab to configure the keep-closed behavior.
Scroll to the bottom and open the section “Keep Closed“
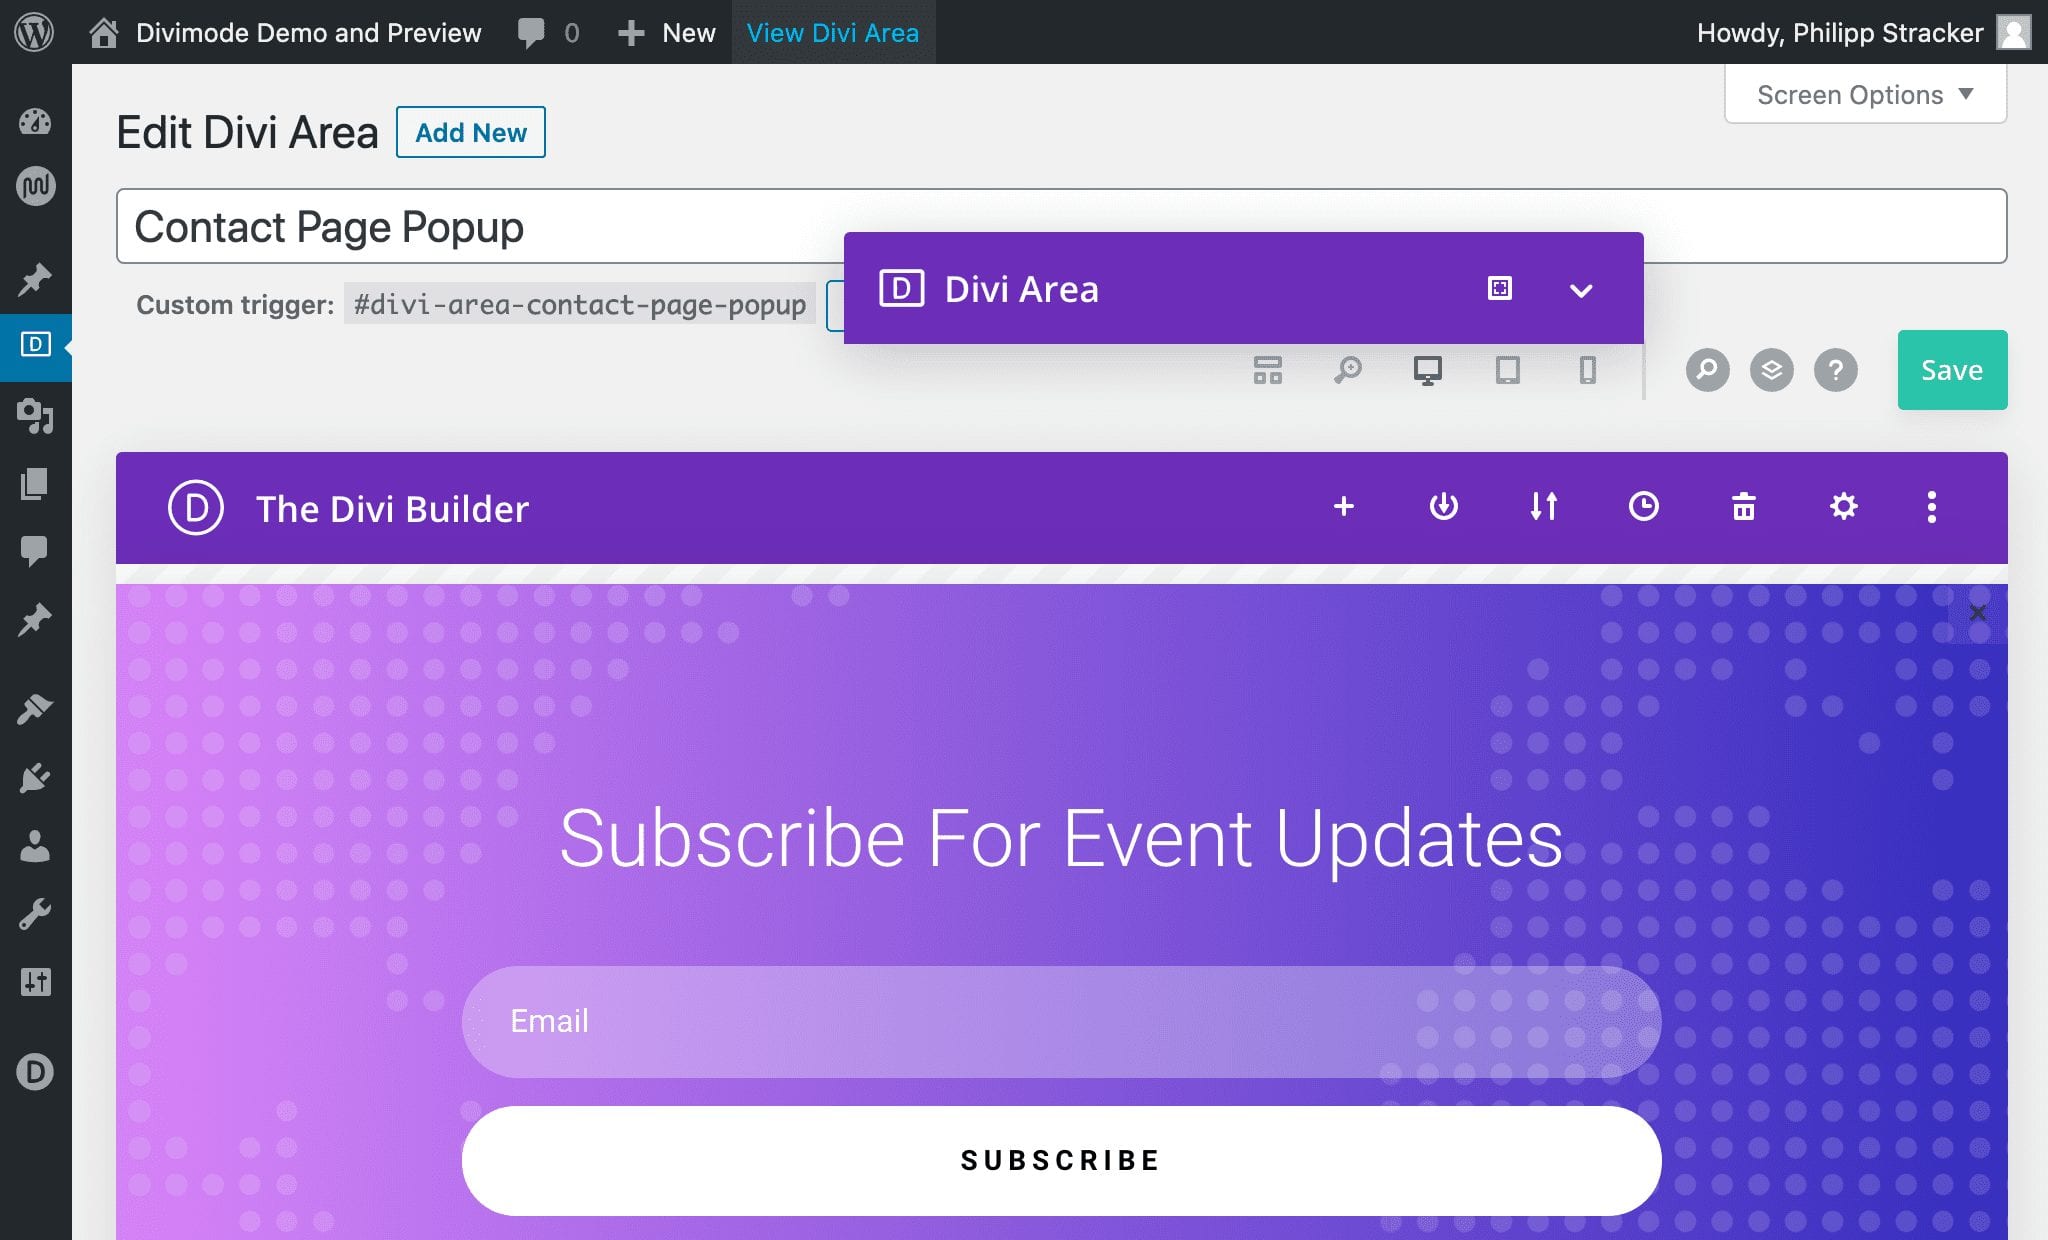
Enable the flag “Keep Area Closed” and enter a close delay – I use “1day” in my sample. - Add some content to the Popup Area and publish it.
- Test the Popup by visiting the page you configured in Step 3 above. You will see the Popup after 3 seconds. If you added the keep-closed behavior, you will not see the Popup again when you close it.
Screenshots


Notes
If you follow the descriptions and screenshots above, you will have a working Popup that displays once per day on your contact page.
Note, that we have not checked any option in the “For User-Role” or “For Device” sections. That means, that the Area is activated for all users (guests and logged-in users) and displayed on all devices.
Also see, how we created a Popup on the contact-page without actually editing the contact page!