
Divi’s built-in sticky options allow you to create stunning visual effects on your page in a few easy clicks. You can apply sticky effects to any element on your page, but in this Elegant Themes tutorial, you will see just how easy it is to add a sticky contact form to any Divi page.
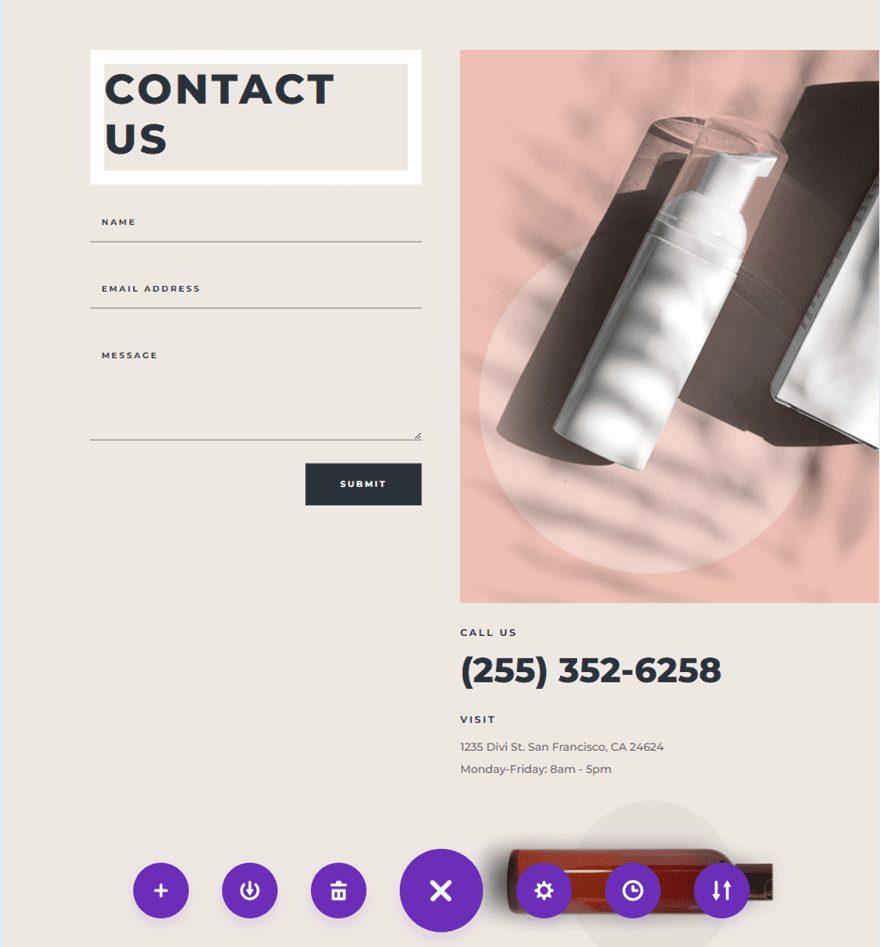
Here is a sneak of what we will design. On mobile, we don’t apply a sticky effect.

Add a Sticky Contact Form to Your Page
- What You Need to Get Started
- How to Add a Sticky Contact Form to Your Page With Divi
- Modifying the Layout for the Sticky Contact Form
- Making the Contact Form Sticky
- Final Thoughts
What You Need to Get Started
Before we begin, install and activate the Divi Theme and ensure you have the latest version of Divi on your website.
Try The Divi Theme Now → Try Divi
How to Add a Sticky Contact Form to Your Page With Divi
Create a New Page with a Premade Layout
Let’s start by using a premade layout from the Divi library. We will use the Contact Page from the Beauty Product Layout Pack for this design.
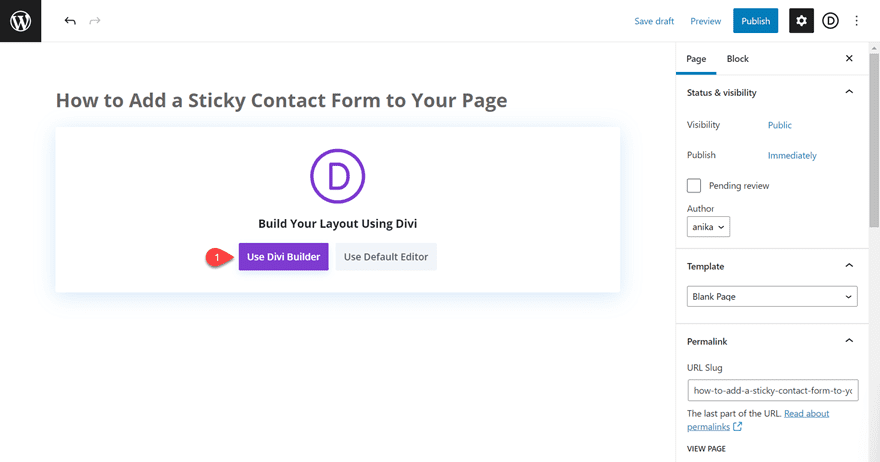
Add a new page to your website and give it a title, then select the option to Use The Divi Builder.
For this example, select Browse Layouts, we will use a premade layout from the Divi library.
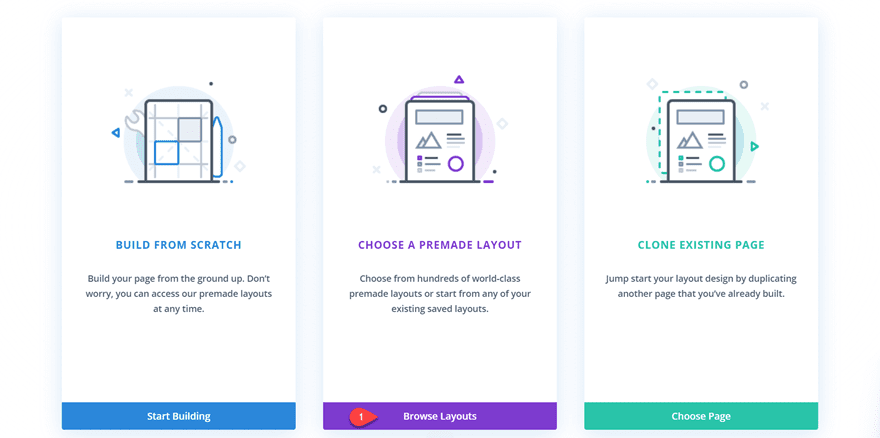
Search for and select the Beauty Product Contact Page layout or any other layout you would like to use on your page.
Select Use This Layout to add the layout to your page. Now you are ready to build your sticky contact form.
Modifying the Layout for the Sticky Contact Form
For this design, we want the contact form in the left column (column 1) to stay sticky while the user scrolls through the other content modules in the right column (column 2). This will give us a dynamic scrolling effect that makes your contact form stand out. Let’s begin by modifying our premade template.
Create a New Section
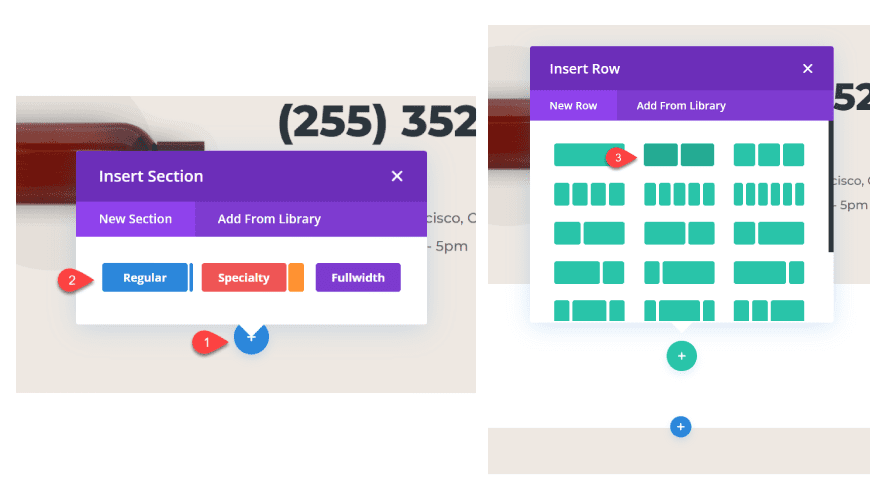
Add a new regular section to your page. Then, insert a new row with two columns. You can add this section anywhere on the page, the other sections will eventually be deleted as we go through the tutorial.
Open the Section Settings and change the background color to match the layout design:
Background: #EEE8E2
Adding Your Sticky Modules to Column 1
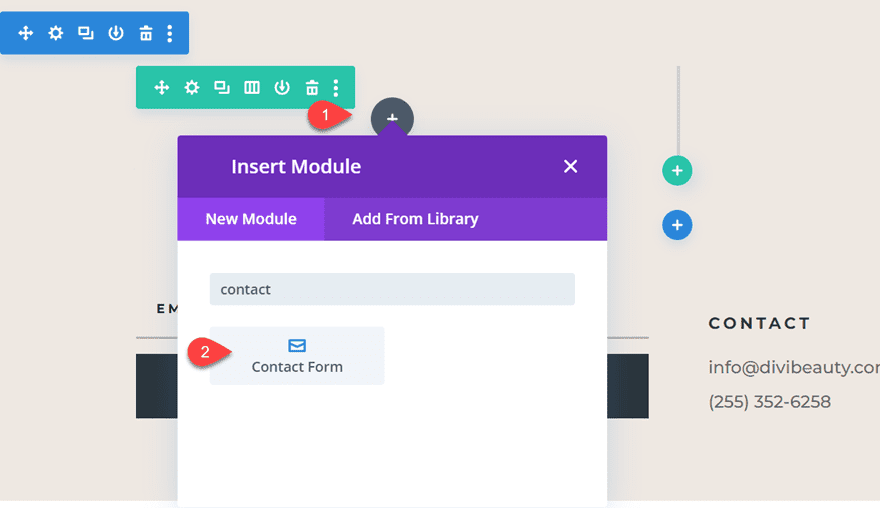
Add a contact form module to column 1. If you’re following the tutorial or already have a contact form on your page, you can simply drag the existing contact form module over to column 1.
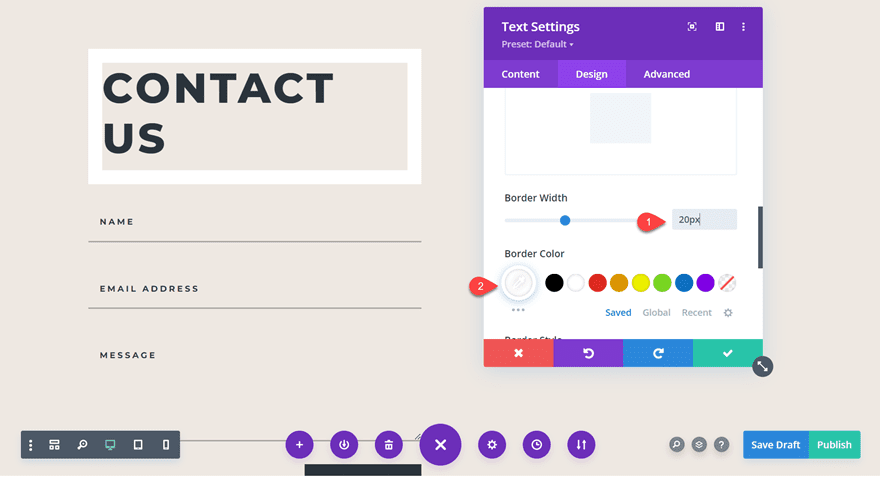
Move the “Contact Us” text module to the top of this section. This will also be sticky. Add a white border in the Text Settings to match the layout design:
- Border Width: 20px
- Border Color: #FFFFFF
The original layout included some extra padding between the text and the border, but we will skip adding this padding as it cuts off the bottom of the contact form on smaller screens.
Add Your Scrolling Modules to Column 2
In column 2, add all of your scrolling modules. For this design, move the two image modules, the contact information, and the location information to column 2. Once you move your modules to the new section, you can delete any remaining empty sections.
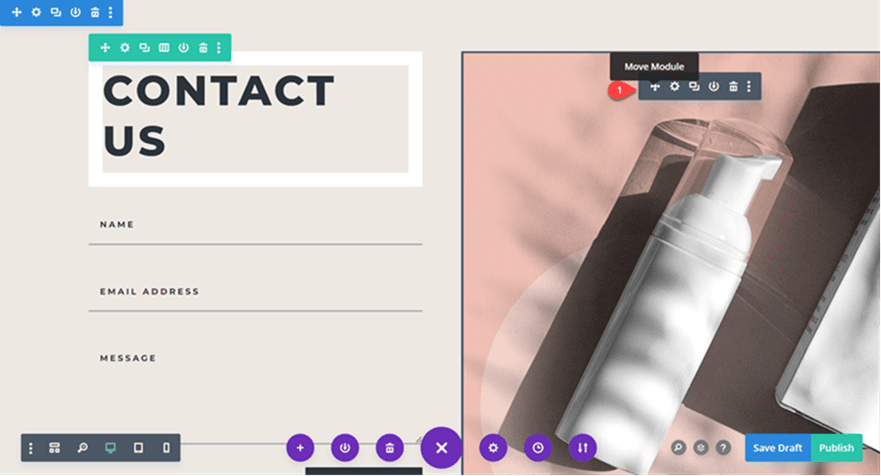
Pro-tip: If you need to move multiple modules at once, hold the Shift key and select the modules you want to move. Use the move module function to move all of your modules at the same time.
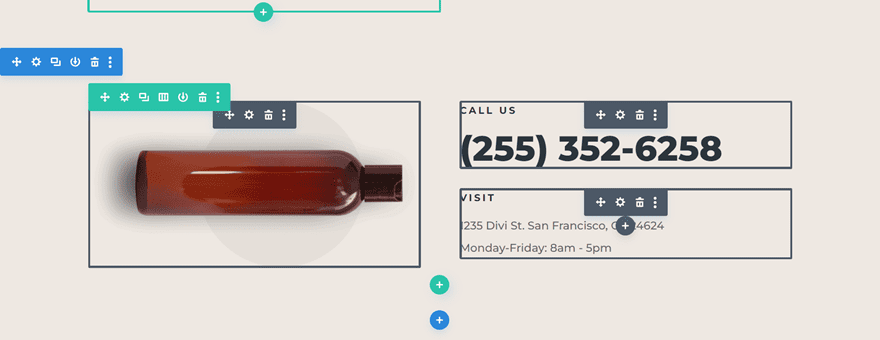
The large offset image from the beauty product layout can cause some horizontal scrolling issues in this design, so let’s change a couple of settings to fix this.
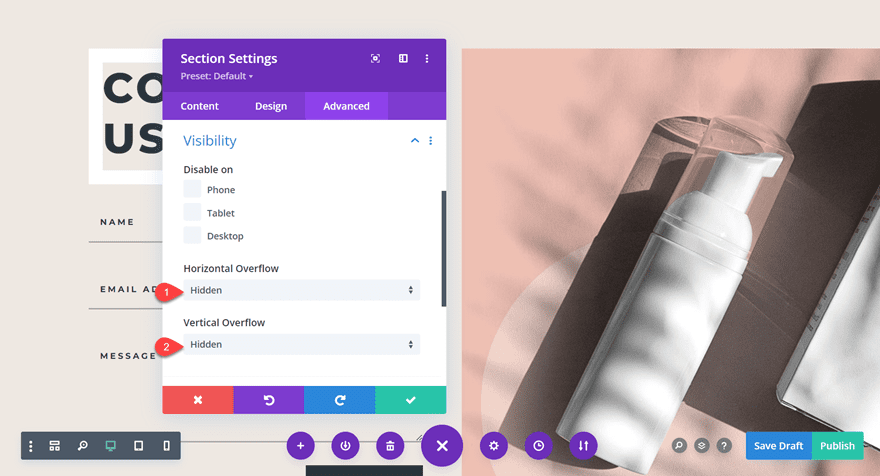
Open the Section Settings. Under Advanced, navigate to Visibility, then update the horizontal and vertical overflow settings:
Horizontal Overflow: Hidden
Vertical Overflow: Hidden
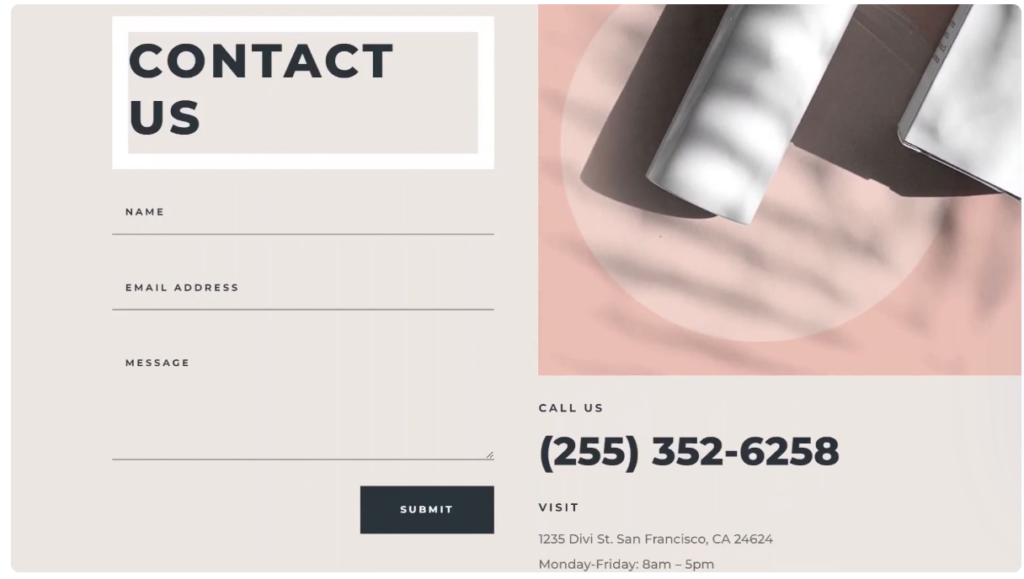
Now your page should look something like this, with your sticky content in column 1 and your scrolling content in column 2.
We are ready to move on to the last step: making the contact form sticky.
Making the Contact Form Sticky
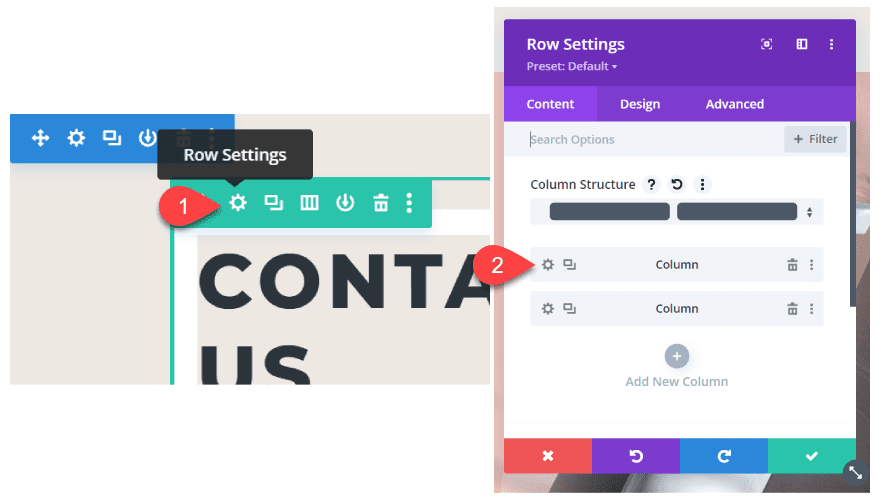
With our layout in place, we can enable the sticky settings for our contact form. Select Row Settings, then select the settings for column 1.
Under the Advanced tab, navigate to Scroll Effects. Here is where we will add the sticky settings. The two-column sticky design does not work well on mobile devices, so we will only change the following options for the desktop layout.
Sticky Position: Stick to the Top
Sticky Top Offset: 15px
Set the Bottom Sticky Limit to Section.
As easy as that! You have now added the sticky settings to column 1, making your contact form and title sticky as you scroll through the page.
Final Thoughts
With Divi’s sticky settings, you can easily improve the look of your contact page. By improving your contact page on your Divi site, you can improve your possible leads, and much more. If you need help setting up a contact form, don’t hesitate to get in contact with our team!
Read the full original tutorial on how to add a sticky contact form to your page in Elegant Themes.
Try Divi Areas Pro today
Sounds interesting? Learn more about Divi Areas Pro and download your copy now!
Many pre-designed layouts. Automated triggers. No coding.
Click here for more details
More Articles You Will Like