If you want to customize your WooCommerce emails, you've got a few solid options. You can stick with the built-in settings for some basic branding tweaks, grab an email customizer plugin for a drag-and-drop experience, or get your hands dirty by overriding template files in a child theme for total control.
Each path offers a different level of flexibility, but they all lead to the same goal: turning those generic, forgettable notifications into powerful, on-brand assets that actually build customer loyalty.
Why Generic Emails Are Costing You Sales
Let's be honest, the default WooCommerce emails are functional, but that's about it. They get the job done by confirming a transaction, but they do absolutely nothing to build a relationship with your customer.
This isn't just a missed branding opportunity; it's a gap that can directly hit your bottom line. Plain, text-heavy emails can make your store feel less professional, chip away at customer trust, and ultimately make repeat purchases less likely.
Think about it from the customer's perspective. One person gets a bland confirmation that looks like every other receipt they've ever received. Another gets a beautifully branded message that reaffirms their great choice, offers helpful next steps, and maybe even hints at a few related products. The difference is night and day.
This one touchpoint is one of the most overlooked levers for locking in future revenue.
The Hidden Value in Transactional Emails
Transactional emails aren't just digital receipts. They're highly anticipated moments in the customer's journey. Unlike marketing campaigns that have to fight for attention, your customers are actively looking for order confirmations and shipping updates.
This anticipation translates into some seriously impressive engagement rates.
Transactional emails like order confirmations and shipping notifications boast a much higher open rate than typical marketing emails. We're talking about a 62% open rate for shipping confirmation messages alone. That's a massive, engaged audience right there.
Even better, these automated emails drive real business, accounting for roughly 37% of sales from email. About one in three people who get one of these emails ends up making another purchase. You can read the full research about these email marketing statistics to see just how powerful they are.
By not customizing your transactional emails, you're ignoring your most engaged audience. It's like having a customer in your store who is ready to listen, but you choose to say nothing interesting.
A Quick Comparison
The business impact really comes into focus when you see the two approaches side-by-side. A small investment of time into customizing your emails can pay off big time in customer perception and long-term value.
Impact of Custom vs Default WooCommerce Emails
| Metric | Default Emails | Customized Emails |
|---|---|---|
| Brand Perception | Generic and impersonal | Professional and trustworthy |
| Customer Engagement | Low; purely informational | High; builds brand connection |
| Repeat Purchases | No direct encouragement | Drives loyalty and future sales |
| Marketing Opportunity | Wasted touchpoint | Prime channel for upsells/info |
As you can see, leaving your emails on the default setting is leaving money on the table. A customized approach, on the other hand, transforms a simple notification into a strategic asset.
Instant Branding Wins in WooCommerce Settings
Before you even think about touching code or installing a single plugin, you can score some major branding points right inside your WooCommerce dashboard. These built-in settings are, without a doubt, the fastest way to stop sending generic, out-of-the-box emails and start reflecting your brand's unique identity.
Honestly, this is the first place everyone should start. The goal is simple: make the basic look and feel of your emails match your storefront. When a customer gets an order confirmation, it should feel like a natural extension of the website they just bought from. That consistency is key to building immediate brand recognition and trust.
Your Quick Customization Checklist
Making these tweaks is incredibly straightforward and genuinely takes less than 10 minutes. Just head over to WooCommerce > Settings > Emails and scroll down to the "Email template" section.
You'll find a few simple fields that pack a big punch:
- Header Image: This is your biggest branding opportunity. Pop in the URL to your logo here to instantly replace the generic WooCommerce header. Make sure it's a high-quality image that looks sharp everywhere.
- Footer Text: Don’t leave this as the default "Built with WooCommerce." Get rid of it! Change it to something that adds a bit of professional polish, like your store name and a link to your support page. Something like: "© 2024 Your Brand Name | Need help? Contact us."
- Color Palette: This is where you bring your brand's vibe to life. Adjust the base, background, and text colors to match your website's color scheme. Even a subtle color shift makes the email feel instantly and unmistakably yours.
Here’s a look at exactly where you'll find these settings in your dashboard.
This little panel gives you total control over the most visible parts of the email template without needing a single line of code. It’s a no-brainer.
Takeaway: Customizing these three core elements—logo, footer, and colors—is the 80/20 of email branding. It delivers the most significant visual impact for the least amount of effort, setting a solid foundation for any advanced WooCommerce email customize efforts you tackle later.
Effortless Customization with an Email Builder
Let's be honest, not everyone wants to dive into PHP files and hooks just to make an email look good. For store owners who'd rather focus on branding and marketing, an email customizer plugin is a game-changer. These tools completely sidestep the technical stuff, replacing the default WooCommerce email system with a visual, drag-and-drop editor.
Instead of wrestling with code, you get to be creative. You can completely overhaul your email layouts, pop in new content blocks, and see exactly how it will look in real-time. It’s hands-down the fastest way to get a professional, on-brand look for every single transactional email you send.
From Bland to Branded in Minutes
The real magic of an email builder is how accessible it makes powerful features. Right away, you can make changes that go far beyond what WooCommerce offers out of the box. Imagine adding a dynamic product recommendation section to your "Completed Order" email, suggesting items based on what the customer just bought. That one little addition can seriously boost repeat business.
Other powerful features you’ll often find include:
- Social Media Feeds: Why not embed your latest Instagram or Facebook posts right in the email footer? It's an easy way to grow your following.
- Dynamic Coupon Codes: You can automatically generate and pop in unique discount codes to give customers a reason to come back for a second purchase.
- Complete Layout Control: Move things around, create multi-column layouts, and drop in custom images or GIFs that match your current campaign style.
This level of control means you can tailor each email for a specific purpose. Your "Order Shipped" email could feature a prominent link to your tracking page, while the "New Account" email might include a friendly welcome video.
An email builder puts advanced personalization within reach. You're no longer just sending a receipt; you're delivering a carefully crafted brand experience that builds loyalty and drives sales. It's a strategic move to elevate your WooCommerce email customize game.
Finding the Right Plugin
The WordPress ecosystem has plenty of great email builders. The trick is finding one that hits the sweet spot between being easy to use and having all the features you actually need. For many store owners, the built-in WooCommerce emails eventually become a roadblock to growth.
Tools like the WooCommerce Email Customizer plugin by WebToffee have become really popular for this exact reason. This plugin lets you personalize order emails from top to bottom—changing text, tweaking layouts, and adding branding across all the default templates. It even goes beyond looks, helping you set up automated workflows for things like abandoned carts or post-purchase thank-yous, which directly improves customer retention. You can discover more insights about how these tools enhance WooCommerce on WebToffee's blog.
Integrating with Your Divi Workflow
If you're a Divi user, the possibilities get even more interesting. For example, you could use a tool like Divi Areas Pro to create a dynamic popup that’s triggered directly from an email link. A customer might click a "Get 15% Off Your Next Order" button in their confirmation email, which then opens a pre-filled opt-in form on your site when they return. We actually have a guide that shows you how to create a mobile opt-in form with Divi Areas Pro that you can check out.
At the end of the day, using an email builder plugin is all about efficiency and impact. It saves you the time and potential headaches of coding while unlocking a whole suite of marketing tools that can turn your everyday transactional emails into a powerful revenue channel.
If you're tired of being boxed in by a plugin's limitations and want to control every single pixel of your emails, then overriding WooCommerce template files is your answer. This is the path for developers and power users who need total structural freedom and aren't afraid to get their hands dirty with a little code.
Honestly, it's the most direct way to create a truly bespoke WooCommerce email customize experience.
The concept is simple but incredibly powerful. You just copy WooCommerce’s default email templates from the plugin folder into your own theme’s folder. This tells WooCommerce, "Hey, forget your standard template for this email—use my custom version instead." The best part? This keeps your modifications safe from plugin updates, so you don't have to worry about your hard work getting erased.
With this method, you get granular control over the actual HTML and PHP that builds the email. You can rearrange entire sections, drop in brand-new information, or even inject complex logic that a simple plugin just can't handle.
Locating and Copying the Right Files
First things first, you need to find the original template files. They're tucked away inside the WooCommerce plugin directory at this path:/wp-content/plugins/woocommerce/templates/emails/
Inside that folder, you'll find a list of .php files, and each one corresponds to a specific transactional email. For instance, customer-processing-order.php is the template for the email your customer gets right after they pay.
To override a template safely, you need to set up a specific folder structure within your child theme. A word of warning: never, ever edit files in your parent theme or the WooCommerce plugin directly.
In your child theme's directory, create a new folder named woocommerce. Inside that, create another folder named emails.
Now, just copy the template file you want to edit—let's use customer-processing-order.php as our example—from the plugin folder into your new child theme directory:/wp-content/themes/your-child-theme/woocommerce/emails/
As soon as that file is in place, WooCommerce automatically detects it and starts using your version instead of its own. You can now open that copied file and start customizing without any risk.
A Real-World Customization Example
Let's make this practical. Say you want to add a personalized thank you message right after the main heading in the "Processing Order" email. It's a small touch that makes a big difference.
Go ahead and open your copied customer-processing-order.php file. Near the top, you should see a line that outputs the main email heading. Right after that, you can add your custom PHP snippet.
Hi ‘ . esc_html( $billing_first_name ) . ‘, thank you so much for your order! We\’re already getting it ready for you.
‘; } ?>This simple piece of code grabs the customer's first name from the order details and displays a friendly, personalized message. Instantly, the email feels more human and less transactional. You could easily use this same spot to add warranty information, links to setup guides, or details about your rewards program.
By overriding templates, you're not just tweaking colors or text; you're fundamentally changing the email's structure and content. This is the way to go when your branding and business needs demand more than what off-the-shelf tools can offer.
This level of control isn't just for emails. The principles of overriding templates in a child theme apply across your entire store. For example, you can learn more about how to customize the checkout page in WooCommerce using very similar strategies, creating a cohesive brand experience from the moment a customer lands on your site to the moment their order is confirmed.
Making Surgical Changes with Hooks and Filters
Overriding entire template files gives you a ton of control, but what if you don't need a complete overhaul? Sometimes, all you need is a small, precise change—like adding a quick "thank you" note, tweaking a subject line, or inserting a custom field. This is where the elegant world of hooks and filters comes into play.
Think of hooks as specific connection points in WooCommerce's code where you can inject your own functions. Instead of tearing down the whole house, you're just adding a new light switch. It's a much cleaner and more efficient way to make targeted tweaks that are easy to manage and won't break when you update WooCommerce.
Understanding Action Hooks vs. Filters
Hooks come in two main flavors, and knowing the difference is key to using them the right way.
- Action Hooks: These let you add something new. An action hook is perfect for inserting extra text, a new block of HTML, or even a special coupon code at a specific spot in the email.
- Filters: These let you modify what's already there. A filter is what you'd use to change the email subject line, alter the recipient's address, or adjust the text in the email heading.
This handy visual breaks down how you can use hooks to slot dynamic content right where you need it.
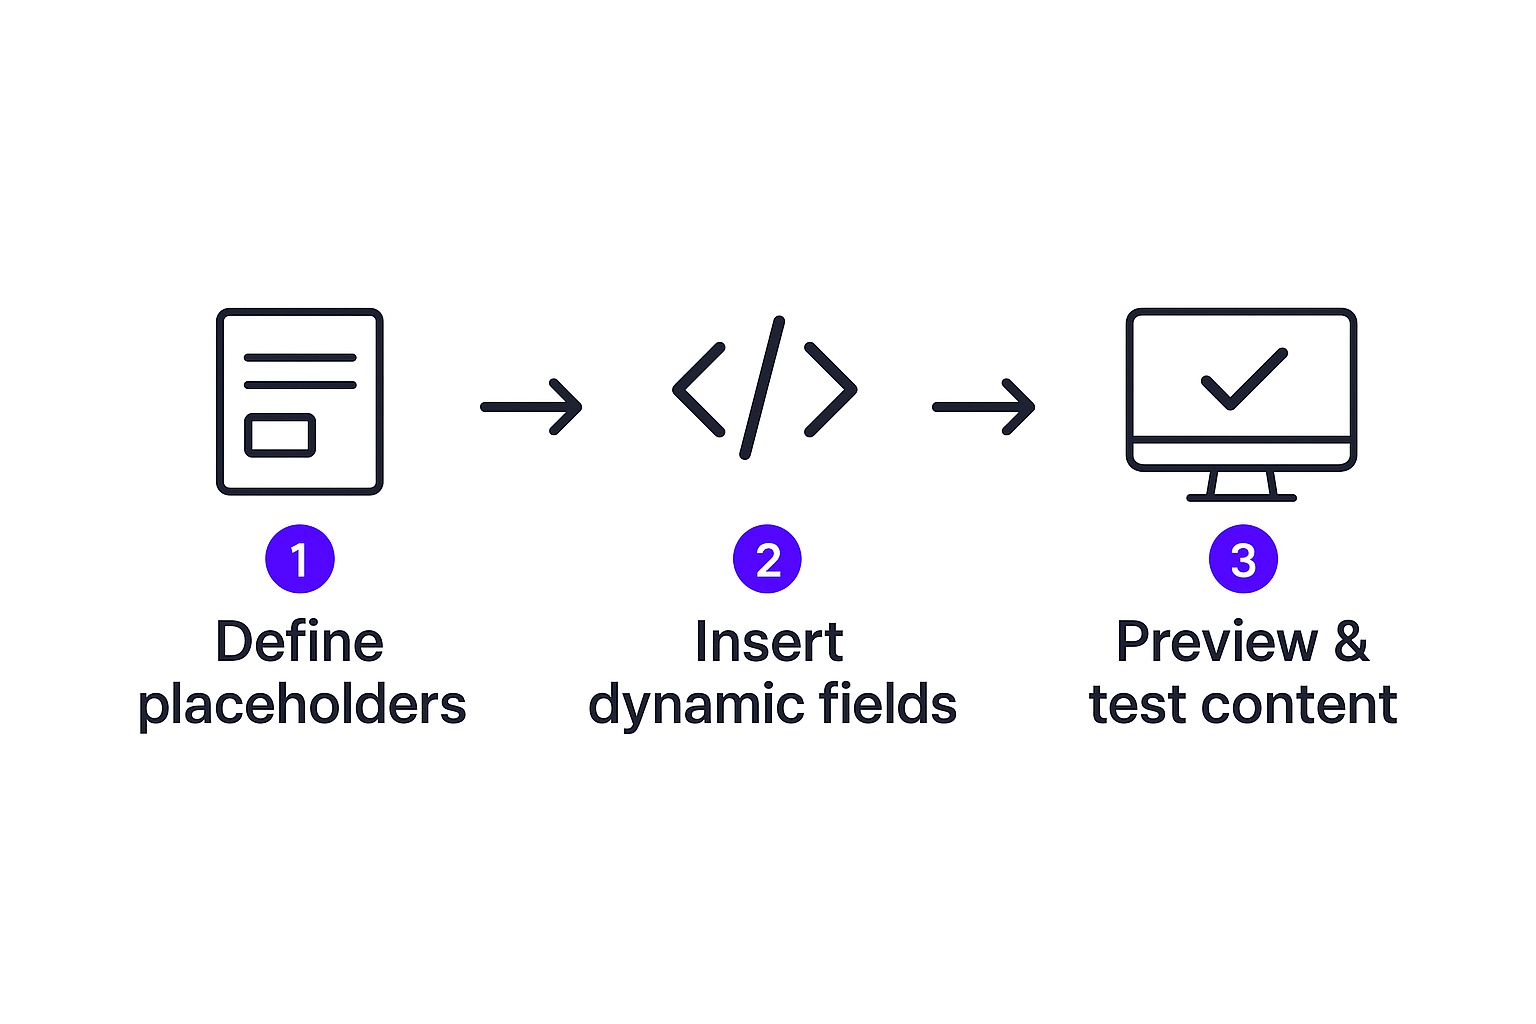
This process really highlights the workflow: figure out what data you need, hook it into the right place, and then test to make sure it looks perfect for every single customer.
Practical Examples of Hooks in Action
The best way to really get this is with some real-world examples. Let's say you want to add a special thank you note right after the order table in all your customer emails. Instead of hunting down and editing multiple template files, you can use a single action hook.
Just drop the following code snippet into your child theme's functions.php file:
/**
- Add a coupon code after the order table in WooCommerce emails.
*/
add_action( 'woocommerce_email_after_order_table', 'add_coupon_to_emails', 10, 4 );
function add_coupon_to_emails( $order, $sent_to_admin, $plain_text, $email ) {
// Only add this to emails sent to the customer
if ( $sent_to_admin ) {
return;
}
echo 'Thanks for your order! Use code WELCOME15 for 15% off your next purchase.
';
}
This tiny snippet hooks into woocommerce_email_after_order_table and cleanly injects your message without you ever having to touch a template file. It's that simple.
Pro Tip: Using hooks and filters is a core principle for keeping your site fast and healthy. It’s a lightweight method that keeps things running smoothly, which is a key part of any strategy to optimize an ecommerce website.
Okay, so what if you wanted to change the subject line for new order notifications sent to you, the admin? For that, you’d use a filter.
/**
- Customize the email subject for new orders.
*/
add_filter( 'woocommerce_email_subject_new_order', 'change_admin_new_order_subject', 1, 2 );
function change_admin_new_order_subject( $subject, $order ) {
$subject = sprintf( 'You’ve Got a New Sale! Order #%s', $order->get_order_number() );
return $subject;
}
This code grabs the default subject line, filters it, and replaces it with something a bit more exciting. This kind of targeted approach is the essence of a professional WooCommerce email strategy—making powerful changes with minimal, clean, and maintainable code.
Once you start diving into customizing WooCommerce emails, you'll find a few questions pop up time and time again. Getting these sorted out early will save you a ton of headaches and make the whole process a lot smoother.
https://www.youtube.com/embed/i6f0KCTgQ-s
Let's walk through some of the most common hurdles I see people run into.
How Can I Test My Customized Emails Before Going Live?
This is the big one. You've just spent hours crafting the perfect email, but how do you actually see it without spamming a real customer or placing a dozen fake orders?
Testing is non-negotiable. Seriously, never skip this step.
The quickest way to get a preview is with a dedicated plugin. A tool like "Preview E-mails for WooCommerce" is a lifesaver. It adds a simple dropdown menu to your order screen, letting you view any email template for any order with a single click. It’s perfect for quick visual checks.
For anything more complex, especially if you're touching code, a staging site is the way to go. A staging site is basically a private clone of your live store. You can place test orders, trigger every email, and see exactly how they look in real inboxes like Gmail or Outlook. This is the professional approach because it lets you check everything—from layout to deliverability—without touching your live environment.
Will My Changes Disappear When I Update WooCommerce?
This is a totally valid fear, and the answer is: no, as long as you do it the right way.
If you go in and edit the core WooCommerce plugin files directly, then yes, your changes will be completely wiped out the next time you update. That's why the golden rule of WordPress development is to never, ever edit core files.
To keep your customizations safe, you have two solid options:
- Use a Child Theme: This is the classic, rock-solid method. Any template overrides or custom PHP you add to your
functions.phpfile should live in a child theme. This keeps your modifications totally separate from the parent theme and any plugin updates. - Use a Plugin: A good email customizer plugin manages everything within its own interface. Your designs are stored separately, so they’re completely shielded from WooCommerce updates.
By using a child theme or a reliable plugin, you ensure your customizations are update-proof. This separates your work from the core software, which is the cornerstone of sustainable WordPress development.
Can I Add Product Custom Fields to Order Emails?
Absolutely. This is one of the most powerful ways to personalize your emails. Maybe you sell engraved jewelry and need to show the custom text, or you offer gift wrapping with a personal message. Getting that info into the order confirmation email is crucial.
While some premium email builder plugins make this a point-and-click affair, the most flexible approach is a small code snippet. You can tap into a WooCommerce hook—like woocommerce_order_item_meta_end—to pull that custom field data and display it right where you want it.
It just takes a simple PHP function added to your child theme’s functions.php file, but it gives you complete control over what extra product information shows up.
At Divimode, we build tools that give you precise control over your website's content and user experience. Learn more about how Divi Areas Pro can help you create dynamic, targeted content that engages customers at every step.
