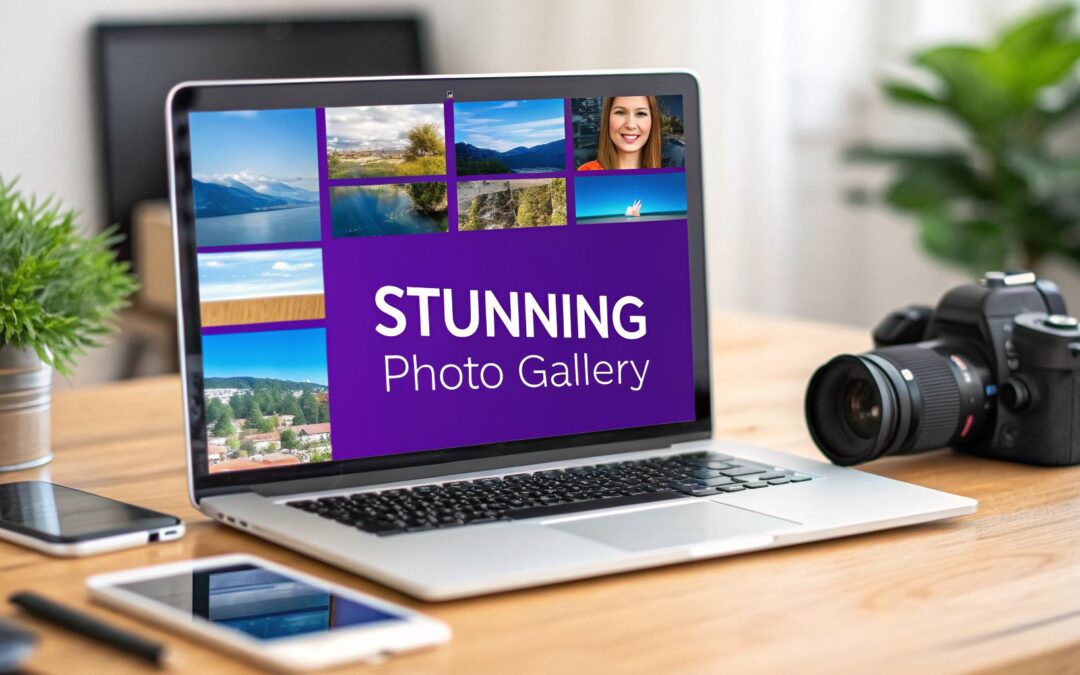
A stunning photo gallery in websites isn't just a nice-to-have feature anymore. It's a storytelling powerhouse that grabs your audience by the eyeballs and makes them stick around. Think of it as the difference between a visitor who bounces after a quick glance and one who stays to see everything you've got.
Why a Photo Gallery Is No Longer Optional

It wasn't long ago that a photo gallery was a simple add-on. Today, it’s a non-negotiable part of any serious website. Visuals have moved from being supporting actors to the main event, shaping how users feel about your brand and what they do next.
The reason is pretty straightforward: our brains are wired for visuals. High-quality images grab attention, get complex ideas across in a flash, and stir up emotions in a way that plain text just can't match. This isn't just some marketing fluff; it has a real, measurable impact on your site's success.
The Business Case for Visual Engagement
Picture a potential customer landing on your site. Are they met with a wall of text, or an inviting, dynamic gallery that showcases your products, your projects, or your brand’s story? The answer to that question often decides whether they stick around or click away. A professional gallery does some heavy lifting for your business:
- Skyrockets Engagement: People love to click and scroll through beautiful images. This keeps them on your site longer, which sends a strong signal to search engines that your content is top-notch.
- Builds Real Trust: High-quality photos of your team, your work, or your products act as tangible proof of your expertise. It makes your brand feel more human and trustworthy.
- Powers Conversions: For an e-commerce shop, a detailed product gallery is make-or-break. For a service business, a portfolio of past work can be the final push a client needs to get in touch.
The data backs this up completely. The average homepage now loads a whopping 59 separate images, a huge jump that shows just how critical visual-first design has become. And it’s not just for show—our brains process high-quality visuals 74% faster than text. This makes a great gallery essential for hooking visitors in those first crucial seconds. You can dig into more of these fascinating web design statistics on Figma.
A well-executed photo gallery doesn’t just show; it sells. It transforms passive browsers into active participants and potential customers by creating an immersive and persuasive visual journey.
The good news? You don't need to be a coding genius to create something incredible. Modern tools like Divi, especially when paired with powerful plugins like Divimode’s Divi Areas Pro, put stunning, high-performing galleries within reach. You can finally deliver the rich, dynamic visual experience your audience craves without bogging down your site's performance.
Choosing the Right Divi Gallery Format for Your Goals
Before you even drop a single image into the Divi Builder, you need to make a key decision: what kind of gallery will you build? The layout you pick has a huge impact on how people interact with your photos and can make or break your design goals.
After all, a gallery that’s perfect for a sleek product showcase might feel totally wrong for an artistic photography portfolio. Let's dig into the three main gallery formats in Divi—Grid, Masonry, and Slider—so you can match the right layout to your specific needs.
Divi Gallery Formats Compared
To get a quick overview, this table breaks down the three core gallery types. It’s a great starting point for figuring out which format will best serve your content and your users.
| Gallery Format | Best For | Pros | Cons |
|---|---|---|---|
| Grid | E-commerce products, corporate photos, team directories. | Clean, organized, predictable, and easy for users to compare items. | Can feel rigid; crops images to fit, losing original ratios. |
| Masonry | Creative portfolios, photography showcases, blogs with varied images. | Dynamic, visually engaging, and preserves original image aspect ratios. | Can look cluttered if not curated well; less predictable flow. |
| Slider | Guided tours, feature highlights, client testimonials, case studies. | Focused, controlled narrative, and saves vertical screen space. | Hides most content, requiring user interaction to see more. |
Each format has its place, and knowing their strengths is the first step. A grid offers order, a masonry layout provides creative freedom, and a slider directs focus. Choosing wisely from the start saves you a ton of headaches later on.
The Classic Grid: Clean and Orderly
The Grid layout is probably the most familiar format you'll see online. It lines up all your images into a perfectly uniform grid, where every single thumbnail is the exact same size. This happens whether your original image was a tall portrait or a wide landscape.
What you get is an incredibly clean, organized, and predictable look that’s a breeze for users to scan. Think of it like a neatly arranged sheet of stamps. Its biggest strength is its structure. This makes it ideal for e-commerce stores displaying products or corporate sites showing off event photos, where giving each item equal visual weight helps users compare them at a glance.
The Artistic Masonry Layout
Often called the "Pinterest-style" layout, the Masonry format is the grid's more creative cousin. Instead of forcing every image into the same box, it maintains the original aspect ratio of your photos. The result is a dynamic, interlocking pattern where images of different heights fit together like a beautifully laid stone wall.
This approach is a lifesaver when you're working with a mix of portrait and landscape shots, as it gets rid of any awkward or unnatural cropping. It feels far more organic and fluid, which is why it’s a go-to choice for artists, bloggers, and photographers.
A Masonry layout is your best friend when your images have different orientations. It honors the original composition of each photo, creating a much more engaging and visually interesting experience for your audience.
The Focused Slider (or Carousel)
Last but not least, we have the Slider (or Carousel). This format takes a completely different approach. Instead of showing everything at once, it displays just one or a few images at a time, asking the user to click or swipe to see the next one.
This is less about overwhelming visitors with a huge collection and more about guiding them through a curated story, one frame at a time. It’s all about controlling the narrative and focusing user attention.
Here are a few scenarios where a slider really shines:
- Guided Tours: Perfect for walking a user through the key features of a single product or a step-by-step process.
- Highlight Reels: A great way to showcase the "best of" your portfolio right on the homepage without eating up a ton of vertical space.
- Client Testimonials: You can pair a client’s photo with their quote, creating a compelling, rotating block of social proof.
By getting a feel for the strengths of each format, you can confidently build a photo gallery that not only looks stunning but also works hard to meet your strategic goals.
Building Your First Gallery With the Divi Builder
Alright, you know the difference between gallery formats. Now for the fun part: building one. Creating your first photo gallery in websites with Divi is surprisingly simple, all thanks to the built-in Gallery module. You won't need any special plugins for this first go-around, just the Divi Builder itself.
To get started, just fire up the Visual Builder on the page where you want the gallery to live. Find the spot where it should go, hit that grey plus (+) icon to add a new module, and type "Gallery" into the search bar. Once you click it, the settings will pop right up, and you're ready to start loading your images.
Adding and Arranging Your Images
First things first, let's get your photos into the gallery. Inside the Content tab of the Gallery module, you'll see a big grey box waiting for you to add images. Clicking it opens the familiar WordPress Media Library.
From here, you can either upload fresh photos or grab ones you've already uploaded. A little power-user tip: hold down the Ctrl key (or Cmd on a Mac) to select a bunch of images all at once. It's a real time-saver.
Once your images are selected, they'll appear as thumbnails right inside the module settings. You can easily drag and drop them to get the perfect order. This is also your chance to add or tweak the title and caption for each photo, which can be displayed right on the gallery if you want.
Pro-Tip: Don't just breeze past the image titles and captions. They do more than just add context for your visitors—they're a golden opportunity to work in relevant keywords, which can give your images a nice little boost in search engine rankings.
Configuring Your Gallery Layout and Design
With your images loaded and arranged, it's time to style your gallery. Head over to the Design tab. Your first stop should be the "Layout" toggle, where you can pick between a Grid and a Slider. The standard Grid layout is perfect for most situations where you want an organized, clean look. If you're aiming for that cool, staggered masonry effect, you'll need a touch of custom CSS, but we'll stick to the basics for now.
This handy little decision tree can help you choose the right format for your content in seconds.

As you can see, it maps common goals like a creative portfolio to a masonry layout, a product showcase to a grid, and a step-by-step tour to a slider. It’s a great visual shortcut.
You can also tweak the column count, which controls how many images appear side-by-side. To dial in the details, explore the "Overlay" settings. This is where you can customize the hover icon, set its color, and adjust the transparency to perfectly match your site's branding. If you want to dive deeper into getting your images ready, check out our ultimate guide to using images with Divi.
With just a few clicks in these settings, you can transform an empty space on your page into a fully functional and polished gallery. It's one of those Divi features that's both powerful and incredibly intuitive right out of the box.
Taking Your Gallery to the Next Level with Divi Areas Pro
A standard Divi gallery is a solid start, but if you're aiming to create an experience that sticks with your visitors, you need to add a layer of interaction. This is where you can go beyond a simple photo gallery in websites and build something that actually pulls people in. With a couple of key plugins from Divimode, you can turn a static grid of images into a dynamic, trigger-based asset.
Let’s walk through how you can use these tools to build some truly advanced gallery interactions. We'll kick things off with the free Popups for Divi plugin to craft a custom lightbox, then really open up the possibilities with Divi Areas Pro for more complex, behavior-driven galleries.
Crafting a Custom Lightbox with Popups for Divi
Divi’s built-in lightbox does the job, but it’s pretty limited. A user clicks a gallery thumbnail, and all they get is a simple popup with the image. What if you could show them so much more? By using the free Popups for Divi plugin, you can design a completely custom lightbox using the Divi Builder you already know and love.
Instead of just a lone photo, your lightbox could feature:
- An image on one side with a detailed description or even a "Buy Now" button on the other.
- A short video that provides context for the project shown in the photo.
- A mini-gallery of related images from the same series.
Setting this up is surprisingly simple. You just create a new "Popup" in Divi and design it any way you want. Then, back in your Divi Gallery module, you link each image thumbnail to trigger that specific popup. It’s a straightforward way to add a ton of depth and functionality to your gallery clicks.
Unleashing Dynamic Galleries with Advanced Triggers
This is where things get really fun. With Divi Areas Pro, you can break free from simple click-based interactions and create galleries that appear based on user behavior. Instead of just sitting on the page, your gallery becomes a responsive element that shows up at the perfect moment.
Imagine a portfolio gallery that elegantly slides in from the side when a user scrolls 75% down your "About Me" page. Or, picture an exit-intent popup featuring your best work that appears just as a visitor is about to leave. These aren't just cool effects; they are strategic tools for re-engaging users and guiding them toward a goal.
For developers and marketers, this is where the power of Divi Areas Pro's content injection really shines. You can even target user roles or device types to display personalized galleries. This taps directly into the reality that while 71% of consumers expect personalization, a mere 34% of brands actually deliver it. It’s especially relevant when you consider that a staggering 92.5% of all pictures are snapped on smartphones, as highlighted in these compelling photography statistics on Vecteezy. This fuels the demand for mobile-first, user-centric gallery experiences.
Creating these triggered galleries is incredibly flexible. You can build the gallery content as a Divi Area and then set it to appear based on a whole range of triggers:
- On Scroll: Reveal a gallery after a user scrolls past a certain point on the page.
- On Exit-Intent: Show a "Don't Miss This!" gallery when a user's cursor moves to leave the page.
- On Click: Trigger a full-screen gallery overlay when a user clicks a specific button or link anywhere on your site.
This approach transforms your gallery from a passive block of content into an active part of your marketing funnel. You can learn more about how to get the most out of these features by exploring how to display content using Divi Areas Pro. By combining smart triggers with beautifully designed content, your photo gallery becomes a powerful tool for capturing attention and driving action.
Optimizing Your Gallery for Speed and SEO
A beautiful photo gallery is a huge plus for any website, but it can turn into a major liability if it wrecks your site speed. Nothing kills a user's experience faster than a page that takes ages to load, and a gallery full of heavy images is often the number one offender.
Let's get into the nitty-gritty of making your visuals fast, efficient, and friendly to search engines.

Your gallery's performance isn't just a technical footnote; it’s a deal-breaker for keeping visitors and ranking well. Think about it: homepages load around 59 images on average. Now consider that a staggering 53% of mobile users will ditch your site if it takes more than three seconds to load—often because of those heavy visuals.
This is where smart optimization becomes absolutely non-negotiable, and thankfully, Divi has the tools you need to do it right.
Image Sizing and Compression
Before you even think about uploading a single photo, you need to tackle resizing and compression. Just dragging a massive 5000-pixel image straight from your camera into the WordPress media library is a recipe for a performance disaster. Sure, the browser will scale it down visually, but your visitor still has to download that entire oversized file.
- Sizing: Figure out the largest size the image will ever be displayed on your site and resize it to those exact dimensions. For a full-width banner on a standard desktop, that might be around 1920 pixels wide. For a small gallery thumbnail, you might only need 400 pixels.
- Compression: Once resized, run your images through a compression tool. This process shrinks the file size, often with no visible drop in quality. Modern formats like WebP are fantastic here, offering much better compression than old-school JPEGs.
A key part of getting your gallery to load quickly is learning how to minimise image size without making your photos look terrible.
Lazy Loading and Modern Formats
The good news is that WordPress and Divi already have some performance-saving features built right in. Lazy loading is now enabled by default, which is a game-changer. It means images "below the fold" (off-screen) won't even start to load until the user actually scrolls down to them. This makes a huge difference for that critical initial page load time.
On top of that, an image optimization plugin can automatically convert your JPEGs and PNGs to the super-efficient WebP format. These plugins are smart enough to serve WebP images to modern browsers while providing a fallback (like a JPEG) to older ones, so you get the speed benefits without leaving anyone behind. For a much deeper dive, check out our complete guide on image optimization for WordPress.
Bolstering Your Gallery for SEO
Optimization isn't just about speed; it's also about helping search engines find and understand your images. Google can't "see" your photos the way a human can, so you need to provide some text-based clues to give it context.
Don't overlook ALT text. It’s not just an SEO box to check—it’s a cornerstone of web accessibility, allowing screen readers to describe your images to visually impaired users. A descriptive ALT text benefits everyone.
Follow these simple rules to give your image SEO a serious boost:
- Use Descriptive File Names: Ditch the generic
IMG_8432.jpg. Instead, name your file something likemodern-kitchen-remodel-with-island.jpgbefore you upload. - Write Meaningful ALT Text: Describe what's in the image clearly and concisely. For that kitchen photo, your ALT text could be "Bright modern kitchen with white cabinets and a large marble island."
- Add Titles and Captions: While these aren't as crucial for SEO as ALT text, they are great for user experience. They provide extra context right on the page, which visitors always appreciate.
Common Questions About Building a Photo Gallery in Websites
As you start building out photo galleries, you're bound to run into a few common questions. It happens to everyone. Getting bogged down by worries about performance, design flexibility, or SEO can be frustrating. Let’s clear up some of the most frequent questions we see from Divi users.
What Is the Best Image Format for a Web Photo Gallery?
For almost any gallery you build today, WebP is your best bet. It delivers incredible compression, meaning your files will be much smaller than old-school JPEGs or PNGs, but without any real drop in quality. That translates directly into faster page loads—a huge win for both your visitors and your SEO.
Of course, JPEG is still a fine fallback for photographs, and PNG remains the go-to when you need transparency. But you should really make WebP your default for modern browsers. Plenty of WordPress optimization plugins can even handle the conversion for you automatically, so you get the best of both worlds without the extra work.
How Can I Make My Divi Gallery Look Unique?
If you want to escape that "default Divi" look, you've got to think beyond the standard Gallery module settings. One of the most powerful things you can do is create a completely custom lightbox experience.
Instead of settling for the basic image popup, try using a plugin like Popups for Divi to design a unique layout inside a Divi Area. This opens up a world of possibilities, letting you add anything you want right alongside the main image:
- A detailed description of the project or a client testimonial.
- A "Buy Now" button if you're showcasing e-commerce products.
- A short video clip that adds more context or a behind-the-scenes look.
You can also get creative with custom CSS to add unique border styles or slick hover effects that match your brand’s look and feel perfectly.
A truly standout gallery often combines default module settings with custom elements. By replacing the standard lightbox with a custom-designed Divi Area, you transform a simple click into a rich, interactive experience.
Can a Photo Gallery Hurt My Website SEO?
Oh, absolutely. A poorly built photo gallery can be a real drag on your SEO. The biggest offenders are always large, unoptimized images that inflate your page size and grind your site to a halt. This kills your Core Web Vitals scores and leads to high bounce rates, both of which are major red flags for search engines.
To make sure your gallery loads fast and gets the visibility it deserves, you need to nail the fundamentals. That means learning how to optimize images for SEO. Another critical mistake is skipping the basics like descriptive file names and ALT text. Your ALT text isn't just for accessibility; it’s also how you tell search engines what your images are about, which is key for ranking in image search.
Ready to build galleries that do more? Divimode gives you the tools you need. With Divi Areas Pro, you can create triggered, interactive galleries that capture attention and drive conversions.
More Articles You Will Like