Alright, let's get Divi up and running on your WordPress site. The whole process is refreshingly straightforward and shouldn't take more than a few minutes.
At its core, it’s a simple three-step dance: download the Divi.zip file from your Elegant Themes account, upload it into your WordPress dashboard, and hit Activate. That’s really all there is to it.
Getting Started With Your Divi Installation
Even if you're new to WordPress, installing Divi is designed to be a smooth ride. You just need a self-hosted WordPress site and an active Elegant Themes membership, and you're good to go.
This ease of use is a big reason Divi is a powerhouse in the WordPress world. Think about it: as of early 2025, WordPress runs an incredible 43.6% of all websites. Divi itself is found on 6% of top-tier WordPress sites, which is a massive footprint. With millions of websites relying on it, a painless setup is non-negotiable.
So, where do you begin? First, you need to decide which version of Divi you're going to install.
The Two Ways to Install Divi
You've got two main options when it comes to adding Divi to your site, and picking the right one from the start will save you headaches later. To give you a clear picture of the workflow, here’s a quick visual breakdown of the download, upload, and activation steps.
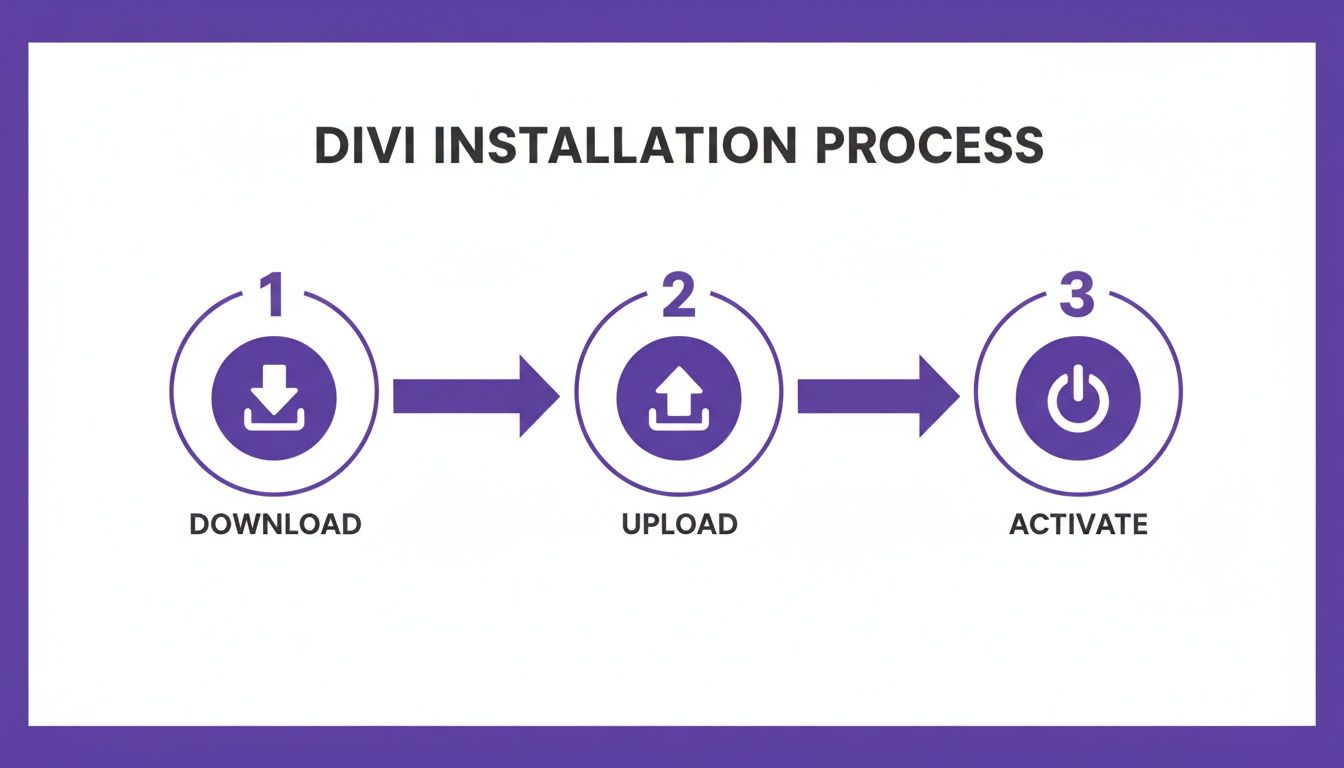
This simple flow is exactly what you'll be doing inside your WordPress dashboard.
Now, let's look at your two choices:
- Installing the Divi Theme: This is the most common route. You install the full theme, which comes with the Divi Builder baked right in. This is the perfect choice for brand-new websites or if you're doing a complete redesign from the ground up.
- Installing the Divi Builder Plugin: What if you already have a theme you really like but want Divi's awesome drag-and-drop builder? No problem. You can install the builder as a standalone plugin and use it with your existing theme.
Here's a quick table to help you decide which path is right for your project.
Divi Theme vs Divi Builder Plugin Installation
A quick comparison to help you choose the right Divi installation method for your website's needs.
| Aspect | Divi Theme Installation | Divi Builder Plugin Installation |
|---|---|---|
| Best For | New websites or complete redesigns where Divi is the foundation. | Adding Divi's page-building power to an existing, non-Divi theme. |
| What's Included | The Divi Builder is fully integrated into the theme. You get all theme features and the builder in one package. | You only get the Divi Builder. Theme features (headers, footers, etc.) are controlled by your active theme. |
| How to Install | Upload and activate via Appearance > Themes in WordPress. | Upload and activate via Plugins > Add New in WordPress. |
| Common Use Case | Building a site from scratch and wanting full control over every element with Divi's ecosystem. | You love your current theme's style but need a more powerful editor for creating page layouts. |
Ultimately, both options give you access to the same fantastic page-building tools. The main difference is whether Divi is running the whole show (the theme) or just handling the content layout (the plugin).
For a complete rundown of everything Divi can do before you jump in, check out our guide on what Divi is for a full overview.
Preparing for a Flawless Divi Installation
A smooth Divi installation starts long before you even think about clicking "upload." Getting the groundwork right is the secret to dodging common errors and making sure your site runs like a well-oiled machine from day one. It all boils down to two things: your hosting environment and your Elegant Themes account.
Think of your web host as the foundation for your house. A shoddy foundation will cause problems no matter how well the house is built, and the same goes for your website. Divi is powerful, but it needs a stable, properly configured server to really shine. A quality host helps you avoid dreaded issues like builder timeouts, slow load times, and frustrating upload failures.
Checking Your Server Settings
First things first, let's make sure your hosting environment meets Divi's minimum system requirements. These aren't just polite suggestions—they're essential for keeping your site stable and performant. Trust me, ignoring these now is a surefire way to run into bizarre, hard-to-diagnose problems down the road.
You can usually find these settings inside your hosting control panel (like cPanel or Plesk), often under a tab called "PHP Configuration" or something similar. Here are the key values you need to look for:
- PHP Version: 7.4 or higher is the current standard for security and speed.
- memory_limit: 128M or more.
- post_max_size: 64M.
- upload_max_filesize: 64M.
If your current settings are lower than these, you’ll need to bump them up. Most modern hosts let you change these values yourself. If you can't find the option or feel a bit lost, just send a quick message to their support team—they handle this stuff all the time.
While you're at it, knowing how to install an SSL certificate is a must for modern site security. This step ensures your site runs on HTTPS, which builds trust with visitors and is a non-negotiable standard today.
Securing Your Elegant Themes Membership and API Key
With your server prepped and ready, the next step is to grab the Divi files from Elegant Themes. If you haven't signed up yet, you'll need to purchase a membership. We break down all the options in our guide on buying the Divi theme to help you pick the right plan.
Once you have an active account, just follow these simple steps:
- Log in to your Elegant Themes account dashboard.
- Head over to the "Downloads" tab and grab the Divi.zip file. Important: Do not unzip it!
- Next, navigate to the "My Account" > "API Keys" section.
- Copy your unique API key to your clipboard.
Keep this API key somewhere safe but handy. You'll need it right after installing Divi to unlock automatic theme updates, get access to that massive library of premade layouts, and tap into premium support. Without it, you’re missing out on some of Divi's most powerful features.
Getting Divi Onto Your Website
You've got your Elegant Themes account set up and the Divi.zip file is sitting on your computer. Now for the fun part: bringing it all to life inside WordPress. This is where we upload and activate Divi, and it's surprisingly straightforward. We’ll cover the two main ways to do this: installing the complete Divi Theme, or just adding the Divi Builder plugin to a theme you're already using.
The simplicity of this process is a huge reason why Divi has become such a powerhouse in the WordPress world. Think about it: Divi runs on roughly 10% of all WordPress sites. When you remember that WordPress itself powers over 43% of the entire internet, you start to see just how massive Divi's footprint is. If you're curious about those numbers, victorduse.com has a great breakdown of WordPress's growth.
Installing the Full Divi Theme
This is the route most people take, especially when building a new site from scratch or doing a total overhaul. When you install the full theme, you’re getting the Divi Builder bundled with all the theme-level controls (like headers, footers, and global styles) in one neat package.
First, head over to your WordPress dashboard. In the left-hand menu, find Appearance and click on Themes.
On the Themes page, look for the Add New button at the very top. Click it. On the next screen, you’ll see another button appear, this time labeled Upload Theme. That's the one you want.
This opens up the theme uploader interface, which is where you'll add your new Divi file. The screenshot below shows you exactly where to find that "Upload Theme" button.
Once you click that, a file selection prompt will appear.
Go ahead and click Choose File, find the Divi.zip you downloaded, and select it. Here’s a critical tip: do not unzip the file first. WordPress is designed to handle the .zip file directly. After you've selected it, just click Install Now. WordPress will take care of the rest, uploading, unpacking, and setting up the theme on your server.
After a moment, you'll see a success message. The last thing to do is click the blue Activate link. And just like that, Divi is now the live theme on your website. Congrats!
Installing the Divi Builder Plugin
But what if you already have a theme you really like and just want to tap into Divi's awesome drag-and-drop page-building power? No problem. In that case, you'll install the Divi Builder as a standalone plugin.
The steps are almost identical, you just start in a different place in your dashboard:
- Navigate to Plugins > Add New from the main WordPress menu.
- Click the Upload Plugin button at the top of the page.
- Select the
divi-builder.zipfile from your computer (this is a separate download from your Elegant Themes account). - Click Install Now, and then finish by clicking Activate Plugin.
This gives you the full visual building experience for your page content without messing with your current theme's header, footer, or other global styles.
Pro Tip: What to Do If the Upload Fails
A common little roadblock people hit here is the "The link you followed has expired" error. This is almost always a server issue, specifically that your host'supload_max_filesizelimit is too small for Divi. The fix is simple: reach out to your hosting provider and ask them to increase that value to at least 32M. It's a quick support request that solves the problem for pretty much everyone.
Essential First Steps After Installing Divi
Getting Divi activated is a huge milestone, but the work isn't quite done. Think of it like moving into a new house—the structure is built, but now you need to turn on the lights and add your personal touches. A few quick post-installation tasks are absolutely vital for unlocking Divi’s full potential and setting your site up for long-term success.
Right out of the gate, your first job is to plug in your Elegant Themes API key. This isn't optional. Without it, you're running Divi in a limited state, completely cut off from automatic updates, premium support, and the entire library of premade layouts—which is one of its biggest time-savers.
Authenticate Your Divi License
To get this sorted, head over to Divi > Theme Options in your WordPress dashboard. You'll spot a tab labeled "Updates." This is where you'll paste your username and the API key you grabbed from your Elegant Themes account. Hit save, and you're good to go.
This one simple step connects your site to the Elegant Themes mothership, ensuring you get all the critical security patches and feature updates as they roll out. It’s the key that truly unlocks the value of your membership.
Why You Need a Divi Child Theme
Next on the list is one of the most important best practices in the WordPress world: setting up a child theme. If you have any intention of adding even a single line of custom CSS or tweaking Divi’s core files, a child theme is non-negotiable.
Imagine spending hours perfecting your site's code, only to see all that hard work vanish the next time Divi pushes an update. A child theme is what prevents that nightmare scenario. It works as a safe, separate layer where all your custom tweaks live, inheriting all of Divi’s power while protecting your changes from being overwritten.
Don't worry, it sounds more technical than it is. For a full walkthrough, our guide on https://divimode.com/how-to-create-a-divi-child-theme/ will get you sorted in just a few minutes. Trust me, this small bit of effort upfront will save you from major headaches later on.
A child theme is your insurance policy against lost work. It ensures that your unique design customizations remain intact, update after update, giving you the freedom to modify your site without fear.
Configure Core Theme Options
With your API key in and a child theme active, it's time to jump into the Divi Theme Options panel. This is your command center for all global site settings. Here are a few things I always configure right away:
- Upload Your Logo: Head to the "General" tab and upload your brand's logo.
- Set a Default Color Palette: Still under "General," you can define a default color palette. This makes it much faster to maintain brand consistency, as these colors will pop up first in the Divi Builder.
- Integrate Social Profiles: Click over to the "Integration" tab to link up your social media profile URLs.
Getting these basic settings in place builds the foundation of your site's identity. Once Divi is active and you've completed these setups, you might want to explore Divi_bars to enhance your design even further. Divi's influence is massive; as of early 2025, it powers 6% of the top one million websites globally, a testament to its flexibility and user-friendly installation.
Troubleshooting Common Divi Installation Issues
Even the smoothest installation can hit a snag. If you're trying to get Divi running on WordPress and keep hitting a wall, don't sweat it. Most of the time, the fix is surprisingly simple.
This is your practical guide to getting past those frustrating error screens and back to what matters: building your site. We’ll walk through the two most common installation headaches I see all the time and give you the exact steps to solve them.
Fixing "The Link You Followed Has Expired" Error
This is, without a doubt, the number one error people run into. And despite the confusing name, it has absolutely nothing to do with an "expired link."
In reality, this is just WordPress's cryptic way of saying the file you’re uploading is too big for your server's default limits. Because Divi is packed with so many features, the Divi.zip file is often larger than what many hosting plans allow right out of the box.
The fix? You just need to increase your server's upload limits. You'll want to bump up the upload_max_filesize and post_max_size values in your hosting environment.
Here are a couple of ways to get it done:
- Contact Your Host: Honestly, this is the easiest route. Just open a support ticket or live chat with your hosting provider and ask them to increase these values to at least 64M. They get this request constantly and can usually handle it in minutes.
- Use cPanel's MultiPHP INI Editor: If you're comfortable poking around your hosting panel, look for an option called "MultiPHP INI Editor." From there, you can find the settings and increase the values yourself.
Increasing these limits solves this problem for almost everyone, letting the upload finish without a hitch.
Don't let server settings intimidate you. A quick five-minute chat with your hosting support can save you hours of frustration. Think of it as a necessary tune-up to prepare your site for a high-performance theme like Divi.
Solving the "Stylesheet Is Missing" Error
Here's another classic roadblock: you try to upload the theme and get hit with a "The package could not be installed. The theme is missing the style.css stylesheet" error.
Good news—this one is an easy fix. The problem is almost always that you've uploaded the wrong ZIP file.
When you download your purchase from Elegant Themes, you get a main package file (something like divi-package.zip) that contains the theme, plus documentation, layouts, and other goodies. You can't upload that whole package. You need to upload the Divi.zip file that’s inside it.
Here’s what to do:
- On your computer, find the main package file you downloaded and unzip it.
- Look inside the folder that was just created. You'll see the correct
Divi.zipfile waiting for you. - Head back to your WordPress dashboard (
Appearance > Themes > Add New > Upload Theme) and upload this specificDivi.zipfile.
It’s a simple mix-up that happens all the time, so if you see this error, just double-check you're grabbing the right file.
Frequently Asked Questions About Installing Divi
When you're installing Divi for the first time, a few common questions tend to pop up. Let's tackle them head-on so you can get through the setup process with confidence and get a better feel for how the Divi ecosystem works.
Can I Use the Divi Builder Without the Divi Theme?
Yes, you absolutely can. The Divi Builder is available as a standalone plugin that you can use with just about any WordPress theme out there. This is the perfect route if you’re already in love with your current theme's design but want to bring in Divi's incredible drag-and-drop power.
To make it happen, just download the divi-builder.zip file from your Elegant Themes account (it's a separate download from the theme). Then, head over to Plugins > Add New in your WordPress dashboard, upload it, and activate it. That's it! The Divi Builder will be ready to go on your pages and posts.
Do I Really Need a Child Theme for Divi?
While Divi will work just fine without one, using a child theme is a non-negotiable best practice if you ever plan on adding your own custom code. I can't stress this enough. Any changes you make directly to the parent theme's files—like adding CSS to style.css or new snippets to functions.php—will be completely wiped out the next time Divi updates.
Think of a child theme as a safehouse for your custom work. It inherits all the power and functionality of the parent Divi theme but keeps your unique code totally separate. Your hard work will survive every update.
Luckily, Elegant Themes makes this easy. They include a blank child theme right in your download package, so you can get started on the right foot.
How Many Websites Can I Use Divi On?
This is one of the best perks of an Elegant Themes membership. Your license lets you use Divi on an unlimited number of websites. This goes for both their yearly and lifetime plans.
For freelancers and agencies juggling multiple client projects, this makes Divi an incredibly smart investment. A single license covers every single site you build.
What If My Divi Installation Fails or Gets Stuck?
If your Divi upload hangs or fails, don't panic. It’s almost never an issue with Divi itself, but rather a simple server configuration problem. In my experience, it usually comes down to one of two things:
- "The link you followed has expired": This is a classic sign that your server's
upload_max_filesizelimit is too low for the Divi theme file. Just reach out to your web host and ask them to bump it up to at least 16M. - "PCLZIP_ERR_BAD_FORMAT": This error almost always means the
Divi.zipfile got corrupted during the download. The fix is easy: go back to your Elegant Themes account, download a fresh copy, and try uploading it again.
These two solutions will fix the vast majority of installation headaches people run into.
Ready to create stunning, interactive popups, fly-ins, and mega menus? At Divimode, we build powerful plugins like Divi Areas Pro to help you create high-performing websites with ease. Discover how Divimode can elevate your Divi site.
More Articles You Will Like