As more and more people use the Popups for Divi plugin, there also is demand for advanced features. One of the most requested features is a way, to display a popup only once per day/week/month, like here:
https://wordpress.org/support/topic/displaying-the-popup-only-once/
And yes, it’s possible to do this, using the JS API which comes with the plugin! If you have not used the JS API yet, then you might want to learn more about it first: How to use the JS API
The example page
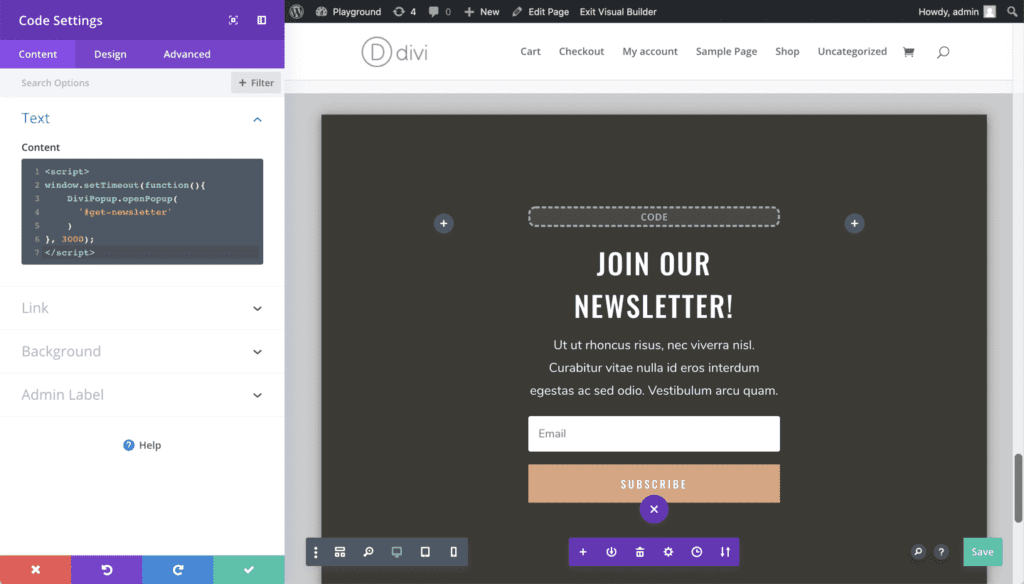
We start with the same newsletter popup and code that we used in the previous post:
window.setTimeout(function(){
    DiviArea.show('get-newsletter')
}, 3000);
And this is the popup with a custom code module that we will extend now:
How we do it
The example above displays the popup three seconds after the page loaded. This is correct on the first page-load, but the “once” per day condition is missing.
For this condition, we can leverage two systems; those two systems are two different approaches. You only need to implement either one on your website.
Cookies
The first option is to set a Cookie when the popup is opened. Then we can always check, whether the cookie is present before displaying the popup again – and if it is, we simply do nothing.
localStorage
The second way is very similar but uses a more modern approach: Instead of using a Cookie, we add a variable to the localStorage collection of the browser. This method is supported by all major browsers and has some benefits against Cookies.
Note that both options that we look at today will store some information in the visitors’ browser. That means a user can bypass the time-limit by using a different browser or turning on “Incognito” mode.
Option 1: Using a Cookie
The advantage of this method is the stable support for Cookies across all browsers. The second benefit of this approach is that you can outsource the expiration logic to the browser: You simply tell the browser when the cookie should expire, and do not need to worry about the correct timing anymore.
There are also two disadvantages that you need to be aware of: First, creating and reading cookies is not as easy in JS as in PHP. We need to write two small JS functions (or use a library). Also, every HTTP request that is made to your website transfers all cookies to the server. This can decrease performance, as arbitrary data is sent back and forth between the browser and your WordPress site.
Step 1: Add Cookie functions
Let’s first add the following code to our webpage, using Divis “Code Integration” option in the wp-admin panel (btw. that code is based on an answer from StackOverflow):
<script>
function setCookie( c_name, value, exdays ) {
	var c_value = escape(value);
	if (exdays) {
		var exdate = new Date();
		exdate.setDate( exdate.getDate() + exdays );
		c_value += '; expires=' + exdate.toUTCString();
	}
	document.cookie = c_name + '=' + c_value;
}

function getCookie( c_name ) {
	var i, x, y, cookies = document.cookie.split( ';' );

	for ( i = 0; i < cookies.length; i++ ) {
		x = cookies[i].substr( 0, cookies[i].indexOf( '=') );
		y = cookies[i].substr( cookies[i].indexOf( '=') + 1 );
		x = x.replace( /^\s+|\s+$/g, '' );

		if ( x === c_name ) {
			return unescape( y );
		}
	}
}
</script>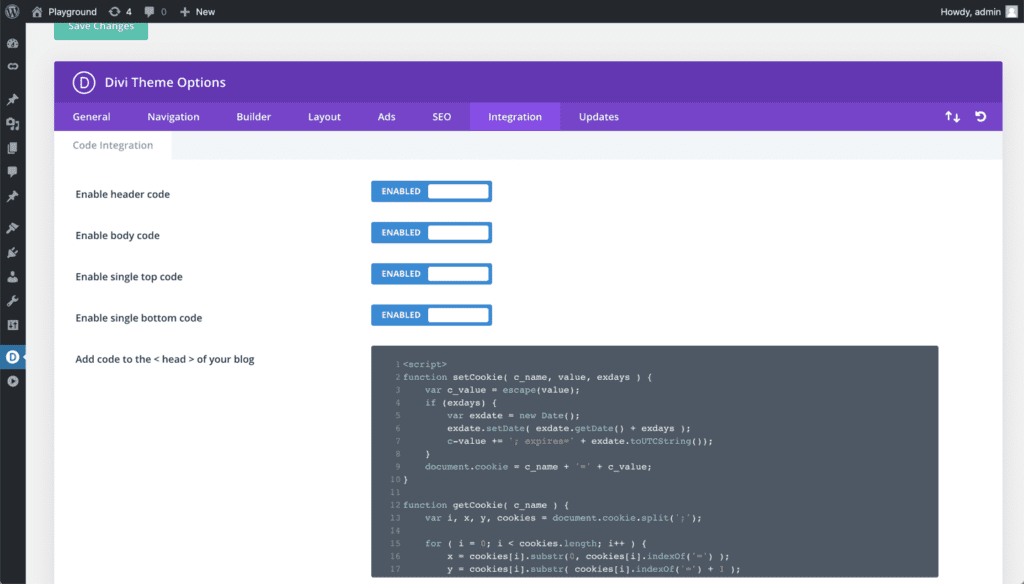
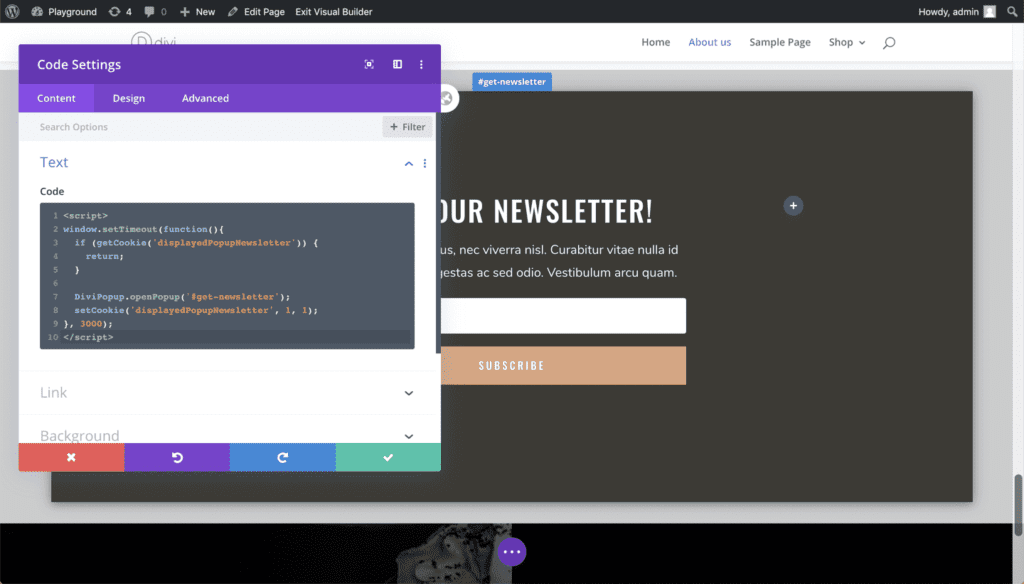
Step 2: Add the 1-day condition
From now on, we can access cookies via JS. So let’s modify the example code to show our newsletter popup. This is the simple part, as we only need to
- Check, if a cookie exists, right before opening the popup. When one exists, we do not show the popup.
- Directly after the popup was opened, we set a cookie with a lifetime of 1 day.
<script>
window.setTimeout(function(){
	// When the cookie exists, do not show the popup!
	if (getCookie('displayedPopupNewsletter')) {
		return;
	}

	DiviArea.show('get-newsletter');

	// The popup was displayed. Set the cookie for 1 day.
	setCookie('displayedPopupNewsletter', 'yes', 1);
}, 3000);
</script>
You see, how easy it is to implement the 1-day delay? All it takes is the expiration date of the cookie!
That’s all there is to do. Just remember, that cookies are sent to your server with each request. So try to keep the cookie-names short and do not add dozens of cookies.
Option 2: localStorage
The great advantage of localStorage is that browsers have a built-in API to access it. Any value that is stored in the localStorage is privately in your browser only; it is not sent to the webserver.
A minor disadvantage is that it’s rather new and there might be some older browsers that do not support it yet. Check out the Can I Use overview for details. Besides, the data inside localStorage has no expiration date, so we need to code that logic manually. Not a big downside, in my opinion.
I’m not going into the localStorage API in detail here. We will use two functions, which are window.localStorage.setItem() and window.localStorage.getItem(). You can read more about it on MDN.
The code
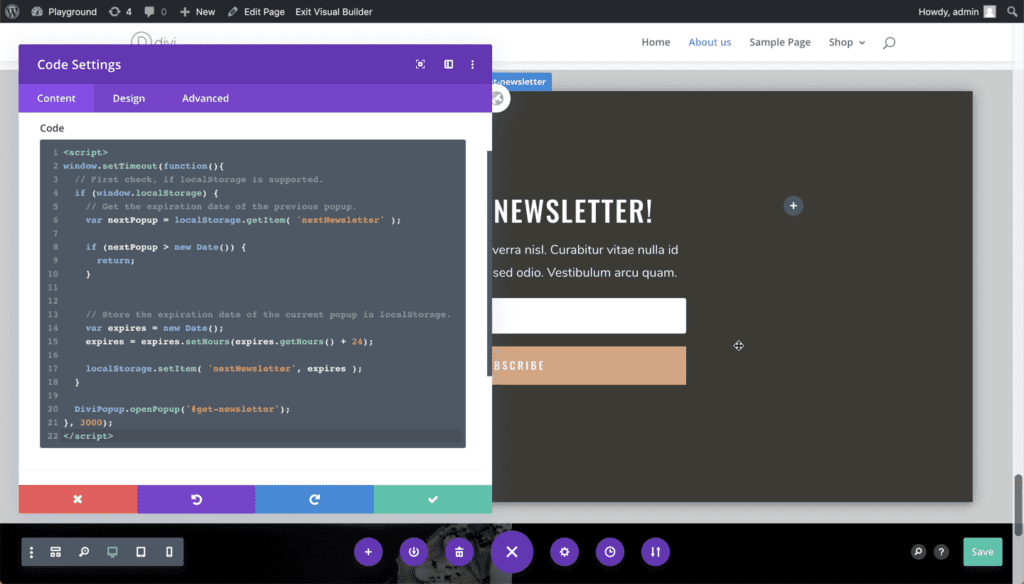
There’s no need to add any code to the global Divi “Integration” page. Simply open up the Code Module for your popup and update the logic.
<script>
window.setTimeout(function(){
	// First check, if localStorage is supported.
	if (window.localStorage) {
		// Get the expiration date of the previous popup.
		var nextPopup = localStorage.getItem( 'nextNewsletter' );

		if (nextPopup > new Date()) {
			return;
		}

		// Store the expiration date of the current popup in localStorage.
		var expires = new Date();
		expires = expires.setHours(expires.getHours() + 24);

		localStorage.setItem( 'nextNewsletter', expires );
	}

	DiviArea.show('#get-newsletter');
}, 3000);
</script>
And this is all we need to add to our Divi page!
The JS code in our Code-Module is a little bit longer here, compared to the Cookie solution. If you have multiple popups that use this logic, you could move most of the code into a JS function to make it shorter…
Option 3: Use Divi Areas Pro
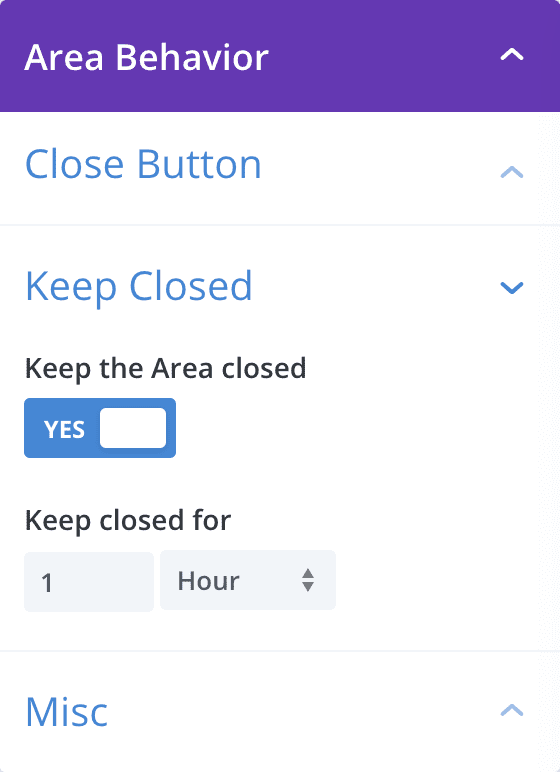
Our premium plugin Divi Areas Pro offers a simple UI to handle all this logic for you.
Every Popup and Fly-In Area can define a “Keep Closed” behavior. Here you can choose whether to keep the Popup or Fly-In closed for a few minutes, hours, days, or weeks:
Conclusion
As you see, it’s rather simple to create advanced display conditions for your popups by using a Code-Module and the DiviArea JS API.
When using Cookies, take care not to create dozens of cookies, as it could impact the page performance. I love the way, how the expiration date can be used for popup timing!
LocalStorage is a very convenient way to store application state details in your visitors’ browser, but you need to code the time-condition manually. However, the localStorage opens the doors to much more conditions, as you can store loads of details without affecting the page performance at all. Like “Display Popup-A 7 times, after day 8 display Popup-B, …”
However, do not put too much business logic into either solution. Once your visitor opens up Incognito Mode, switches the browser, etc. he will see the popup again.
More Articles You Will Like