
When you want to edit a WooCommerce product page in Divi, you've got a few different paths you can take. You could stick to the default WordPress and WooCommerce settings for basic product info, use the Divi Builder inside the product description for more interesting layouts, or go all-out with the Divi Theme Builder for total control.
For most people, starting with the Divi Builder and the WordPress Customizer is the sweet spot. It's a powerful, code-free way to make some serious improvements to your product pages right away.
Mastering the Essentials of Divi and WooCommerce
Before you jump into building a completely custom product page from scratch, it's worth getting a handle on the tools Divi and WooCommerce give you out of the box. You'd be surprised how much you can change without ever touching a complex template or a line of code.
It all comes down to understanding how the default settings, the Divi Builder, and the WordPress Customizer play together. Nailing this foundation makes quick edits a breeze and helps you know exactly when it’s time to level up to a more advanced method.

Start with the Standard WooCommerce Product Editor
Your first stop is always the most familiar one: the standard WordPress editor. This is your command center for all the core product data. Just navigate to Products > All Products and click 'Edit' on any item. This backend is what feeds all the crucial information directly into your Divi layout.
This is where you'll manage the non-negotiables:
- Product Title and Permalink: The name and URL for your product.
- Product Description: The main, long-form text area—this is where you can activate the Divi Builder.
- Product Data Section: The hub for setting your price, inventory, shipping details, and variations.
- Product Short Description: That quick summary that usually pops up next to the product image.
- Product Image and Gallery: All your product shots.
Get this information right before you even think about design. No amount of slick styling can make up for the wrong price or a missing product photo. And if you're just starting out, finding reliable WooCommerce dropshipping suppliers is another one of those foundational steps you can't afford to skip.
Unlock the Divi Builder in the Description Area
Here’s a trick that’s surprisingly underused for making quick customizations. You can actually enable the Divi Builder right inside the main product description field. By default, it's just a plain text editor, but a single click on "Use The Divi Builder" turns that space into a fully functional design canvas.
This simple move lets you escape the single-column text trap. Suddenly, you can build multi-column layouts, add sleek image galleries, embed promo videos, or drop in a powerful Call To Action module—all without leaving the standard product page structure.
Think about it. Let's say you're selling a high-tech gadget. Instead of a boring wall of text, you could create a two-column layout. On the left, a bulleted list of key features. On the right, a video showing the product in action. It’s a simple change that makes your content far more engaging, and you don't even need a full Theme Builder template to do it.
Fine-Tune with the WordPress Customizer
Last but not least, don't sleep on the WordPress Customizer. Divi supercharges it. Head over to Appearance > Customize > WooCommerce, and you'll find global controls for your entire store's styling. This is where you set the rules to keep your brand looking consistent across every single product.
You can tweak things like:
- Store Notice: A site-wide banner for sales or announcements.
- Product Catalog: How your products look on the main shop page.
- Product Images: Settings for image size and cropping.
- Checkout: A few options for the checkout flow.
Even better, Divi’s own settings in the Customizer (like under General Settings > Typography or Buttons) let you set default styles for fonts, colors, and buttons. If you set these up correctly from the start, every "Add to Cart" button and price tag will look exactly how you want it, giving your store a polished, professional feel. For a deeper dive into tools that can elevate your store, check out our guide on the essentials for WooCommerce for Divi.
Building Custom Layouts with the Divi Theme Builder
When the standard product editor and WordPress Customizer just don't cut it, the Divi Theme Builder is where you really take the reins. This isn't about tweaking a few settings; it's about architecting your entire product page from scratch. Think of it as the difference between redecorating a room and building a new one from the ground up.
The real magic here is creating a global template that stamps your brand's look and feel across every single product. Or, you can get granular and design unique templates for specific product categories. Imagine a special layout for your clothing line with a big, bold size chart, and a completely different one for electronics that puts the tech specs front and center. That's what the Theme Builder makes possible.
Getting Started with a New Product Template
First things first, head over to Divi > Theme Builder in your WordPress dashboard. You'll see a visual map of your site's templates. Just click "Add New Template" to get the ball rolling.
A settings box will pop up, and this is where you tell Divi where to apply your new design. You can assign it to:
- All Products: This is the go-to for most stores. One unified, consistent design for every product you sell.
- Products in Specific Categories: Perfect for stores with diverse product types that just need different layouts to shine.
- Specific Products: Got a flagship product? Give it the VIP treatment with a completely custom, high-impact landing page experience.
Once you’ve made your choice and created the template, a new slot appears in the Theme Builder interface. Now, click on "Add Custom Body," and you’ll be whisked away to the Divi Builder to start designing.
Placing Essential WooCommerce Modules
Inside the Divi Builder, you're free from the default WooCommerce structure. You're now building your page with Divi's dedicated WooCommerce modules. These are like puzzle pieces that dynamically pull in your product data and place it exactly where you want it.
You'll be working with a core set of modules:
- Woo Images: This handles your main product image and the gallery.
- Woo Breadcrumb: Shows customers the navigation path to the product.
- Woo Title: Simply pulls in the product's name.
- Woo Price: Displays the current price.
- Woo Add to Cart: The all-important purchase button, complete with quantity and variation options.
- Woo Tabs: Renders the description, additional info, and reviews in either tabs or an accordion.
For example, you could whip up a clean, modern two-column layout. Drop the Woo Images module in the left column. On the right, stack the Woo Title, Woo Price, and Woo Add to Cart modules. This kind of strategic placement gives you total command over the page's visual flow.
The real win with the Theme Builder is breaking free from that rigid, default layout. You can move the price above the title, stick an "Add to Cart" button at both the top and bottom of the page, or even turn the tabs into a slick accordion—all visually, without touching a line of code.
This isn't just about making things look pretty; it's a powerful tool for conversion optimization. Getting your product pages right has become a massive competitive advantage. While the average WooCommerce conversion rate hovers around 2%, well-optimized stores can easily hit 4% or more. And with 65% of WooCommerce traffic coming from mobile, a custom, mobile-first layout designed in the Theme Builder is non-negotiable. You can dive deeper into these impactful WooCommerce statistics on woocustomdev.com.
Leveraging Dynamic Content for Richer Pages
Beyond the standard Woo modules, Divi's dynamic content feature pushes customization to another level. It lets you pull specific product data points directly into any standard Divi module, like a simple Text or Image module.
Let's say you've added a custom field for "Material" using a plugin like Advanced Custom Fields (ACF). With dynamic content, you can grab that "Material" data and display it anywhere. You could pop it into a nicely styled Text module right under the price, giving customers crucial info at a glance. It's the perfect way to display data that doesn't have its own dedicated WooCommerce module, like:
- Custom Fields: Think special product details like "Author," "Release Date," or "Country of Origin."
- Product Attributes: Display attributes like "Color" or "Size" outside of the standard dropdowns for more visibility.
- SKU or Stock Status: Make this info more prominent by placing it wherever you see fit.
Being able to seamlessly weave custom data into your design transforms your product pages from generic templates into rich, informative experiences. By thoughtfully combining WooCommerce modules and dynamic content, you can build a product page that not only looks incredible but also answers customer questions before they even ask, building trust and driving more sales.
7. Injecting Dynamic Content with Divi Areas Pro
A custom template in the Divi Theme Builder gives you incredible control over the layout of your product page, but what about its behavior? Static pages are predictable. Dynamic, interactive content is what grabs attention and actually drives sales.
This is where you graduate from layout design to experience design. A tool like Divi Areas Pro by Divimode becomes your secret weapon.
Instead of cramming every last detail into your Theme Builder template, this approach lets you inject targeted content—popups, banners, fly-ins—precisely when and where it'll have the most impact. You're no longer just editing a product page; you're building an intelligent sales environment that responds to your customers.
Shifting from Static Layouts to Dynamic Experiences
Think of Divi Areas Pro as a smart content delivery system for your product pages. First, you create a piece of content, called an "Area," using the familiar Divi Builder. This Area can be anything you can dream up: a promotional banner for a flash sale, a detailed size guide, a video tutorial, or an email signup form.
Next, you define a set of rules that dictate how, when, and to whom this Area appears. This powerful combo lets you add rich layers of information and interaction without bloating your main page template.
The big idea here is to separate your supplemental content from the core page structure. This keeps your Theme Builder templates clean and focused on essential product info, while Divi Areas Pro handles the timely delivery of promotions and helpful extras.
This is fundamentally different from just piling more modules into your Theme Builder layout. It’s about creating content that reacts to user behavior in real-time, making the entire shopping experience feel more personal and genuinely helpful.
Creating Targeted Content with Practical Triggers
The real magic happens with the triggers and display conditions. You can craft messages that feel incredibly relevant because they show up at the perfect moment.
Just imagine these real-world scenarios:
- Size Guide on Click: A customer is eyeing a t-shirt and clicks the "Size" dropdown. Instantly, a sleek popup with a detailed size chart appears. This is easily done by triggering an Area on a CSS class or ID click.
- Category-Specific Banners: You're running a sale exclusively on your "Summer Collection." You can create a banner that displays only on product pages within that specific category, creating urgency right where it matters.
- Exit-Intent Discounts: A shopper moves their mouse to leave the page without buying. Just before they go, a fly-in slides into view offering a 10% discount to complete their purchase. This classic exit-intent trigger is a proven way to rescue otherwise lost sales.
The choice between a full-blown custom layout and injecting dynamic content really depends on your goals. This decision tree breaks down that initial choice between a complete template redesign and sticking with the default layout.
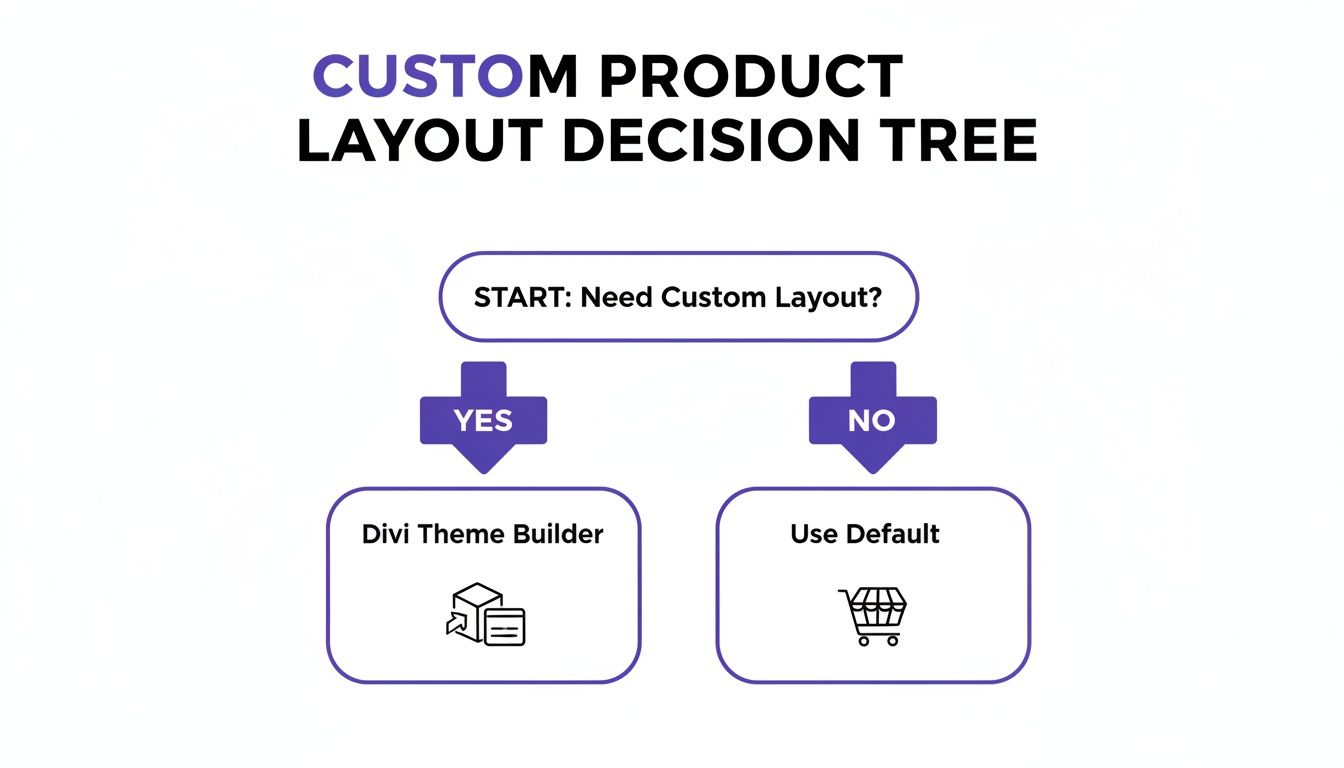
This graphic simplifies the first big decision, but tools like Divi Areas Pro introduce a powerful third path: enhancing either the default or a custom layout with dynamic, targeted content.
Setting Up Your First Dynamic Area
Getting your first Area live is surprisingly straightforward. The whole process boils down to designing the content itself and then telling it how to behave.
- Build Your Area: Head to Divi > Divi Areas and create a new Area. This drops you right into the Divi Builder, where you can design your popup, banner, or fly-in just like any other page. Add your text, images, buttons—whatever you need.
- Define the Type: In the Area settings, you'll choose what it is—a Popup, a Fly-in, an Inline Area? This determines its basic behavior.
- Set the Trigger: Next, you pick the trigger. Do you want it to appear on page load, after a time delay, when a user scrolls, or based on an action like a click or exit intent?
- Assign Display Conditions: Finally, you set the display conditions. This is where you tell Divi Areas Pro where to show the content. You can limit it to "All Product Pages," pages in a certain category, or even target it to specific user roles, like showing a special deal only to logged-in members.
For a complete walkthrough of the advanced settings and use cases, you can learn more about designing dynamic content with Divi Areas Pro in our in-depth guide. Mastering this technique will elevate your site from a simple product catalog into a persuasive, interactive sales machine.
Choosing Your Divi Customization Method
Deciding which customization path to take can feel overwhelming. Each method offers a different balance of power, ease of use, and flexibility. This table breaks down the most common approaches to help you pick the right tool for the job.
| Method | Best For | Skill Level | Flexibility |
|---|---|---|---|
| Divi Theme Builder | Complete layout redesigns and creating a consistent look across all products. | Intermediate | High |
| Child Theme/Overrides | Deep structural changes to WooCommerce's core template files. | Advanced (Requires PHP) | Very High |
| WooCommerce Hooks | Injecting custom functions or content into specific template locations programmatically. | Advanced (Requires PHP) | High |
| Divi Areas Pro | Adding dynamic, targeted content like popups, banners, and conditional info. | Beginner to Intermediate | Very High |
| Custom CSS | Quick styling tweaks, color changes, and minor layout adjustments. | Beginner to Intermediate | Medium |
| WooCommerce Settings | Basic adjustments to image sizes, checkout options, and store-wide settings. | Beginner | Low |
Ultimately, the best approach often involves a combination of these methods. You might use the Divi Theme Builder for the overall structure, Custom CSS for styling details, and Divi Areas Pro to add dynamic promotional layers on top.
Leveraging Code Snippets for Advanced Customization
While visual tools like the Divi Theme Builder give you a ton of control, there are times when you need surgical precision. For those moments, nothing beats getting your hands dirty with a little bit of code.
For developers and power users, editing a WooCommerce product page with code snippets provides a level of control that visual builders simply can't match. This is where you can make fine-tuned adjustments, add custom logic, and truly tailor the user experience without hacking away at core template files. It's a clean, efficient, and update-safe way to take complete command.
Where to Add Your Code Safely
Before you start pasting code, let's talk about where to put it. The number one rookie mistake is adding snippets directly into your parent theme's functions.php or style.css file. That's a recipe for disaster—all your hard work will get wiped out the next time Divi updates.
Here are the two professional-grade methods:
- A Child Theme: This is the classic, most robust solution. By creating a child theme for Divi, you get your own
functions.phpandstyle.cssfiles that are completely insulated from theme updates. - A Snippets Plugin: For those who'd rather skip the FTP client, a plugin like the free Code Snippets is a fantastic alternative. It gives you a clean interface right inside WordPress to add, manage, and toggle your snippets on and off individually.
Honestly, for most users, a snippets plugin is the most organized and manageable way to handle custom functions.
Manipulating Layout with WooCommerce Hooks
WooCommerce is brilliantly designed with a system of hooks—actions and filters—that act like designated plug-in points all over the product page template. By tapping into these hooks with some simple PHP functions, you can add, remove, or rearrange content without ever touching the original template files.
Let's say you want to add a "Free Shipping" notice right above the "Add to Cart" button. It's surprisingly easy. You just need to hook into the woocommerce_single_product_summary action.
function add_shipping_notice_before_cart() {
echo '
🎉 Free shipping on all orders over $50!
';}
add_action( 'woocommerce_single_product_summary', 'add_shipping_notice_before_cart', 15 );
See that number 15 at the end? That's the priority, and it controls the execution order. Since the price hook runs at priority 10 and the "Add to Cart" button runs at 30, our priority of 15 slips our message perfectly in between them. It’s an elegant solution that takes just a few lines of code.
The potential here is massive. For those looking to build even more complex functionalities, diving into custom WordPress plugin development is the natural next step.
Fine-Tuning Styles with Custom CSS
While hooks handle the structure, Cascading Style Sheets (CSS) handle the visuals. Every single element on your product page—from the title to the tabs—has a CSS class or ID that you can target to change its look and feel.
The best way to find the right selector is to use your browser's built-in "Inspect" tool. Just right-click on the element you want to change and choose "Inspect." This opens up a developer console that shows you the exact HTML structure and the CSS rules being applied.
Pro Tip: Don't guess with CSS selectors. Use the Inspector to find the precise class or ID you need. This stops you from writing overly broad rules that could accidentally mess up other parts of your site.
Let's say you want to make your product title bigger and change its color. After inspecting it, you find it has the class .product_title.
Your custom CSS would look something like this:
.product_title.entry-title {
font-size: 32px;
color: #2c3e50;
font-weight: 700;
}
Just drop that snippet into your child theme's style.css file or the "Additional CSS" section in the WordPress Customizer, and you'll instantly override the default styling. When you combine targeted CSS with PHP hooks, you've got a powerful one-two punch for truly advanced product page customization.
Overriding Templates for Deep Structural Changes
So, you've tried the Divi Builder, you've tinkered with CSS, and you've even dropped in a few code snippets. But what happens when you need to make changes that go beyond just looks? For those moments when you need to fundamentally change the HTML structure of your product page, it's time to roll up your sleeves and override a WooCommerce template file.
This is the most powerful method in our toolkit, giving you total control over the raw PHP and HTML that builds your product pages. It's not about changing a color here or nudging an element there; this is about rewriting the blueprint.
Because this method involves editing core files, a quick word of caution: make sure you know how to back up your WordPress site before you start. It’s a simple step that can save you a world of headache.
The Role of a Divi Child Theme
Everything we're about to do relies on one critical piece: a Divi child theme. I can't stress this enough. If you try to edit the template files directly inside the main Divi theme or the WooCommerce plugin folders, your hard work will be completely wiped out the next time you run an update. Poof. Gone.
A child theme is your safety net. It inherits everything from the parent Divi theme but gives you a protected space to make your own modifications. When WordPress loads a page, it looks in your child theme's folder first. If it finds a matching template file there, it uses your custom version. If not, it just falls back to the original. Simple, safe, and professional.
Locating and Overriding the Right Template File
The first real step is figuring out which file to edit. For a single product page, the main player is usually content-single-product.php.
Here's the workflow I use every time:
- Find the Original File: Using an FTP client or your hosting file manager, navigate to
wp-content/plugins/woocommerce/templates/. This is where all the default WooCommerce templates live. - Copy, Don't Move: Locate the file you want to change, like
content-single-product.php, and copy it. Never move the original! - Create the Destination: Head over to your Divi child theme folder and create a new folder inside it called
woocommerce. The name and location have to be exact. - Paste and Get to Work: Paste the file you copied into this new
woocommercefolder. Now, you can open this version of the file and edit the PHP and HTML to your heart's content.
Overriding templates gives you ultimate control, but it also comes with responsibility. You're now in charge of that file, which means you may need to update it in the future if a major WooCommerce release changes things.
This technique is also fantastic for tackling things that visual builders can't, like accessibility. For example, you can edit the image templates to ensure every product image gets proper alt text. It sounds small, but it's a massive win. Improving alt text can boost accessibility by 87%, yet a shocking number of WooCommerce sites fall short here.
Good accessibility isn't just about compliance; it's about conversions. Websites with solid keyboard navigation can see a 13% increase in conversions. It's a clear signal that making your site usable for everyone is just good business.
A Real-World Example: Restructuring Product Meta
Let's make this practical. Say you dislike how WooCommerce places the product meta (SKU, categories, tags) below the "Add to Cart" button. You want it right under the product title, where it's more prominent.
You'd open up your new content-single-product.php file in your child theme. Inside, you'll see a line that looks something like this:
do_action( 'woocommerce_single_product_summary' );
This one line is a trigger that runs a whole sequence of other functions. To move the meta, you could find the specific hook for it (woocommerce_template_single_meta), remove it from its default sequence, and then re-add it where you want it under the title. Or, you could just comment out the original hook and write your own PHP to display the SKU and categories exactly how you want, maybe wrapping them in custom divs for unique styling later.
This is the approach to take when a Divi Theme Builder layout feels too rigid and a simple CSS trick just won't cut it. It offers incredible power for anyone comfortable with a bit of PHP and HTML.
Still Have Questions?
Diving into all the ways you can customize a WooCommerce product page can definitely spark a few questions. Whether you're a seasoned Divi pro or just getting your feet wet, here are some clear answers to the most common things I get asked.
Can I Use the Divi Builder on Some Products but Not Others?
You absolutely can, and it's one of the best features of the Divi Theme Builder. You have incredible control over where your templates apply.
It's simple to create a unique, highly-designed product page layout and then assign it only to specific product categories, tags, or even individual products. This means you could roll out a flashy, custom layout for a flagship product while letting your simpler items stick with the standard WooCommerce design. It's the perfect way to create a unique landing page experience without needing to rework your entire store.
What Is the Safest Way to Add Custom Code?
This one's crucial: never, ever edit the parent theme files directly. I can't stress this enough. The moment you update Divi, all those changes will be gone for good.
Instead, you have two much better, industry-standard options:
- Use a child theme: This is the go-to method for developers. You can safely add your PHP snippets to the child theme's
functions.phpfile and all your custom CSS to itsstyle.css. - Use a code snippets plugin: If you're not comfortable using FTP to manage theme files, a plugin like Code Snippets is a fantastic alternative. It gives you a clean interface right inside WordPress to add, organize, and even turn your PHP and CSS snippets on or off.
Both of these approaches keep your custom code separate and safe from any theme updates.
Will Customizing My Product Page Slow Down My Site?
It can, but it doesn't have to. Performance really comes down to how you customize the page, not just that you did. The most common performance killer I see is people using a ton of massive, unoptimized images—that'll slow down any site, regardless of the tools you use.
A well-built Divi Theme Builder template is generally very efficient. Where you can run into trouble is by overloading it with complex modules, heavy third-party scripts, or poorly written code snippets. Always keep optimization top-of-mind by compressing your images, minifying CSS and JavaScript, and investing in quality hosting.
How Do I Edit the Checkout or Cart Pages with Divi?
Editing your cart and checkout pages works exactly the same way as a product page. You just need to head over to the Divi > Theme Builder and create new templates specifically for them.
When you create a new template, you'll see options to assign it to your Cart or Checkout pages. Once that's set, you can build out a custom body using Divi’s specific WooCommerce modules like Woo Cart Products or Woo Checkout Billing. This gives you full control to style these critical steps in the buying process to perfectly match the rest of your brand.
At Divimode, we build powerful tools to help you create more dynamic and effective Divi websites. Elevate your product pages with interactive popups, targeted banners, and intelligent content injection. Learn more about what you can build with Divimode.
More Articles You Will Like


