So, you've hit a wall with off-the-shelf WordPress plugins. You've tried patching things together, but nothing quite nails the specific feature you need for your business. This is exactly when you start looking into custom WordPress plugin development.
It’s all about creating a bespoke plugin from scratch to solve a problem that pre-built solutions just can't handle. You're taking the reins to build unique functionality, lock down security, and optimize performance for your website's specific goals. It’s the ultimate way to get your site to do exactly what you need it to do.
Why Invest in Custom WordPress Plugin Development

The WordPress plugin repository is massive, but relying on it exclusively often means making compromises. You find a plugin that’s almost perfect, but that little gap can cause real friction for your customers or your team's workflow. This is where building your own plugin really starts to make sense.
Instead of stacking multiple plugins on top of each other—a practice that can introduce security holes and slow your site to a crawl—a custom solution is lean and focused. No bloated code, no features you'll never use, and no third-party branding getting in the way.
Solving Unique Business Problems
Let’s get practical. Imagine you run an e-commerce store that sells locally sourced produce. You need a shipping calculator that talks directly to a local courier's unique API, giving customers hyper-accurate delivery quotes based on their specific neighborhood. Good luck finding an off-the-shelf plugin for that.
A custom plugin, on the other hand, can be built to communicate perfectly with that API. The result? A seamless checkout process that builds trust and boosts conversions. This is the real business case for going custom: solving operational headaches that generic tools were never built for.
I've seen this need pop up in a few common scenarios:
- Proprietary System Integration: Connecting a website to a company's internal inventory software, a one-of-a-kind CRM, or a unique data source.
- Complex Business Logic: Building out a multi-step booking system with tricky pricing rules that no existing plugin can manage.
- Tailored User Experiences: Creating a custom front-end dashboard for members that displays data and features specific to your business model.
The Power of the Plugin Ecosystem
The huge demand for custom solutions is a testament to how flexible WordPress really is. This custom plugin ecosystem is a big reason why the platform powers over 75 million websites. While the official repository has around 58,000 free plugins, the need for unique functionality fuels a massive market for custom development.
Just look at a giant like WooCommerce, which powers over 5 million active online stores. It's a perfect example of the common business journey: start with a powerful existing tool, then invest in custom add-ons to gain a competitive edge. You can learn more about the WordPress ecosystem's scale and how it shapes these development trends.
When deciding between building and buying, it helps to see the trade-offs side-by-side.
Custom Plugin vs. Off-the-Shelf Plugin: A Quick Comparison
Here’s a quick breakdown of what you’re getting into with each approach.
| Factor | Custom Plugin | Off-the-Shelf Plugin |
|---|---|---|
| Functionality | Built precisely for your specific needs. No more, no less. | Generic features that may or may not cover all your requirements. |
| Cost | Higher initial investment for development. | Lower upfront cost or free. May have subscription fees. |
| Performance | Optimized and lean. Contains only the code you need. | Can be bloated with unused features, potentially slowing down your site. |
| Security | More secure, as the code is private and not a public target. | Code is public, making it a potential target for widespread attacks. |
| Support | Direct access to the developer who built it. | Relies on the plugin author's support forums or ticketing system. |
| Updates | You control the update schedule and feature roadmap. | You're dependent on the developer for updates and compatibility. |
Ultimately, the choice depends on how critical the functionality is to your business operations.
A custom plugin is an asset, not an expense. It's a purpose-built tool designed to solve a specific problem, improve efficiency, or create a unique advantage that competitors using off-the-shelf solutions cannot easily replicate.
By investing in a bespoke plugin, you gain complete ownership of the code, its features, and its future. That means tighter security—since the code isn't public for attackers to poke at—and better performance, since it’s built just for you.
Throughout this guide, we'll walk through exactly how to build these powerful, targeted solutions from the ground up.
Planning and Structuring Your First Custom Plugin
Jumping straight into code without a plan is one of the most common mistakes I see developers make. Trust me, a few hours spent mapping out your plugin's purpose and structure will save you days of refactoring complex code down the line. Think of it as drawing up the blueprint before you pour the foundation—it’s the only way to make sure everything fits together.
The very first thing you need to do is define your plugin's single, primary goal. What specific problem are you solving? Who is this for, and what do they need to accomplish with your tool? Answering these questions keeps you laser-focused on the core functionality and helps you dodge the dreaded feature creep, which can bloat your plugin and turn it into a maintenance nightmare.
Once you have a clear purpose, you can start outlining the necessary features. For example, if you're building a custom testimonial slider, your feature list might look something like this:
- A custom post type for testimonials.
- Fields for the author's name, photo, and the testimonial text.
- A shortcode to display the slider on any page.
- A settings page to control things like transition speed and slider styles.
This simple list becomes your project roadmap, guiding you from the first line of code to the final zip file. If you need a refresher on how plugins fit into the bigger WordPress picture, our guide on what a WordPress plugin is and how to use it is a great place to start.
Designing a Scalable Folder Structure
How you organize your files is just as important as the code you write inside them. A messy folder structure quickly becomes impossible to navigate as your plugin grows. Adopting a standardized, logical structure from day one is one of the best habits you can form as a developer.
This infographic gives a solid overview of the foundational workflow for planning your plugin's architecture.
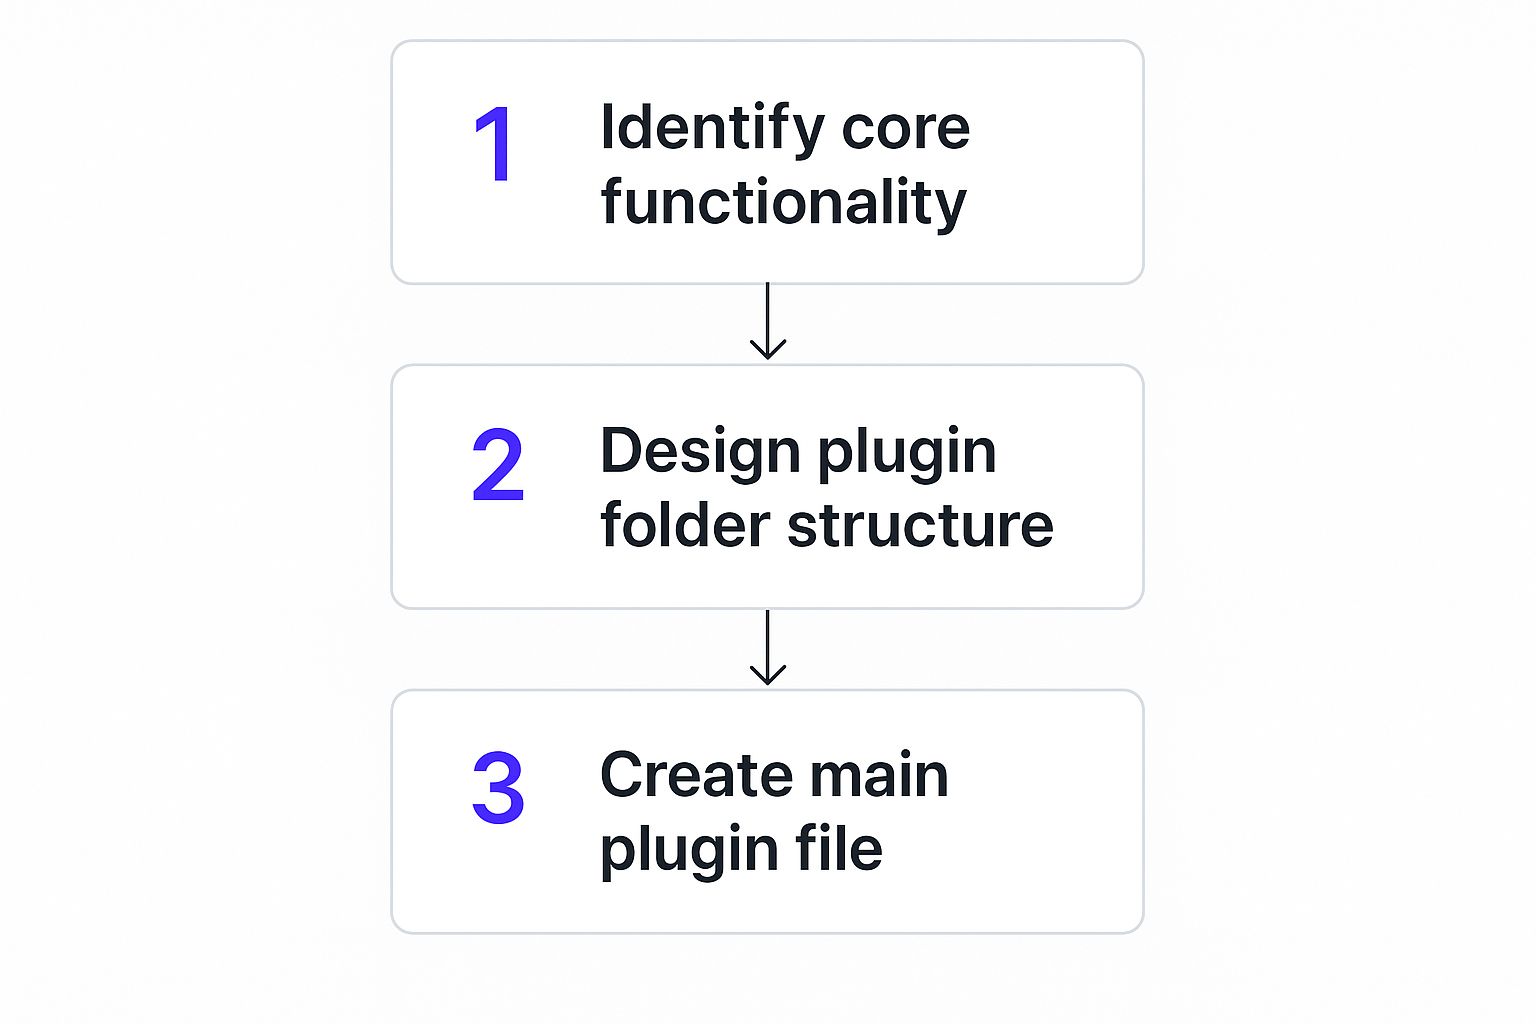
As you can see, a clean file structure is a direct result of clear functional planning, all of which comes together in your main plugin file.
A common and highly effective structure separates different types of code into their own directories. This practice, known as "separation of concerns," makes your code much easier to debug, extend, and understand.
Here’s a boilerplate structure I often use as a starting point:
/my-custom-plugin
|– /assets
| |– /css
| | -- frontend.css | |-- /js | | — frontend.js
|– /includes
| |– functions.php
| |– class-my-plugin-cpt.php
| -- class-my-plugin-shortcodes.php — my-custom-plugin.php
- /assets: This folder holds all your public-facing files like CSS stylesheets, JavaScript files, and images.
- /includes: This is where the bulk of your plugin's PHP logic lives. Separating functionality into different files (like one for custom post types and another for shortcodes) keeps your main file clean and manageable.
- my-custom-plugin.php: This is the main plugin file. It’s the entry point that WordPress recognizes and loads.
Planning isn't just some optional first step; it's the most critical phase of development. A well-organized plugin is easier to secure, faster to debug, and a breeze to hand off to another developer in the future.
Creating the Main Plugin File
With your folders in place, the next task is to create the main PHP file. This file must contain a special comment block at the top, known as the plugin header. WordPress reads this header to display your plugin's information in the admin dashboard. Without it, WordPress won’t even know your plugin exists.
This header is a non-negotiable requirement. It tells WordPress everything from the plugin's name to its version number.
Here’s what a minimal plugin header looks like:
Okay, so WordPress now recognizes your plugin. That’s a great first step, but it’s time to make it actually *do* something. This is where the real magic begins, and it’s all powered by a system called **hooks**. Think of hooks as specific anchor points or events in the WordPress loading process. They’re scattered all throughout the WordPress core, themes, and even other plugins, giving you a chance to jump in and run your own custom code at just the right moment. Leaning on this system is the absolute cornerstone of proper **custom WordPress plugin development**. It’s what lets you modify and extend WordPress without ever touching the original source code. This is non-negotiable because it means your hard work won’t get wiped out the next time WordPress pushes an update. The hook system is split into two main types: Actions and Filters. They might look similar in your code, but what they accomplish is fundamentally different. ### Actions Do Things An **Action** is a hook that fires at a specific point during the WordPress lifecycle. When you “hook” into an action, you’re essentially telling WordPress, “Hey, when you get to this point, please run my function.” You use actions to *add* functionality or *do* something—like adding a script to the site’s header or sending a notification email when a post is published. To make this happen, you use the `add_action()` function. A classic real-world example is adding custom CSS or JavaScript to your website. The wrong way is to hard-code a `` tag into your theme’s `header.php` file. The *right* way is to use the `wp_enqueue_scripts` action hook, which WordPress specifically designed for this exact task. Here’s how that looks in practice. Let’s say we need to load a custom stylesheet for our plugin’s frontend. function myplugin_enqueue_styles() { wp_enqueue_style( ‘myplugin-styles’, plugin_dir_url( __FILE__ ) . ‘assets/css/frontend.css’, array(), ‘1.0.0’ ); } add_action( ‘wp_enqueue_scripts’, ‘myplugin_enqueue_styles’ ); In this snippet, we’re telling WordPress to run our `myplugin_enqueue_styles` function whenever it fires the `wp_enqueue_scripts` action. This safely and correctly adds our stylesheet, playing nice with WordPress’s performance and dependency management. ### Filters Change Things A **Filter**, on the other hand, is all about modifying data. When you hook into a filter, you’re telling WordPress, “When you’re about to use this piece of data, pass it to my function first. I’ll make some changes and then hand it back to you.” Filters are used to *change* or *manipulate* something, like adding text to the end of a blog post or altering a product’s price in WooCommerce. You’ll use the `add_filter()` function for this. Let’s build a tangible feature. Imagine we want to tack on a promotional message at the bottom of every single blog post. The `the_content` filter is the perfect tool for this, as it lets us intercept and modify post content right before it’s displayed on the screen. Here’s the code: function myplugin_add_promo_message( $content ) { // We only want this on single blog posts, not pages or archives. if ( is_singular( ‘post’ ) ) { $promo_message = ‘Enjoying this article? Check out our latest products!
<div class="wrap">
    <h1>Promo Message Settings</h1>
    <form action="options.php" method="post">
        <?php
        settings_fields( 'myplugin_options_group' ); // Outputs nonce, action, and option_page fields for security.
        ?>
        <table class="form-table">
            <tr valign="top">
                <th scope="row">Custom Message</th>
                <td>
                    <input type="text" name="myplugin_promo_message" value="<?php echo esc_attr( get_option('myplugin_promo_message') ); ?>" class="regular-text" />
                </td>
            </tr>
        </table>
        <?php submit_button(); ?>
    </form>
</div>
<?php
}
Pay close attention to settings_fields(). This function is a powerhouse. It handles all the critical security work by adding hidden nonce fields, protecting the form against Cross-Site Request Forgery (CSRF) attacks. The form's action points to options.php, the core WordPress file responsible for processing and saving our white-listed setting. This built-in, robust system is exactly why using the Settings API is so much better than trying to build a form from scratch.
This simple settings page gives an admin a text box to customize the promotional message, showing how just a few core functions can create a secure, user-friendly interface for any plugin.
Prioritizing Security in Your Plugin Development

Let's be blunt: writing code that works is only half the job. Building a plugin that users can actually trust—that's the real challenge. In the world of custom WordPress plugin development, you can't just bolt on security at the end. It has to be baked in from the very first line of code.
A single weak spot can bring down an entire website. When you consider that plugins are behind over 50% of all known WordPress vulnerabilities, you start to see just how much responsibility falls on our shoulders as developers. You can see more about the broader landscape here: https://divimode.com/wordpress-security-plugins-essential-tools-for-protecting-your-site/
This high-stakes environment is exactly why businesses are willing to pay for expertise that keeps them safe. With the average WordPress developer salary floating around $72,000, companies understand the value of mitigating risk. WordPress is a massive ecosystem—drawing 2.4 to 2.6 million searches every month—and every site owner in it puts security at the top of their list.
Sanitize Input Always
If you take away one thing, make it this: never, ever trust user input. I mean it. Any data that comes from a form, a URL, or anywhere outside your own code has to be considered hostile until proven otherwise. The process of cleaning that data before it ever touches your database is called sanitization.
Thankfully, WordPress gives us a whole toolkit of functions for this. Using them isn't optional; it's fundamental.
sanitize_text_field(): This is your workhorse for basic text inputs. It strips out sketchy HTML tags and weird spacing, neutralizing most common script injection attempts.sanitize_email(): Pretty self-explanatory. It gets rid of any character that doesn’t belong in an email address.sanitize_textarea_field(): Like the text field function, but it knows to preserve line breaks for multi-line inputs.absint(): Expecting a positive whole number, like a post ID? This function makes sure you get exactly that. No funny business.
Going back to our settings page example, here’s how we'd sanitize our promo message before saving it:
$clean_message = sanitize_text_field( $_POST['myplugin_promo_message'] );update_option( 'myplugin_promo_message', $clean_message );
That one little function call is a massive step in preventing someone from injecting malicious JavaScript right into your site's database via a settings field.
Escape Output Every Time
Just as important as cleaning data on the way in is securing it on the way out. This is called escaping. You do it right before you display any data on the screen. This is your primary defense against stored Cross-Site Scripting (XSS) attacks, where a hacker manages to get malicious code into your database, which then executes in an innocent user's browser.
Again, WordPress provides the tools we need:
esc_html(): Use this when you're printing data directly inside an HTML tag.esc_attr(): Perfect for printing data inside an HTML attribute, like thevalueof an input field or aclassname.esc_url(): Make sure a URL is safe and properly formatted before you stick it in anhreforsrcattribute.esc_js(): Safely prints a string for use inside an inline JavaScript block.
When we output our saved promo message back into the settings field, we used esc_attr() for this very reason:
<input type="text" value="<?php echo esc_attr( get_option('myplugin_promo_message') ); ?>" />
This ensures that even if something nasty somehow got into the database, it gets rendered as harmless text instead of being executed by the browser.
Prevent Unauthorized Actions with Nonces
A nonce (which stands for "number used once") is a unique, temporary security token. WordPress uses them to confirm that a request—like submitting a form—is legitimate and came from the right place, initiated by the right user. They are absolutely critical for stopping Cross-Site Request Forgery (CSRF) attacks, where an attacker tricks a logged-in user into accidentally performing an action they never intended.
Think of a nonce as a secret handshake. Your form presents the handshake to WordPress, and if it's not the right one, WordPress slams the door shut. No questions asked.
When we built our settings page using the Settings API, the settings_fields() function conveniently added a nonce for us automatically. But if you’re building a form from scratch, you must add it yourself using wp_nonce_field() inside your <form> tags. Then, on the processing side, you check it with wp_verify_nonce(). Skip this, and you’re leaving your forms—and your users—wide open to attack. For a deeper dive, you can learn how to secure user roles and permissions to further lock things down.
Even after you’ve mapped out your entire project, a few questions always seem to pop up during custom plugin development. Let’s walk through some of the practical concerns I see developers run into all the time, from performance and compatibility to keeping things updated down the road.
How Do I Keep My Custom Plugin From Slowing Down The Website?
Performance is everything. A plugin with killer features is useless if it grinds the site to a halt. The secret is to be deliberate and surgical with your code and how you load resources.
Your first focus should be on writing efficient database queries. It's tempting to write raw SQL, but you should almost always avoid it. Native WordPress functions like WP_Query or get_posts are your best friends here. They’re not only more secure, but they also have built-in caching and are already optimized for the WordPress database structure.
Next, make sure you only load scripts and styles where they’re actually needed. You can use conditional checks like is_page() or is_singular('your_cpt') to stop your assets from loading across the entire site. Loading a massive JavaScript library on every single page just for one contact form is a classic, and totally avoidable, performance killer.
For data that doesn’t change often, you absolutely need to use caching. The Transients API (set_transient, get_transient) is a fantastic tool built right into WordPress for this. It lets you store the results of heavy database queries or complex calculations for a set amount of time, which can dramatically lighten the load on the server for anyone visiting that page.
What's The Best Way To Handle Updates For My Custom Plugin?
When your plugin isn't listed on the official WordPress.org repository, you need to roll your own update system. This sounds way more intimidating than it actually is. Following the standard approach gives your users a seamless and professional experience.
Here’s the breakdown: you host the new version of your plugin—the .zip file—on your own server. This could be a private GitHub repository or just a folder on your website. Right next to that file, you’ll also host a simple JSON file. This file acts as a manifest, containing key details like the new version number, the direct download URL for the zip, and a changelog.
Back inside your plugin's PHP code, you'll tap into the pre_set_site_transient_update_plugins filter. This hook is your entry point. It lets you ping your remote JSON file and compare its version number against the one the user has installed. If there's a new version, you simply inject its data into the transient. Once that's done, WordPress takes over and automatically shows the update notification in the admin dashboard, just like it does for any official plugin.
Can I Use Modern PHP Features And Frameworks?
Absolutely, but you have to be smart about it. You can and should use modern PHP features like namespaces, traits, and anonymous functions. Just be mindful of the minimum PHP version that WordPress itself requires. That gives you a safe baseline to work from, ensuring you don't break older sites.
Using Composer to manage dependencies and autoload your classes is a widely accepted best practice, especially for larger plugins. It’s a game-changer for keeping your code organized and easy to maintain.
A word of caution, though: think twice before you try to embed an entire framework like Laravel or Symfony. While they're incredibly powerful, they bring a ton of overhead and can create some nasty conflicts with WordPress core. It's almost always better to pull in specific, lightweight libraries for the job you need done rather than a full-stack framework.
How Should I Debug Issues In My Custom Plugin?
Good debugging skills are non-negotiable. Your first move should always be to enable WP_DEBUG, WP_DEBUG_LOG, and WP_DEBUG_DISPLAY in your wp-config.php file. This trio will show errors on the screen (only on a dev site, please!) and, more importantly, write them to a debug.log file inside your wp-content directory.
Try to break the habit of using var_dump() or print_r() directly in your code. It’s a quick-and-dirty method that can easily break page layouts or AJAX calls. A much cleaner approach is to log your variables to the debug file instead: error_log(print_r($your_variable, true));. This lets you inspect anything you need without disrupting what the user sees.
For a much deeper dive, you need a tool like Query Monitor. It's an indispensable plugin for developers that lets you inspect database queries, see which hooks are firing on a page, check API calls, and so much more. And for those really thorny bugs, setting up Xdebug with an editor like VS Code is the ultimate solution. It lets you set breakpoints and step through your code's execution line by line.
At Divimode, we build powerful tools like Divi Areas Pro to help you create engaging, high-performing Divi websites without compromise. Explore our plugins and expert tutorials to take your projects to the next level at https://divimode.com.
More Articles You Will Like