You log in for a normal maintenance check and find a broken layout, a failed checkout, or a popup that stopped firing overnight. Nothing in your deployment notes explains it. Then you notice a plugin updated itself while you were asleep.
That’s usually the moment people stop asking whether they should learn how to cancel automatic updates and start asking how to regain control without creating a security mess of their own.
For Divi and WooCommerce work, the core problem isn’t updates themselves. The problem is unattended change. A Divi site often depends on theme behavior, builder modules, custom CSS, WooCommerce templates, and third-party plugins all staying in sync. When one piece changes without testing, the whole site can wobble.
A professional workflow fixes that. You disable the updates you don’t want happening automatically, then you update on your schedule, in your order, with backups and staging in place.
Why Automatic Updates Can Be Risky for Your Divi Site
A Divi site can look stable for months, then break from one routine update. The failure usually isn't dramatic at first. A mega menu loses styling. A popup stops targeting properly. A checkout field no longer renders where it should.
On a brochure site, that’s annoying. On a WooCommerce build, that’s expensive.

What goes wrong in real Divi stacks
The failure pattern is usually familiar:
- A plugin updates first. Its new code assumes a newer theme version, a different module output, or a changed hook.
- Divi still runs the old setup. Your templates don’t immediately fail everywhere, which makes the issue harder to spot.
- Users hit the broken path before you do. That might be a cart page, a fly-in offer, or a mobile navigation state.
- Cache hides the problem. Admin views can look fine while visitors get the broken version.
For Divi users on WordPress, auto-updates have caused disruptions in up to 30% of cases tied to plugin incompatibilities, according to the verified data drawn from Updraft’s discussion of WordPress auto-update risks.
That number matters less than the lesson behind it. If you didn’t approve the change, you didn’t test the change.
Practical rule: Security matters, but so does control. The safe position for a customized Divi site is supervised updates, not blind updates.
Why WooCommerce raises the stakes
WooCommerce adds order flow, customer accounts, payment behavior, and transactional emails to the mix. An update conflict doesn’t just create a visual bug. It can interrupt revenue.
That’s why I treat update control as part of site hardening, not just convenience. A stable site needs backups, permissions, monitoring, and a deliberate update routine. Divi users who want the broader security side of that workflow should also review these Divi security practices for keeping your website safe.
The trade-off nobody should ignore
Automatic updates exist for a reason. They reduce the window where known issues remain unpatched. But on a heavily customized build, they also remove the testing step that protects your layout, conversion flow, and client trust.
That’s the trade. Convenience versus oversight.
For a simple hobby site, convenience might win. For a client store built with Divi, custom modules, and WooCommerce, oversight should win almost every time.
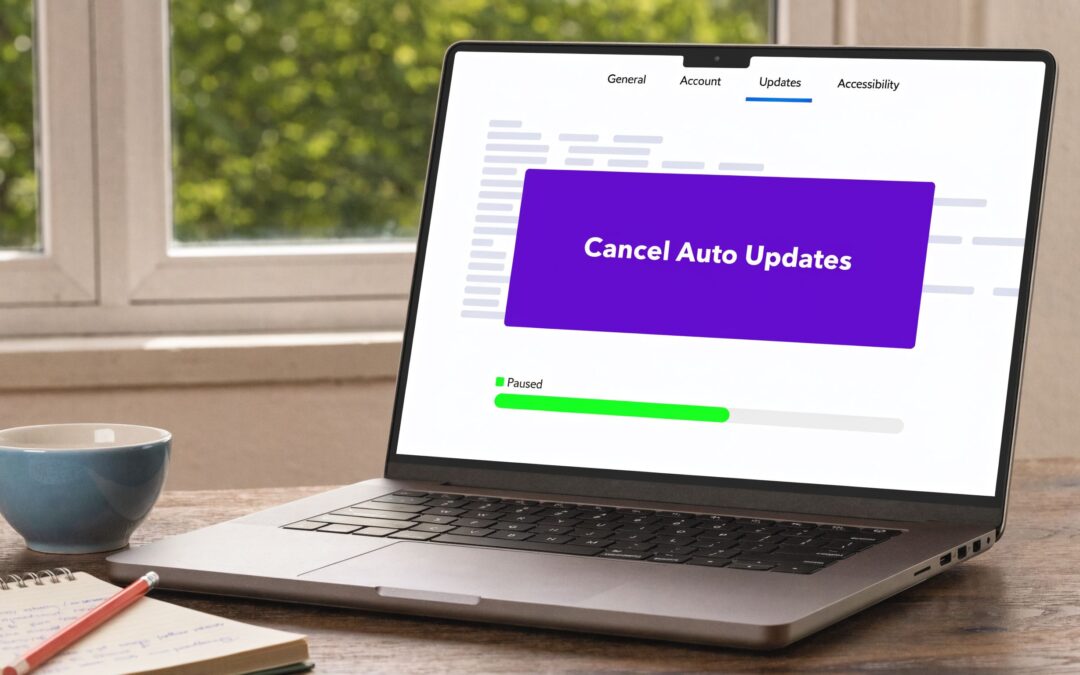
Disabling WordPress Updates with Code
Code gives you the firmest control over WordPress updates. On a Divi or WooCommerce build, that matters because update policy should live in the codebase, not in a setting an admin can flip without realizing the impact.
The two files that matter are wp-config.php for WordPress core behavior, and either a site-specific plugin or functions.php for plugin and theme filters.

Disable WordPress core auto-updates
Add this line to wp-config.php, above the line that says That's all, stop editing!:
define('WP_AUTO_UPDATE_CORE', false);
This constant tells WordPress not to install core updates automatically.
That setting is simple. Placement is what trips people up. Put it in the wrong file, add it too low in the load order, or let your host override it, and you can end up thinking updates are blocked when they are not.
Disable plugin and theme auto-updates
Use these filters in a site-specific plugin or, if needed, in your child theme’s functions.php:
add_filter('auto_update_plugin', '__return_false');
add_filter('auto_update_theme', '__return_false');
What each line does:
| Code | Effect |
|---|---|
add_filter('auto_update_plugin', '__return_false'); |
Stops plugins from auto-updating |
add_filter('auto_update_theme', '__return_false'); |
Stops themes from auto-updating |
On a Divi site, a child theme is the minimum safe place if you are not using a site plugin. Putting this in the parent Divi theme is a maintenance mistake. A theme update can wipe your custom logic, which defeats the whole point of controlling updates in the first place.
Use a site plugin when you want policy to survive theme changes
I prefer a lightweight custom plugin for this job. It keeps operational rules separate from design code, which is cleaner on client projects and easier to track in version control.
Example:
<?php
/**
 * Plugin Name: Site Update Controls
 */

define('WP_AUTO_UPDATE_CORE', false);

add_filter('auto_update_plugin', '__return_false');
add_filter('auto_update_theme', '__return_false');
That file can live in wp-content/plugins/site-update-controls/site-update-controls.php.
Activate it once, then verify the behavior in the Updates screen and in your environment logs. If the dashboard still shows odd update behavior, check for host-level controls or review this guide on why automatic plugin updates are unavailable in WordPress.
Where code works well, and where it does not
Code-based control works best when the site is managed like a professional build. Version control is in place. Staging exists. Deployment is documented. The person approving updates also tests Divi templates, checkout flow, and plugin conflicts before anything reaches production.
It works less well when hosting tools override WordPress defaults, multiple admins make undocumented changes, or snippets are scattered across a theme, a code-snippets plugin, and mu-plugins.
WooCommerce raises the stakes here. A delayed visual glitch in Divi is annoying. A checkout failure after an unsupervised plugin update costs money. The problem is unattended change, not just the update itself.
A practical baseline for Divi and WooCommerce sites
For most production sites, this is the baseline I use:
- Add
WP_AUTO_UPDATE_COREinwp-config.php. - Disable plugin and theme auto-updates with filters.
- Store the filters in a site plugin when possible.
- Test updates on staging first.
- Confirm key pages and flows after each update, especially Divi layouts, product pages, cart, checkout, account pages, and transactional email triggers.
This policy should also match the rest of your workflow. If WordPress updates are manual but your Windows development machine reboots during work, or your iPhone and Android test devices change browser behavior overnight, you still lose consistency. Web professionals need update control across the whole stack, not just inside WordPress.
WordPress only knows an update is available. It does not know whether your Divi modules, custom code, payment gateway, or caching layer will handle that change cleanly.
Using a Plugin for Granular Update Management
Not everyone wants to touch wp-config.php or write a custom plugin just to stop updates. That’s fair. If your goal is practical control with less code, a dashboard tool is easier to hand off to a client or a junior team member.
A plugin such as Easy Updates Manager is the usual starting point because it gives you one place to manage core, plugin, and theme behavior.

Why a plugin can be the better option
The code method is stronger when you want hard rules in the codebase. The plugin method is better when you want visibility and selectivity.
That’s useful on client sites where you may want to keep one trusted utility updating automatically while blocking everything else until review.
Here’s the practical comparison:
| Approach | Best for | Main limitation |
|---|---|---|
| Code snippets | Developers who want fixed policy in the site code | Less friendly for non-technical admins |
| Update management plugin | Agencies, freelancers, site owners who want visual controls | Another plugin to maintain |
A sensible plugin-based policy
A good setup inside an update manager usually looks like this:
- Disable all automatic updates first. Start from a locked-down state.
- Allow only what you trust. If one small utility has a stable track record in your build, you can allow that one later.
- Keep major changes manual. Theme updates, WooCommerce updates, and anything tied to templates should stay under review.
- Review logs often. A visual tool is only useful if someone checks it.
One useful Divi-specific reference if you’ve ever seen missing toggles or inconsistent behavior is this note on why automatic plugin updates are unavailable.
Where plugins shine
Plugins make selective policy easier than code for teams that manage many sites.
For example, you can:
- Block all theme updates while allowing security-oriented utility plugins
- Turn off core auto-updates but still leave update notifications active
- Use one shared admin workflow instead of editing files on every install
That visual layer matters when your team includes designers, account managers, or support staff who need to see update state without opening source files.
A quick walkthrough can help if you're comparing plugin interfaces and options:
Where plugins fall short
A plugin can make policy easier, but it doesn’t remove responsibility.
It won’t fix:
- Poor staging discipline
- No backup process
- Untracked code changes
- Plugin conflicts already present in the stack
If your update workflow depends on memory, it will eventually fail. Use a repeatable policy, whether that policy lives in code or in a management plugin.
If you’re choosing between the two approaches, the key question isn’t technical skill. It’s operational style. If you want hard enforcement, use code. If you want easier delegation and per-site control, use a plugin.
Safely Managing Divi Ecosystem Updates
Divi sites need a stricter update policy than generic WordPress installs because the moving parts are tightly connected. The theme, builder output, custom CSS, child-theme overrides, WooCommerce templates, and Divi-focused plugins all affect the same front end.
That means isolated updates are often the wrong move.
Treat Divi updates as compatibility events
If you update the Divi theme without checking the plugins built around that environment, you’re gambling on compatibility. The same is true in reverse. A plugin can change markup assumptions, script behavior, or option handling while the theme still expects the old pattern.
The safer approach is to treat related updates as a batch on staging.
That usually means checking:
- The Divi theme version
- Divi Builder behavior on key templates
- WooCommerce pages and account areas
- Any plugin that injects UI elements, conditions, or custom interactions
Read the changelog before you click update
Most update problems become obvious after the fact because nobody read what changed. Changelogs often tell you whether a release touches compatibility, dynamic content, frontend scripts, or layout output.
Before updating Divi itself, check guidance specific to how to update the Divi theme. The point isn’t just to get the new version installed. The point is to know what else needs verification around it.
A Divi update is rarely “just a theme update” on a customized site. It can affect every reusable layout and interaction pattern built on top of it.
What not to do
I’d avoid these habits on any serious Divi build:
- Updating from live first
- Updating one dependency at random because it looks minor
- Assuming visual builder checks are enough
- Letting client admins run theme updates without a test plan
A better default
Use a staging copy, update related Divi components together, and test the exact features your users touch. That includes popups, conditional headers, product pages, carts, account screens, and mobile navigation states.
The goal isn’t to freeze your site forever. The goal is to update with context.
Stabilizing Your Development and Test Environments
Site stability starts before anything reaches production. If your local machine updates itself at the wrong time, or your test phone changes OS behavior overnight, you can waste hours debugging a problem that isn’t in your code.
That’s why learning how to cancel automatic updates should extend beyond WordPress itself.
Windows update control for local development
Development machines running XAMPP, Local, Docker, or similar stacks need predictable uptime. The verified data notes that disabling Windows automatic updates on development machines prevents conflicts, and that faulty updates have caused significant downtime in some setups. The same verified source says the Group Policy or Registry methods provide 98% persistent disablement, with the full walkthrough summarized in this Action1 guide to stopping Windows 11 updates.
For Windows Pro or Enterprise:
- Open
gpedit.msc. - Go to Computer Configuration > Administrative Templates > Windows Components > Windows Update > Manage end user experience.
- Open Configure Automatic Updates.
- Set it to Disabled.
- Run
gpupdate /force.
For Windows Home:
- Open
regedit. - Go to
HKEY_LOCAL_MACHINE\SOFTWARE\Policies\Microsoft\Windows\WindowsUpdate\AU - Create or edit the DWORD
NoAutoUpdate. - Set
NoAutoUpdate=1.
The same verified data also notes a practical alternative. Pausing updates for several weeks through normal Windows Update settings avoids registry risk and is a good fit when you only need a stable sprint window.
iPhone and iPad update control for testing
If you test responsive behavior or checkout flows on iOS, automatic updates can change the environment underneath you. The verified data says iOS devices had 1.5 billion active devices as of 2024, with 28% global smartphone market share, and that automatic software and app updates have been pushed heavily since iOS 12. It also says users can disable iOS update automation in Settings > General > Software Update > Automatic Updates by turning off Automatically Install and Automatically Download iOS Updates, while App Store app updates can be disabled in Settings > App Store by turning off App Updates and Use Mobile Data, as described in this Apple Community thread on disabling automatic updates.
For testing, I prefer keeping one iOS device stable during active client work. If Safari, WebKit behavior, or app rendering changes mid-project, comparison gets messy fast.
Android update control and OEM overrides
Android needs extra attention because one setting often isn’t enough. The verified data says Android powers over 70% of global smartphones as of 2023 with approximately 3 billion active devices worldwide, and that standard app auto-updates can be disabled in the Play Store through Profile > Settings > Network preferences > Auto-update apps > Don't auto-update apps, based on the verified Android walkthrough in this YouTube reference on stopping Play Store auto-updates.
But there’s a second layer. The verified data also states that Android users must sometimes disable updates in manufacturer-specific settings because OEM overlays can often override preferences, particularly on devices using stores such as Samsung’s Galaxy Store.
That means your checklist on Android should include:
- Google Play Store settings
- Manufacturer app store settings
- System update settings
- Any “smart update” or optimizer feature the device maker added
This matters when you keep a few physical devices around for QA. If one Samsung phone updates apps through Galaxy Store without explicit user action while the Pixel doesn’t, your test results stop matching.
Build this into your workflow
A stable professional process covers live sites, staging sites, laptops, and test devices. If you want to push this further into team process, it helps to align update discipline with broader CI/CD pipeline best practices, especially around predictable environments and release gates.
Keep at least one machine and one mobile device as your “known stable” baseline during active projects. That gives you a fixed reference when debugging layout or checkout issues.
Your Professional Workflow for Manual Updates
Once automatic updates are under control, you need a routine that replaces them. Manual updates only work when they’re consistent.
The cleanest approach is to make updates a scheduled operational task, not a background accident.

The update day checklist
Use a fixed sequence every time:
Create a full backup
The verified data connected to WordPress update control notes backing up first with UpdraftPlus and mentions a 98% recovery rate in that context, drawn from the verified WordPress auto-update reference already discussed earlier.Push updates to staging first
Never discover breakage in front of customers.Review compatibility notes
Read changelogs, scan support threads, and check whether the update affects builder output, WooCommerce templates, or frontend scripts.Apply updates in a deliberate order
Don’t click “update all” and hope for the best.Run a real test pass
Check home, landing pages, menus, popups, contact forms, cart, checkout, and account pages.Deploy to live after verification
Production should receive a tested state, not an experiment.
What a real test pass should include
A good post-update review isn’t just visual.
Check these items:
- Layout integrity on desktop and mobile
- Interactive elements such as popups, toggles, fly-ins, and menus
- WooCommerce flow from product page to checkout
- Forms and submissions
- Logged-in states if the site has memberships, customers, or gated content
“Manual updates” doesn’t mean slow or outdated. It means every change passes through a checkpoint before users see it.
Security still belongs in the process
Disabling automatic updates doesn’t remove security responsibility. It increases it. You now own the timing, review, rollout, and rollback.
That’s why update work should sit inside a broader security habit. If you want a useful framing for that bigger picture, this overview of the vulnerability management lifecycle is a good companion to a manual update policy. It helps connect patching, validation, and response into one operational loop.
The practical standard
The most reliable sites aren’t the ones that update fastest. They’re the ones that update cleanly.
For Divi professionals, the standard should be simple. Disable unattended updates where they create risk. Test in staging. Verify the user paths that matter. Then release with confidence.
If you build with Divi and want better control over interactive site behavior, cleaner documentation, and tools made for serious production work, Divimode is worth keeping in your toolkit. It’s a strong resource for Divi users who want dependable plugins, practical guidance, and a more disciplined path to stable site management.
More Articles You Will Like