When you're building a visually stunning website with Divi, an image optimization WordPress plugin isn't just a nice-to-have tool—it's an absolute necessity. These plugins work in the background to automatically compress and resize your images, which dramatically cuts down page load times and makes for a much smoother user experience.
For a Divi site that’s packed with high-quality visuals, this is the secret to getting better SEO rankings and keeping visitors from bouncing.
Why Image Optimization Is Crucial for Divi Websites
Let's be blunt: slow websites kill conversions. They don’t just annoy visitors; they actively drive them away. For anyone using the Divi theme, unoptimized images are almost always the number one culprit behind poor performance. This directly tanks your Core Web Vitals, frustrates users, and can even push your site down in search results.
Even a single heavy hero image or an uncompressed client logo can add precious seconds to your load time—a delay most people just won’t put up with.
The Real-World Impact on Divi Sites
Think about a WooCommerce store built with Divi. A product gallery loaded with dozens of beautiful, high-resolution images can easily cripple your page speed, leading straight to abandoned carts. Or maybe you've built an interactive popup with a plugin like Divi Areas Pro. If its background image isn't optimized, it might load so sluggishly that it completely defeats its purpose of grabbing a user's attention.
These scenarios all point to the same truth: image optimization is a direct lever for your business's success. When you get it right, you'll see tangible results:
- Lower Bounce Rates: Faster pages keep people engaged and clicking around your site.
- Improved Conversions: A snappy, seamless experience on product pages encourages more people to buy.
- Better SEO Rankings: Google loves fast, user-friendly websites and rewards them in search results.
The Power of Automation
This is where the right image optimization WordPress plugin becomes a game-changer. It automates the entire process, which is a massive relief for busy Divi users. These tools have truly revolutionized WordPress performance, especially for highly interactive and visual sites.
Independent tests often show that a solid plugin can slash image file sizes by 65-75% on average. That's a huge deal when you consider that images can make up over 60% of a page's total weight. Getting them under control can boost your overall site speed by as much as 30%.
Choosing an optimization plugin isn't just a technical tweak; it's a strategic decision. It ensures your creative vision in Divi doesn't come at the cost of performance, giving you the best of both worlds—stunning design and lightning-fast speed.
By automating this critical task, you free yourself up to focus on what you do best: design and content. If you want to dive deeper, you can find more image optimization tips for SEO and web performance to round out your strategy. And for more Divi-specific advice, be sure to check out our complete guide on using images with Divi.
Selecting the Right Plugin for Your Projects
Choosing the best image optimization plugin for WordPress isn't a one-size-fits-all deal. The perfect tool for a solo blogger is totally different from what a digital agency managing a dozen client sites needs. Your specific projects, workflow, and even your budget should be the real drivers here, not just a flashy feature list.
Before you just grab the most popular plugin, you need to understand the fundamental difference in how they work. It really boils down to one key question: where does the optimization happen? On your own server, or in the cloud?
Cloud vs. Local Processing
Most of the big names—think ShortPixel, Imagify, and Optimole—are cloud-based. When you upload an image, it gets sent off to their powerful servers, compressed, and then sent right back to your media library. The huge advantage here is that this puts zero strain on your web server. If you're on shared hosting or need to run a massive bulk optimization, this is a lifesaver. No timeouts, no slowing down your live site.
On the flip side, a plugin like EWWW Image Optimizer primarily handles things locally, right on your server (though they offer a cloud option too). This means your server's own horsepower does the compressing. For developers on a beefy VPS or anyone who needs to keep all data on-site for privacy, this is a fantastic choice. The pricing is often more generous, sometimes with "unlimited" plans, because you're using your own resources.
For instance, a freelancer running a single, high-traffic WooCommerce store on a managed VPS might love the control of local processing. But an agency that’s churning through thousands of images across multiple client sites on all kinds of hosting plans? They’d be much better off with the reliability of a cloud service.
Pricing Models and Your Business
Your choice also comes down to how you prefer to pay. Does a recurring subscription fit your cash flow, or is a one-time credit pack a better fit?
- Subscription Plans: These are perfect for agencies or busy sites that are constantly adding new images. You get a predictable monthly bill for a set number of optimizations. Simple.
- One-Time Credits: Ideal for freelancers or site owners who have a huge existing library to optimize and then only add new images occasionally. You just buy a block of credits that never expire.
Reputation and Specialized Compatibility
Trust and reliability are massive. In the WordPress world, security and a solid track record are what make certain plugins industry standards, especially for Divi users managing complex sites with WooCommerce. A recent analysis from Patchstack praised EWWW Image Optimizer for its robust API and great balance of quality and speed. This stuff matters in a market where the top plugins have been downloaded over 6+ billion times.
You can see the trust in the numbers. Established players like ShortPixel have been around since 2014 and boast over 300,000+ active installs. Optimole is another great example, with 200,000 installs and 530+ five-star reviews, showing it really resonates with e-commerce managers who need something that just works.
Finally, if you're a Divi user, seamless compatibility is a deal-breaker. The best plugins just work with the Divi Builder, correctly handling background images, gallery modules, and even images inside custom modules without any fuss. If you're building out your toolkit, checking out the top 5 Divi plugins for all site owners is a great way to find other performance-boosting gems. Always check a plugin's recent updates and compatibility notes for your theme before you commit.
Your Guide to Installation and Optimal Configuration
Alright, you've picked out the perfect image optimization plugin. Now for the fun part: getting it set up to actually make a difference.
A common mistake I see all the time is just installing a plugin and walking away, leaving the default settings untouched. The real magic happens when you dial in the options to match your site's needs, especially if you're working with something as visually rich as Divi or a product-heavy WooCommerce store. Let's get it done right.
After you install and activate your plugin from the WordPress dashboard, it'll probably ask you to connect an account or paste in an API key. This is totally normal for cloud-based services like ShortPixel or Imagify; it's how they link your website to your optimization credits. Once that's handled, dive into the plugin’s settings, which you'll usually find under "Settings" or its own shiny new menu item.
This flowchart gives you a good idea of how different folks—from freelancers to big e-commerce stores—land on their plugin of choice, leading right to this configuration step.
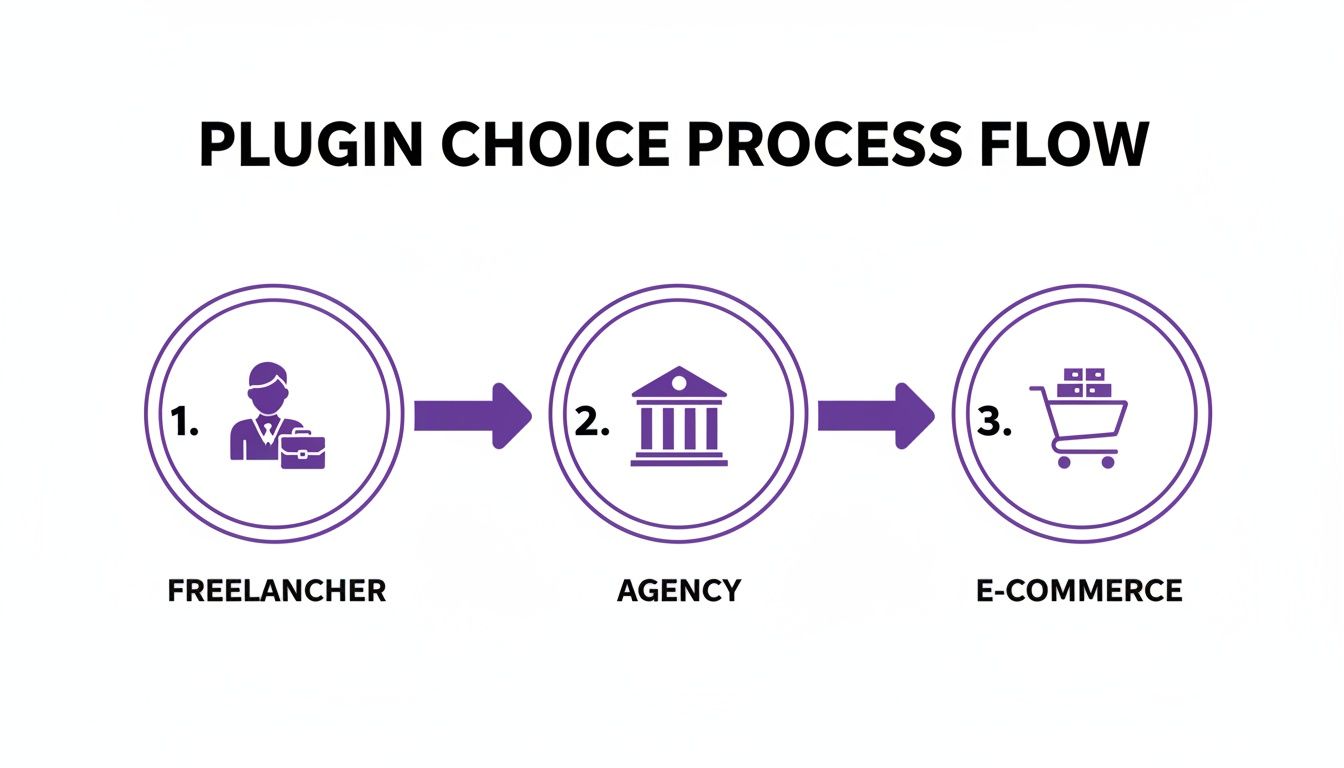
As you can see, no matter your path, it always ends with a thoughtful setup. That’s where the real performance gains are hiding.
Essential Settings to Enable Immediately
First things first: turn on WebP conversion. WebP is a modern image format from Google that delivers amazing compression with quality that stands up to JPEGs and PNGs. Flipping this switch means modern browsers get these tiny, fast-loading files, while older browsers automatically get the original format as a fallback. It's a win-win.
Next, you need to find the compression level. You'll typically see a few choices:
- Lossless: This shrinks the file size without any quality loss, but honestly, the savings are pretty small.
- Lossy (often called Glossy or Smart): This is the sweet spot for almost every website. It gives you huge file size reductions with a drop in quality so minor you'd need a magnifying glass to notice it.
- Ultra Lossy: This is maximum compression. It might introduce some slight visual imperfections, so it's best for sites where speed is the one and only priority, trumping pixel-perfect images.
For most Divi and WooCommerce sites, I always recommend the "Lossy" setting. It’s the perfect balance between a beautiful site and a fast one.
Taming Large Uploads and Boosting Page Speed
Two other settings are non-negotiable for a fast site: automatic resizing and lazy loading.
Go ahead and enable "Resize large images" and set a maximum width. For most full-width layouts in Divi, something around 1920px is a great starting point. This single setting stops you or your clients from uploading a massive 5000px photo straight from a camera, which would otherwise bring your site to a screeching halt. The plugin just scales it down automatically. It’s a lifesaver.
Finally, switch on lazy loading. This is a clever trick that stops images from loading until a visitor is about to scroll them into view. It dramatically speeds up the initial page load, which is a game-changer for long blog posts or WooCommerce category pages packed with products.
By enabling WebP conversion, choosing a smart lossy compression level, resizing oversized uploads, and implementing lazy load, you're moving beyond the defaults and truly optimizing for performance. These four settings alone will account for the most significant speed gains.
The need for powerful tools like these is obvious in the WordPress world. Leading plugins like Optimole are now running on over 200,000 sites, using a global CDN for real-time optimization. And the results speak for themselves. The bulk optimizer in Image Optimizer by Elementor has been shown to crush 2MB images down to just 179KB on average—a dream for anyone using plugins that add lots of custom image sizes, like Divi Areas Pro. You can find more great insights about this over on the official Elementor blog.
Recommended Settings for Divi and WooCommerce
To make it even easier, here's a quick-reference table that compares typical default settings to what I recommend for a high-performance Divi or WooCommerce site. Applying these will give you an immediate boost.
| Setting | Default Value | Recommended for Divi/WooCommerce | Reason |
|---|---|---|---|
| WebP Conversion | Often disabled | Enabled | Serves smaller, next-gen images to modern browsers for faster loads. |
| Compression Level | Often Lossless | Lossy (Smart/Glossy) | Provides the best balance of significant size reduction and high visual quality. |
| Resize Large Images | Usually disabled | Enabled (Max Width: 1920px) | Prevents massive, unoptimized images from being uploaded and slowing down the site. |
| Lazy Loading | Often disabled | Enabled | Dramatically improves initial page load times by deferring offscreen images. |
These tweaks are simple, but their combined impact on your site's speed and user experience is huge. It's the difference between a site that feels sluggish and one that feels snappy and professional.
Advanced Optimization Techniques and Pro Tips
Once you've got the basics dialed in, it's time to fine-tune your setup. These are the strategies that really separate a fast site from a sluggish one, giving you a serious edge in performance and user experience. We're moving beyond simple compression and thinking about the entire image delivery pipeline.
One of the most impactful moves you can make is integrating your image optimize wordpress plugin with a Content Delivery Network (CDN). Most premium plugins offer their own CDN or play nicely with services like Cloudflare or Bunny.net.
Here's the magic: a CDN stores copies of your images on servers all over the world. So, when someone from Japan visits your site, the images are served from a local server in Asia, not all the way from your main server in Texas. This drastically cuts down latency and is an absolute must-have for any business with an international audience.
Safely Bulk Optimizing a Large Media Library
Staring down a media library with thousands of existing images can feel pretty intimidating. The last thing you want to do is overload your server and cause timeouts or, even worse, a crash—especially on shared hosting.
To pull this off safely, here are a few pro tips I've learned over the years:
- Prioritize Cloud Processing: If you can, choose a plugin that handles the optimization on its own servers (this is often called cloud-based processing). It completely offloads the heavy lifting from your server.
- Adjust Batch Sizes: Don't try to do it all at once. If your plugin lets you, start with a smaller batch size, maybe 50-100 images at a time. This breaks the massive task into manageable chunks your server can actually handle.
- Run During Off-Peak Hours: Kick off the bulk process overnight or whenever your site traffic is at its lowest. This minimizes any potential performance hit for your live visitors.
And please, always—I mean always—create a full backup of your /wp-content/uploads/ directory before you start. Problems are rare with good plugins, but that backup is your ultimate safety net.
Troubleshooting Divi and WooCommerce Compatibility
Even the best plugins can sometimes have little quirks with complex tools like Divi or WooCommerce. If you notice images in a Divi gallery aren't lazy loading, or your WooCommerce product photos suddenly look blurry, don't panic. These are usually easy fixes.
A common culprit is a conflict with Divi's own performance settings. Just head over to Divi > Theme Options > General > Performance and try turning off Divi's native lazy loading. This lets your optimization plugin take full control without any confusion.
For WooCommerce, the key is making sure your plugin is set to optimize all the different thumbnail sizes WordPress generates. Your product pages and category grids rely on these smaller images, and if they're not compressed, those pages will definitely feel slow.
Here's one final pro tip for you: be careful with transparent PNGs. They're fantastic for logos and icons, but they can be notoriously large files. Many plugins have a feature to convert transparent PNGs to JPEGs on a solid color background. Use this selectively on images where transparency isn't absolutely critical—you'll be amazed at how much file size you can save.
Beyond specific plugins, just understanding the principles of choosing optimal image sizes for web will make a huge difference. For a deeper dive, our guide on how to compress images for web offers more hands-on advice to get your images in perfect shape.
Measuring Your Performance Wins
You've done the work, but how do you prove it made a difference? Guesswork isn't going to cut it. To really see the impact of your new image optimize wordpress plugin, you need to benchmark your site’s performance before and after making any changes. This is the only way to get concrete data that proves your efforts paid off.
The process is pretty straightforward. Before you hit that bulk optimize button, pop over to a free tool like Google PageSpeed Insights or GTmetrix. Run a test on a few key pages—I usually pick the homepage, a long blog post, and maybe a product page if it's an e-commerce site. Save those initial reports. That's your "before" snapshot.
Key Metrics to Watch
Once your plugin has worked its magic, run the exact same tests on the same pages. Don't just glance at the top-line score. You need to dig into the specific metrics that image optimization directly affects. These numbers are what tell the real story.
I always pay close attention to these three data points:
- Total Page Size: This is the most direct measurement of your plugin's success. You should see a significant drop here, often by several megabytes, as your image files are now much lighter.
- Largest Contentful Paint (LCP): As a core part of Google's Core Web Vitals, this metric tracks how quickly the largest image or text block becomes visible. Faster-loading images are one of the best ways to improve your LCP time, which is a big deal for SEO.
- HTTP Request Count: While the main goal is shrinking file sizes, features like lazy loading can also reduce the number of image requests made when the page first loads, which helps speed up that initial render.
Interpreting Your Results
When you put your "before" and "after" reports side-by-side, the difference should be night and day. It's common to see your PageSpeed score jump up, your LCP time fall comfortably into the "good" range (that's under 2.5 seconds), and your total page size shrink dramatically.
This data-driven approach is invaluable. It’s not just a satisfying pat on the back for a job well done; it’s tangible proof you can show to clients or stakeholders. Handing them a report where the page size was cut by 70% and the load time improved by two full seconds is far more powerful than just saying, "the site feels faster now." It demonstrates the real-world impact of choosing the right tools and, more importantly, configuring them correctly.
Got Questions? We've Got Answers
When you're diving into image optimization with a WordPress plugin, especially with a theme as powerful as Divi, a few questions always pop up. Here are the most common ones we hear from Divi users, with straightforward answers to get you on the right track.
Will An Image Optimization Plugin Make My Images Look Blurry?
Not if you set it up right! The whole game is about finding that sweet spot between file size and image quality. Honestly, most modern plugins use what's called visually lossless compression, which is a fancy way of saying they shrink the file size dramatically with almost no difference you can actually see.
My advice? Start with a 'lossy' setting (sometimes called 'Glossy' or something similar) and take a close look at your most important images. For almost everything you'll use on the web, the quality is fantastic, even on super-sharp screens. If a hero image or a key product photo doesn't look quite right, you can always dial back the compression for that specific image or exclude it entirely.
Can I Use One Of These Plugins On A Live Site With Thousands Of Images?
Absolutely. This is exactly what they're built for. Every solid optimization plugin comes with a Bulk Optimization tool designed to chew through your entire existing Media Library.
Just one critical piece of advice before you hit that button: always run a full backup of your website. Pay special attention to your /wp-content/uploads/ folder, as that's where all your images live.
For really huge libraries, pick a plugin that processes images on its own cloud servers. This is a lifesaver because it offloads all the heavy lifting from your web server, which prevents your site from slowing down or timing out during the bulk optimization.
Trust me, letting their servers do the work is the safest and smoothest way to handle thousands of images at once.
How Do These Plugins Work With Divi Background Images And Galleries?
In my experience, the best plugins handle this seamlessly. They hook directly into the WordPress media workflow, so when you add an image to a Divi module—whether it's in a gallery, a slider, or as a background—it automatically pulls the optimized version.
Where you might need to do a little tweaking is with features like lazy loading. If you notice that images "above the fold" (the content you see without scrolling) are loading a bit slow, you might need to tell the plugin to exclude certain CSS classes.
And a pro tip: after you change any settings, always clear your Divi static CSS cache and your browser cache. It’s a simple step, but it ensures you’re actually seeing the latest, fully optimized version of your page and not some old, cached copy.
Ready to build stunning, high-performing websites with Divi? Divimode provides the tools and expert guidance you need. Explore our powerful plugins and tutorials at https://divimode.com.
More Articles You Will Like