When we talk about image optimization in WordPress, we're really talking about shrinking down image file sizes without making them look terrible. The goal is to speed up your website. This usually comes down to a few key techniques: compression, resizing, and using modern formats like WebP. Get this right, and you’ll see a huge improvement in user experience and a nice little bump in your search engine rankings.
Why Image Optimization Matters for Your WordPress Site
Let's be honest, slow-loading images are more than just a small frustration—they're a legitimate business problem. We live in a world where attention spans are short. Every extra second your site takes to load is another opportunity for a potential customer to hit the back button. More often than not, the culprit is large, unoptimized images hogging bandwidth and putting a strain on your server.
The consequences are real and you can actually measure them. A mere one-second delay in page load time can cause 7% fewer conversions, 11% fewer page views, and a 16% decrease in customer satisfaction. If you're running an e-commerce store, that's lost money. For a blogger, it means fewer eyeballs on your content and less ad revenue. It all adds up.
The Impact on User Experience and SEO
When someone lands on your site, they expect things to be quick and smooth. Big, clunky images create friction and make your pages feel slow and unprofessional. That bad first impression can seriously hurt your brand's credibility and convince people not to come back. And you can bet Google and other search engines are paying attention.
Site speed is a confirmed ranking factor. One of the biggest perks of optimizing your images is the positive effect it has on your site's visibility, making it a critical piece of any solid Search Engine Optimization (SEO) strategy. By making image optimization a priority, you're sending a clear signal to search engines that your site delivers a quality experience, which helps you climb the search results.
"Images are often the heaviest elements on a web page. Optimizing them is not just a technical task—it's a fundamental part of creating a positive user experience that directly influences your bottom line and search visibility."
A Modern Approach Is Non-Negotiable
Image optimization isn't just about simple compression anymore. By 2025, it's become a cornerstone of website performance, especially for WordPress sites, which now power over 43% of the web. We're in what some experts call the 'millisecond economy,' where speed is a make-or-break business metric.
A modern strategy is about more than just one thing. It's a combination of smart compression, converting images to next-gen formats (like WebP), using adaptive resizing for different devices, and leveraging a global Content Delivery Network (CDN) to serve images from the closest location. You can find more insights on this evolution of image optimization on Topsyde.com.
This holistic approach makes sure that every single visual on your site is delivered as efficiently as possible, no matter what device or where in the world your visitor is. In the next sections, we'll get into the nitty-gritty and walk through the practical steps—the 'how'—to get all of this set up on your own WordPress site.
Preparing Your Images Before You Upload
Smart image optimization starts before you even touch the WordPress media library. If you just upload images straight from your camera or stock photo site, you're setting yourself up for a slow website down the road.
Think of it this way: spending a few minutes prepping your images is the foundation. Plugins can automate and improve things later, but getting the basics right from the start gives you a massive head start. This initial manual work gives you direct control over the most important factors: format, dimensions, and filename. It's not just a "nice-to-have"; it's a core part of any professional workflow.
Choose the Right File Format
Your first decision is what kind of file to use. This choice is a trade-off between file size and visual quality, and there’s no single "best" option. It all depends on what the image is.
- JPEG (or JPG): This is your workhorse for photos. Think hero images, product shots, or anything with lots of colors and gradients. JPEGs use "lossy" compression to shrink file sizes way down, often with no quality difference you can actually see.
- PNG: Reach for a PNG when you need a transparent background or have graphics with sharp, clean lines. Logos, icons, and illustrations are perfect candidates. It uses "lossless" compression, which keeps the quality perfect but usually means a bigger file than a JPEG.
- WebP: Developed by Google, WebP is the modern powerhouse. It can be either lossy or lossless and consistently produces smaller files than JPEGs and PNGs at the same quality. While WordPress supports it, you don't always need to create WebP files yourself—many optimization plugins will handle the conversion for you automatically.
This infographic breaks down the key differences at a glance.
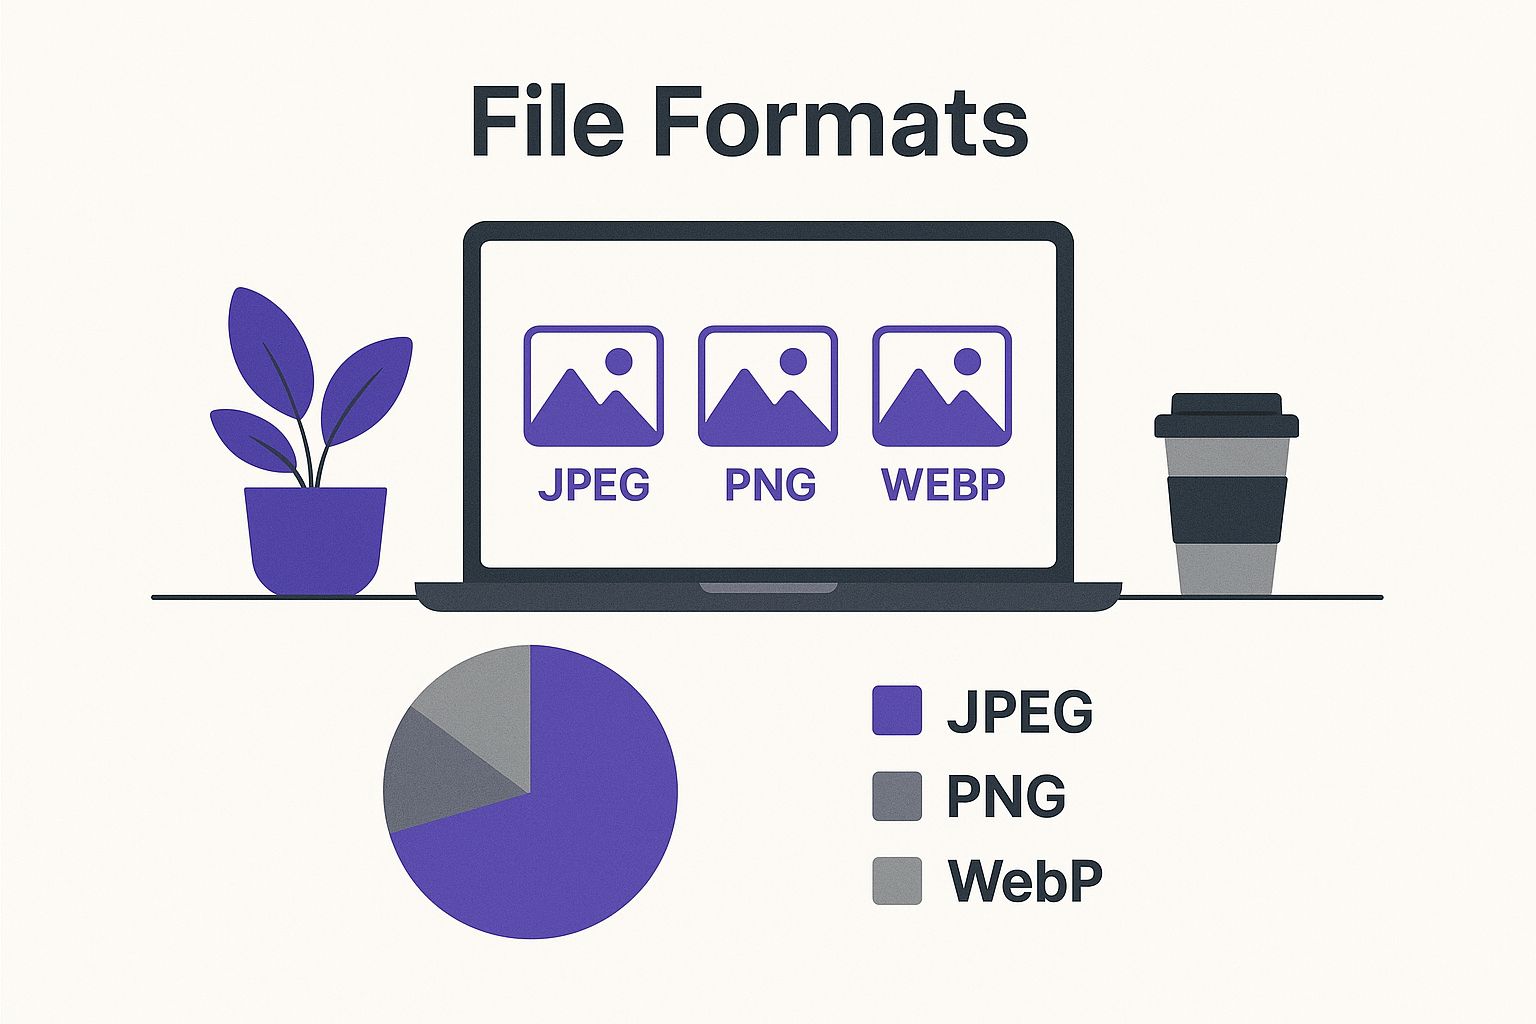
Simply choosing JPEG for photos and PNG for graphics is a powerful, fundamental optimization step that too many people skip.
To make this even clearer, here's a quick table to help you decide.
Choosing the Right Image Format
| Format | Best For | Key Feature | Consideration |
|---|---|---|---|
| JPEG | Photographs, complex images with gradients. | Excellent compression for small file sizes. | Loses a tiny bit of quality with each save (lossy). |
| PNG | Logos, icons, graphics with sharp lines, transparency. | Preserves perfect quality (lossless) and supports transparency. | File sizes are generally larger than JPEGs. |
| WebP | A modern replacement for both JPEG and PNG. | Superior compression and quality; supports transparency. | Not all older browsers support it (though most do now). |
| SVG | Logos, icons, and simple illustrations (vector-based). | Infinitely scalable without losing quality; tiny file sizes. | Not suitable for photographs; can be complex to create. |
Choosing the right format from the get-go prevents you from using a massive file when a much smaller, more efficient one would have worked just as well.
Resize Images to Fit Your Theme
Uploading a 5000×3500 pixel photo directly from your camera is one of the most common and damaging performance mistakes. Your website doesn't need it.
Even if WordPress creates smaller versions, that huge original file is still sitting on your server, eating up storage space.
Before you upload, resize your images to the actual dimensions they'll be displayed at. If your blog's content area is 800 pixels wide, there is zero reason to upload an image that's 2000 pixels wide. Use a free tool like GIMP, Canva, or any online image editor. This one step can slash file sizes by over 90% before compression even comes into play.
Use Descriptive Filenames and Alt Text
Search engines can't see your images, but they can read text. Your filenames and alt text are huge opportunities for SEO and accessibility that shouldn't be wasted.
Stop uploading files named IMG_2025.jpg.
Instead, rename the file to describe what's in it, using keywords naturally. For a bakery website showing off a dessert, a filename like chocolate-lava-cake-dessert.jpg is far better than photo1.jpg.
Likewise, alt text (alternative text) describes the image for screen readers and search engine crawlers. Good alt text is descriptive but straight to the point.
- Bad Alt Text: "cake"
- Good Alt Text: "A rich chocolate lava cake on a white plate with powdered sugar sprinkled on top."
These pre-upload steps aren't just busywork—they have a real impact. Strong image optimization in WordPress is proven to boost SEO and keep users on your site longer. In fact, data from 2025 shows that well-optimized images can increase page views by up to 94% and social media shares by 150%. If you want to dig even deeper into the technical side, we have another great guide for optimizing images for WordPress you should check out.
How to Choose the Right Optimization Plugin
While manually prepping your images is a great start, a solid image optimization in WordPress plugin is what really puts things on autopilot and pushes your site's performance to the next level. The problem? The market is absolutely flooded with options, and it's tough to see past all the marketing hype.
So, instead of just rattling off a list of popular plugins, let's build a practical framework for picking the right tool for your website. This isn't about finding the single "best" plugin—it's about finding the one that fits your site's goals, your comfort level with technology, and your budget. A photographer's portfolio has completely different needs than an e-commerce store juggling thousands of product images.
Key Features to Look For
When you're comparing plugins, a few core features deliver the biggest bang for your buck. I consider these the non-negotiables that separate a basic tool from a true optimization powerhouse.
- Compression Quality and Control: Can you choose between lossy and lossless compression? More importantly, can you fine-tune the compression level? You need that control to find the perfect sweet spot between file size and visual quality.
- Automatic WebP Conversion: This is a big one. A good plugin should automatically convert your images to the modern WebP format and serve them to compatible browsers. You shouldn't have to lift a finger.
- CDN Integration: A Content Delivery Network (CDN) is a must for speeding up image delivery to a global audience. Look for plugins that either have a CDN built-in or play nicely with popular services like Cloudflare or Bunny.net.
- Bulk Optimization: You’ll inevitably need to optimize your entire existing media library. Check how the plugin handles this. Are there limits? Is the process smooth or clunky?
The goal here is total automation. A top-tier plugin should handle resizing, compressing, and WebP conversion for every new image you upload, all running quietly in the background. It should keep your site fast without demanding constant attention.
Comparing the Top Contenders
Let's put this framework to the test with three of the most popular plugins on the market: ShortPixel, Imagify, and WP Smush. Each has its own strengths and is a great fit for different types of users.
ShortPixel is my go-to recommendation for anyone laser-focused on performance. Its compression algorithms are famously aggressive and high-quality, letting you squeeze every last kilobyte out of your images. It also has rock-solid WebP conversion and a reliable CDN.
Imagify comes from the same team behind the WP Rocket caching plugin, and you can tell. It's known for its incredibly user-friendly interface. It strikes a fantastic balance between power and simplicity, which makes it a great choice for beginners who want excellent results without getting bogged down in complicated settings.
WP Smush has been around forever and is a crowd favorite, largely thanks to its generous free version that provides lossless compression for unlimited images. To unlock its most powerful features—like the excellent CDN and its aggressive "Super Smush" compression—you'll need to upgrade to the Pro version.
Real-World Scenarios for Choosing a Plugin
Let's make this super practical with a couple of common examples I've seen over the years.
- For a Photographer's Portfolio: Image quality is everything. You absolutely cannot afford pixelated or blurry photos. For this, a plugin like ShortPixel is ideal. Its "Glossy" compression setting offers a massive reduction in file size with virtually no perceptible loss in quality—perfect for high-resolution photography. You can optimize your entire gallery without compromising your art.
- For a High-Traffic E-commerce Store: With thousands of product images, speed is money. Here, a solution like Imagify or Smush Pro with an integrated CDN is a total game-changer. The CDN ensures your product photos load almost instantly for customers anywhere in the world, smoothing out the buying process and reducing cart abandonment.
The data backs this up. In real-world tests, lossy compression can shrink JPEG file sizes by about 40.6%. For PNGs, the savings are even more dramatic, often reaching up to 83.4% without a noticeable drop in quality. It just goes to show how a well-chosen plugin is a scalable and cost-effective way to supercharge your site's performance.
Beyond the Features
Finally, once you've narrowed it down, think about the user experience. Does the plugin's dashboard make sense to you? Is the pricing model clear—are you paying a monthly fee or buying credits? These little details really matter as your site grows.
And remember, these tools are constantly evolving. Many plugins have been improved to work seamlessly with the latest WordPress updates, as new functionalities are a key part of every major release. It’s always a good idea to stay current by reading up on the new features and improvements in WordPress 6.0. Making the right choice now will save you a ton of headaches down the road and keep your site fast and efficient for years to come.
Alright, you've got your images prepped and a solid optimization plugin doing the heavy lifting. Now it's time to kick things into high gear. This is where we move beyond basic compression and start tapping into modern browser tech to seriously upgrade how your site performs.
The big idea here is simple: stop forcing your visitors' browsers to download every single image on a page the moment it loads. For a long blog post or a gallery page, that "load everything now" approach is a massive waste of resources and one of the biggest culprits behind slow initial page speeds. Let's get smarter about it.
Get on Board with Lazy Loading
If there's one technique you need to know for modern image optimization in WordPress, it's lazy loading. It basically tells the browser to hold off on loading images that are "below the fold"—anything the user can't see yet. As they scroll down, images pop into view and load just in time.
The impact on your initial load time is huge. Instead of trying to grab all 20 images on a page at once, the browser only needs to fetch the two or three that are immediately visible.
- Faster Initial Page Load: This is the big win. It directly boosts perceived performance and improves crucial metrics like Largest Contentful Paint (LCP).
- Saves Bandwidth: You're not just saving your server's bandwidth; you're also helping out visitors, especially those on spotty mobile data plans.
- Less Server Strain: Your server can breathe a little easier when it isn't bombarded with dozens of simultaneous image requests.
Since WordPress 5.5, a basic version of lazy loading has been built right in. But honestly, most optimization plugins like Smush or Imagify give you much better control. They let you exclude certain images (like your logo or a critical hero image) and can even lazy load videos and iframes, which is a game-changer.
Let Responsive Images Do Their Thing with Srcset
Here’s a little secret: WordPress has been handling responsive images for you for years, but most people don't even realize how powerful this is. It uses an HTML attribute called srcset to give the browser a whole menu of different-sized versions of the same image.
The browser then acts like a smart waiter, picking the perfect file based on two things:
- The device's screen size: A huge desktop monitor gets a high-res image, as it should.
- The display density (think retina screens): A fancy new phone with a high-pixel-density screen gets a much sharper image than an older, standard-density screen of the same physical size.
This is huge. It means someone on a tiny smartphone isn't stuck downloading a massive 1920px-wide image that was meant for a desktop. WordPress makes this magic happen automatically by creating several thumbnail sizes every time you upload an image. It's a quiet but absolutely essential part of the image optimization in WordPress ecosystem.
When you pair lazy loading with
srcset, you get a seriously efficient system. The browser first waits to load an image until it's actually needed, and then it picks the perfect size from the available options. It's the key to top-notch performance on any device.
Supercharge Delivery with a CDN
A Content Delivery Network (CDN) is the final piece of the puzzle for world-class speed. Think of it as a global network of servers that keeps copies of your static files, like your images. When someone visits your site, their browser grabs the images from whichever server is geographically closest to them.
For example, if your main server is in Dallas, a visitor from London would normally have to wait for the images to travel all the way across the Atlantic. With a CDN, they'd get them from a server right there in London instead. This massively cuts down on latency—the technical term for the time it takes data to travel.
Most of the top-tier image optimization plugins offer their own CDN, and it's by far the easiest way to set one up. When I'm choosing a plugin, this feature alone can be worth the price of admission. It takes a pretty complex process and boils it down to flipping a single switch. This last step can make a profound difference in your site's performance, a critical factor when you're trying to speed up your Divi website. After all, a fast, globally accessible site isn't just great for users—it's also a huge green flag for search engines.
How to Know if Your Optimization Actually Worked
You’ve spent all this time prepping images, configuring plugins, and tweaking settings. So, how do you actually know if any of it made a difference? The proof is in the data. Measuring your site's performance isn't just some techy task for developers; it's a super straightforward way for anyone to see the real-world impact of their image optimization work.
Running a quick test is the only way to get a clear picture. It takes all the guesswork out of the equation and gives you a data-driven strategy. Plus, it's the perfect way to prove the value of your work and spot any areas that might still need a little love. It all comes down to a simple "before and after" comparison.
First, Establish Your Performance Baseline
Before you flip the switch on that new plugin or bulk-optimize your media library, you need a "before" snapshot. This baseline is your starting point, capturing how your site performs with all its current, unoptimized images.
Head over to a free tool like Google PageSpeed Insights or GTmetrix. It's as easy as plugging in your website's URL and hitting "analyze."
Don't just fixate on the big score at the top. You want to zero in on these specific metrics, as they're heavily influenced by your images:
- Largest Contentful Paint (LCP): This is a Core Web Vital that measures how long it takes for the biggest thing on the screen (usually an image) to load. A massive, unoptimized hero image is almost always the culprit behind a bad LCP score.
- Total Page Size: This is the combined weight of everything on your page, measured in kilobytes (KB) or megabytes (MB). Images are usually the heaviest part, so this number should drop like a rock after you're done.
- Total Page Requests: This counts every single file the browser has to grab to load your page. While it's not just about images, things like lazy loading can definitely lower the initial request count.
Jot these numbers down somewhere. This is the hard data you'll use to show off your success.
Now, Run Your Post-Optimization Test
Once you’ve made your changes—whether that’s activating a plugin, setting up a CDN, or enabling lazy loading—it’s time for the "after" test. Give it a few minutes for any site caching to clear out, then run your URL through the exact same tool again.
You should see some real, tangible improvements right away. Your LCP time should be quicker, your Total Page Size should be way smaller, and your overall performance score will probably get a nice boost. These aren't just vanity metrics; a smaller, faster page makes for a much better experience for your visitors, especially anyone on a mobile connection.
This screenshot from PageSpeed Insights shows you exactly where image optimization can make a huge difference.
The report gives you specific pointers like "Properly size images" and "Serve images in next-gen formats," and even estimates the time you could save.
Interpreting the Results and Fine-Tuning
The "Opportunities" section of your performance report is an absolute goldmine. It doesn't just vaguely tell you your site is slow; it tells you exactly why and gives you actionable steps to fix it.
After optimizing, look for the image-related warnings to disappear. If you had a warning about serving next-gen formats and it's gone after you turned on WebP in your plugin, that's a clear win.
This whole process isn't a one-and-done deal. Think of it more like a regular check-up. Every time you add a bunch of new content and images to your WordPress site, it's a good idea to run these tests again to make sure everything is still humming along nicely. This habit of continuous measurement helps you fine-tune your strategy, confirm your tools are doing their job, and consistently deliver a fast, high-quality site experience.
Answering Your Top Image Optimization Questions
Once you start digging into image optimization in WordPress, a few common questions always pop up. Getting these right can be the difference between a zippy, high-performing site and a slow, frustrating one. Let's cut through the noise and get you the straightforward answers you need.
Think of this as your go-to FAQ for the hurdles you're bound to run into. I've heard these questions countless times, so let's clear them up once and for all.
What's the Real Difference Between Lossy and Lossless?
This is probably the number one question I get, and for good reason. Your choice here directly trades file size for image quality, so it's a critical concept to grasp.
Lossless Compression: Imagine putting a file into a ZIP folder. That's lossless. It shrinks the file by stripping out unnecessary metadata but doesn't touch a single pixel of the actual image. The quality remains 100% identical to the original. This is your go-to for technical diagrams, logos, or icons where every pixel has to be perfect.
Lossy Compression: This method is a bit more aggressive. It cleverly throws away bits of image data that the human eye isn't likely to notice anyway. The result? A much, much smaller file size with a tiny, often imperceptible, drop in quality. For almost any photograph on your website, this is the way to go.
A good lossy compression can slash file sizes by 70% or more with no visible difference to the average user. That's a massive win for your page speed.
Do I Still Need to Resize Images if My Plugin Compresses Them?
Yes. One hundred percent, yes. This is a huge mistake I see people make all the time. Compression and resizing are two completely different things that solve two separate problems.
Resizing changes an image's dimensions—its physical height and width in pixels. If you upload a massive 5000px wide photo from your camera, WordPress has to store that giant file, even if you only ever show it at 800px wide on the page. Compression simply makes the file size of that 5000px image smaller.
Always, always resize your images to the largest size they will ever be displayed on your site before you upload them. Relying on a plugin to handle everything is inefficient, wastes server space, and is just plain lazy. A solid workflow always includes both steps.
Should I Optimize Images Before or After Uploading to WordPress?
This really comes down to your personal workflow and how much hands-on control you want. Both paths are valid.
Optimizing images before you upload gives you total control. Using desktop software like Adobe Photoshop or a quick web tool like TinyPNG lets you manually tweak and review each image to nail that perfect balance between quality and file size. This is the preferred route for photographers, designers, and anyone who's a bit of a perfectionist.
Optimizing after uploading with a WordPress plugin is all about automation and efficiency. It’s the perfect “set it and forget it” system, especially for websites with multiple authors or for anyone who just wants to publish content without worrying about an extra step. The plugin just works in the background, making sure no unoptimized image slips through.
Is a CDN Really Necessary for a Small Website?
For a tiny local blog with an audience in the same town, maybe a CDN is overkill. But for just about everyone else, it's become an incredibly powerful and almost essential tool.
A Content Delivery Network (CDN) does more than just speed up your site for international visitors. It takes a huge load off your main server by delivering all your images from its own global network. This makes your entire site feel quicker and more responsive, even for people browsing from just down the street.
Many of the best image optimization plugins now bundle a CDN for a very reasonable price, making it a no-brainer upgrade for sites of any size. Given the major performance boost you get, it’s almost always worth the small investment.
Ready to create stunning, high-performing popups and interactive content on your Divi site? Divimode provides the tools you need. Check out our powerful plugins and expert tutorials at https://divimode.com to take your website to the next level.
More Articles You Will Like