Adding an Instagram feed to your website isn't just about making it look good; it's a smart move to boost engagement, build trust, and keep your content fresh without any extra work. Think of it this way: instead of a static, quickly outdated photo gallery, a live feed turns your site into a dynamic space that shows off your brand’s latest activity and personality.
This constant stream of new visuals tells visitors you’re active, relevant, and engaged.

Show Off Authentic Social Proof
One of the biggest wins here is the instant social proof. When potential customers see real people using and loving your products, it builds a layer of trust that a canned testimonial just can't match. Featuring user-generated content (UGC) or snaps from influencer collaborations right on your site adds a powerful dose of credibility.
This is a core tactic of modern social media marketing for ecommerce—you’re bringing your social community directly onto your website. It’s a great way to keep visitors clicking around longer, which boosts your site's dwell time and sends positive signals to search engines.
Tap Into a Massive, Engaged Audience
Let's not forget the sheer scale of Instagram. You're connecting your website to a platform with over 2 billion monthly active users, making it the fourth-largest social network in the world.
What's really interesting is that 62.7% of users now turn to the platform to research products before making a purchase. Your website visitors are almost certainly doing this already, so why not bring that experience directly to them? For Divi websites, a live feed transforms this audience into a powerful, automated source of social proof that can lift conversions.
A live Instagram feed acts as a bridge between your social media presence and your primary digital asset—your website. It validates your brand with real-time activity and user engagement, which is far more persuasive than a simple "Follow Us" button.
This approach is just one of many effective strategies you can employ. For more ideas, check out our guide on powerful social media marketing tips. By bringing your social world and your website closer together, you create a much more convincing and cohesive brand experience for every single visitor.
Choosing Your Method: Plugins vs. Manual Embedding
When it comes to putting an Instagram feed on your website, you've really got two main paths to choose from: grabbing a dedicated WordPress plugin or just embedding posts manually, one by one. Each route has its own set of pros and cons, and honestly, the right choice boils down to what you're trying to accomplish.
Think of plugins as the all-in-one toolkit. They're built for convenience and power, letting you craft dynamic, highly customized feeds without needing to write a single line of code. For most people, especially those already comfortable in the Divi ecosystem, this is going to be the most practical and powerful way to go.
The Power of Plugins
A good plugin completely automates the process. Instead of you having to remember to update your site, the plugin just pulls in your latest Instagram posts automatically, keeping your website’s content fresh and relevant with zero effort. Plus, they come loaded with features that are simply impossible to achieve with manual embedding.
Here’s what you typically get in the box:
- Multiple Layouts: Instantly switch between grids, carousels, sliders, or masonry layouts to find the perfect fit for your page design.
- Advanced Customization: Tweak colors, fonts, spacing, and hover effects to make the feed look like a natural part of your brand.
- Content Filtering: You can get really specific. Pull in posts from certain hashtags, showcase user-generated content, or even filter out posts that contain specific keywords.
- Performance Optimization: The best plugins are built with speed in mind, using tricks like image caching and lazy loading so your feed doesn't drag down your site's performance.
If you're new to this whole world, our guide on what a WordPress plugin is and how to use it is a great starting point. And while we're focused on WordPress here, the idea of using third-party tools to add functionality is universal. For instance, merchants on other platforms use the best Shopify apps to increase sales in a very similar way.
When Manual Embedding Makes Sense
On the flip side, Instagram gives you a native "embed" feature that lets you drop a single post right onto your website. It’s incredibly straightforward, but also incredibly limited. You can't create a dynamic grid, and it won't pull in new content for you. You have to go in and embed every single post, one at a time.
So, when would you ever choose this route? Manual embedding is perfect for very specific, targeted uses.
Imagine you're writing a blog post about a client's success story. Embedding their glowing Instagram post right in the middle of that article gives you powerful social proof exactly where it matters most. It’s also a fantastic way to highlight a single major announcement or a really eye-catching photo without the overhead of installing a whole plugin.
The choice comes down to scale and purpose. For a dynamic, ever-fresh gallery that drives engagement, a plugin is unbeatable. For surgical, high-impact placement of a single post, manual embedding is the quick and easy solution.
Making the right choice here lets you tap directly into Instagram's incredible engagement. Business photo posts on the platform see an average engagement rate of around 3%. And with 130 million users clicking on shopping posts every month, embedding that social activity on your site is just smart strategy. By picking the right method, you can translate that buzz into real results for your own website.
How to Add Your Feed Using a WordPress Plugin
For most folks using WordPress and Divi, grabbing a dedicated plugin is easily the smartest and quickest way to get an Instagram feed onto your site. Let's be honest, plugins are built to handle the messy stuff—like API connections and content updates—while giving you a ton of design options that you just can't get by manually embedding a post. They turn what could be a technical headache into a pretty simple process.
I'll walk you through the typical setup using a solid plugin like Smash Balloon's Social Photo Feed as our example. The steps are pretty much the same for most quality Instagram plugins, so you can follow along even if you end up choosing a different one.
This diagram really simplifies the two main paths you can take.
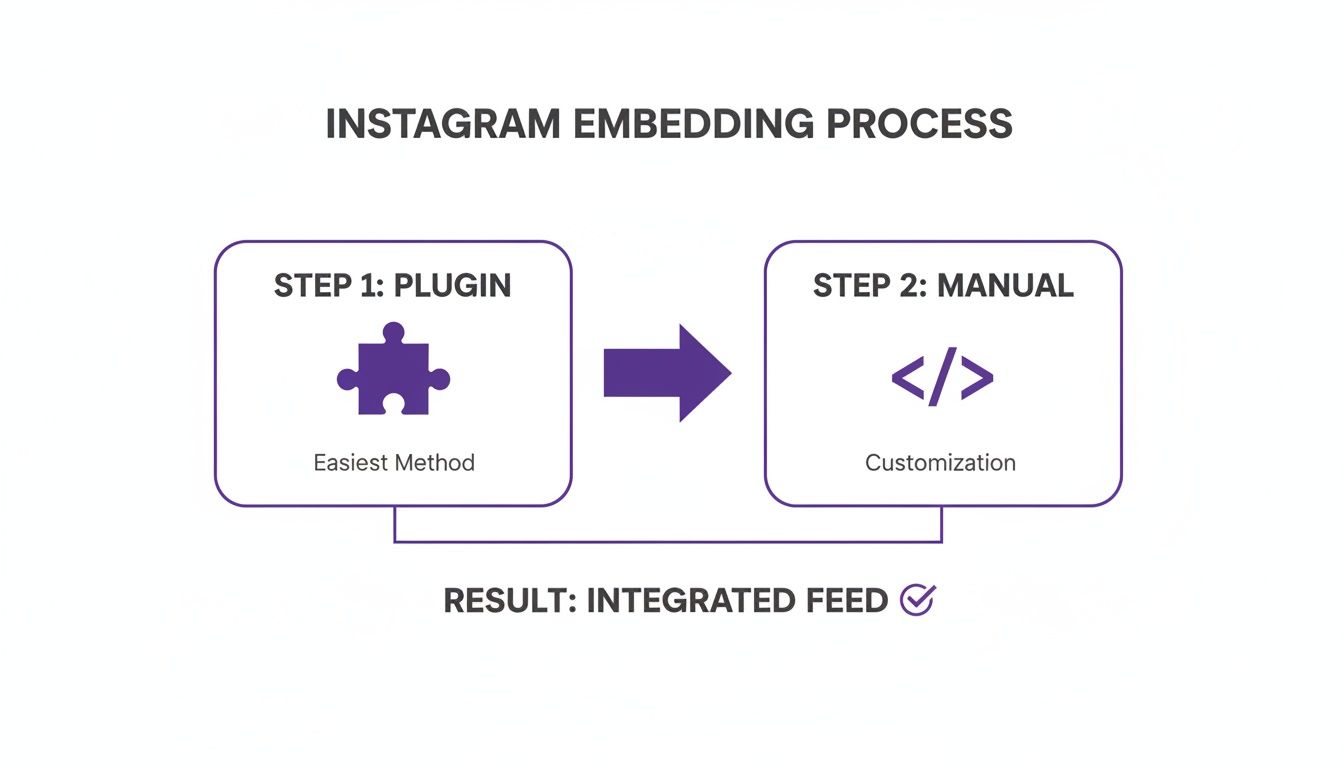
As you can see, the plugin route is all about an automated, feature-packed experience. The manual approach? That’s really just for dropping in a single, specific post.
Installation and Activation
First things first, you need to get the plugin installed. Head over to your WordPress dashboard and navigate to Plugins > Add New. Search for the plugin you've chosen, hit "Install Now," and then "Activate." This will usually add a new menu item to your dashboard, either under its own name or tucked away in the "Settings" tab.
This new area is your command center for everything related to your feed.
Connecting Your Instagram Account
With the plugin active, it'll immediately ask you to connect your Instagram account. This is the most important part of the setup, as it gives your website official permission to pull in your photos and videos through the Instagram API.
Most plugins today use a secure method called oAuth. You'll be sent over to Instagram's official site to log in and approve the connection. This is the safest way to do it because you never actually type your Instagram password into the plugin itself.
Pro Tip: I can't stress this enough—only use plugins that connect via the official API and oAuth. This keeps your connection stable and compliant with Instagram's rules, so your feed doesn't suddenly break when they push an update.
Once you grant permission, Instagram sends an access token back to your website. Think of this token as a secure key that proves your site has the right to access your feed. The plugin saves this key and uses it to automatically fetch your new posts.
Configuring Your First Feed
Now for the fun part. With your account linked, you can start building your feed. The plugin will likely ask you what kind of feed you want to create—a standard user timeline, posts from a public hashtag, or maybe posts you've been tagged in.
From there, you’ll dive into the customization settings. You can usually tweak things like:
- Layout: Choose from a classic grid, a sliding carousel, or a more modern masonry style.
- Columns and Posts: Decide how many columns you want and the number of photos to show.
- Image Spacing: Adjust the gap between images for a tight, seamless look or something more spaced out.
After you save your settings, the plugin will give you a unique shortcode. It’ll look something like [instagram-feed]. This little snippet of code is what you'll use to place the feed on your site.
Adding the Feed to a Divi Page
If you're a Divi user, this last step is a breeze. Just edit the page where you want the feed to show up and fire up the Divi Builder.
Add a Code module to your layout. All you have to do is paste the shortcode you just generated directly into the module’s content box.
Save your changes, exit the builder, and that’s it! Divi will process the shortcode, and your styled Instagram feed will appear right where you placed it. The best part about this method is the flexibility—you can drop that Code module into any column or row, giving you total control over how it fits within your page design.
Styling Your Feed to Match Your Brand
Once you’ve got your Instagram feed displaying on your website, the real work begins: making it look like it actually belongs there. An out-of-the-box, default style can feel jarring, breaking the visual harmony of a site you’ve spent hours designing. The goal is to create a seamless experience where your feed enhances your brand, not distracts from it.
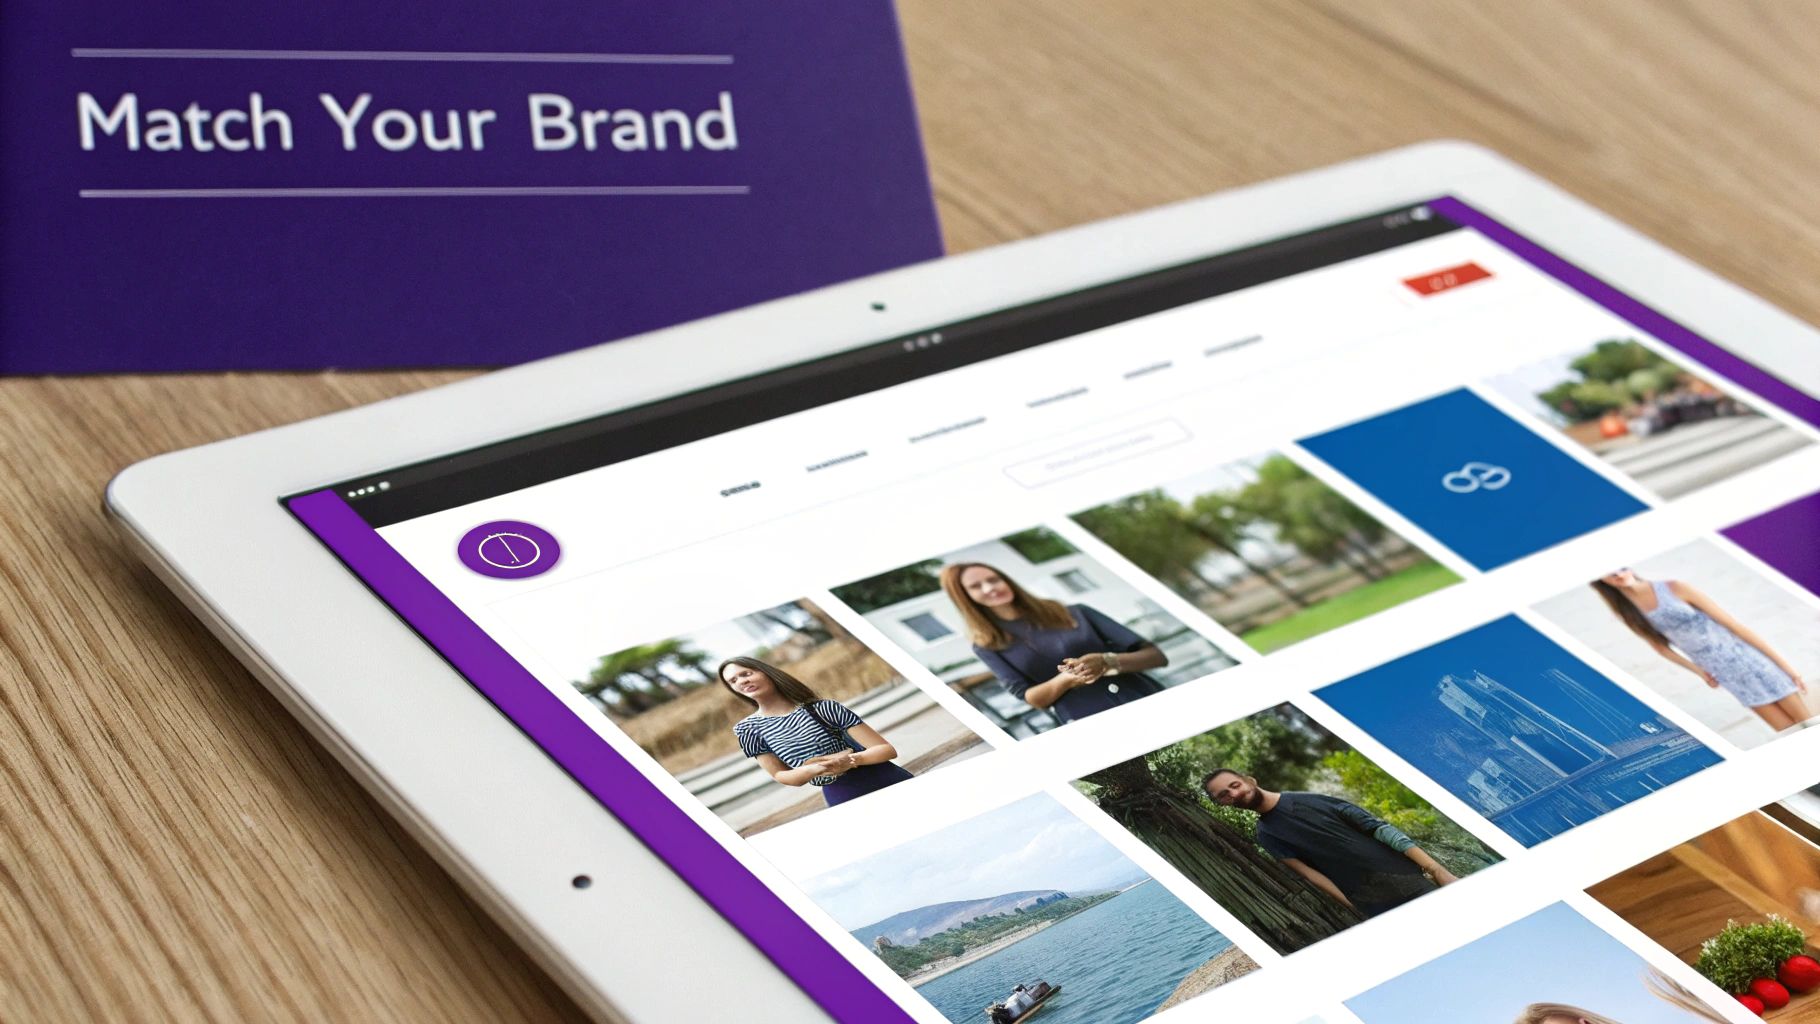
Thankfully, most quality plugins come with a solid set of built-in styling controls. You don't need to be a coding wizard to make some pretty significant visual tweaks that bring everything in line with your brand identity.
Mastering Built-In Plugin Styles
Before you even think about cracking open a stylesheet, dive into the customization panel of whatever plugin you chose. This is where you'll find the low-hanging fruit for brand alignment. I’ve seen luxury brands use these settings to create clean, minimalist grids with tons of white space, while vibrant travel blogs have opted for colorful, gapless masonry layouts that pop off the page.
Look for these common settings to start dialing in your design:
- Color Palette: Tweak the colors for the header, buttons (like 'Follow' or 'Load More'), and hover effects. Match them to your website’s primary and accent colors for instant cohesion.
- Typography: Many plugins let you either pick from Google Fonts or, even better, inherit your theme’s fonts. This is a huge win for maintaining a consistent look.
- Header Design: You can usually customize or completely hide the feed’s header. This often includes changing the profile picture shape, text size, and how the bio is displayed.
Your feed’s styling is a direct reflection of your brand's attention to detail. A cohesively styled feed tells visitors that every part of their experience on your site has been thoughtfully considered, which builds subconscious trust and professionalism.
Taking a few minutes to configure these basic options can transform a generic widget into a polished, professional element that feels custom-built for your Divi website.
Elevating Your Design With Custom CSS
For designers and developers who want total control over every pixel, custom CSS is your best friend. Most plugins assign specific classes to the feed elements, making it surprisingly straightforward to target and style them.
Inside Divi, you can add these CSS snippets to your child theme's style.css file or drop them directly into the Divi > Theme Options > Custom CSS box.
Here are a few practical ideas to get you started:
- Custom Hover Effects: Add a subtle zoom or a color overlay when someone hovers over an image. It's a small touch that makes your feed feel more interactive.
- Minimalist Aesthetic: Want a clean, image-focused gallery? Use CSS to hide elements like like-counts or photo captions.
- Responsive Adjustments: Refine how the feed looks on mobile. You might want to force a 2-column layout on smaller screens or adjust the spacing so it doesn't feel cramped.
By combining the user-friendly plugin settings with some targeted CSS, you can ensure your Instagram feed doesn't just display your content—it elevates your entire website design and reinforces your brand identity. Honestly, this level of polish is what separates an average site from a truly great one.
Optimizing Your Feed for Speed and User Experience
Adding a dynamic Instagram feed shouldn't come at the cost of your website's performance. A slow-loading site is a surefire way to frustrate visitors and take a hit on your SEO rankings, so it’s something you need to tackle from the get-go. After all, what good is a beautiful feed if it drives people away before it even loads?
The biggest performance killer, by far, is trying to load a dozen high-resolution images all at once. This is exactly where a well-coded plugin proves its worth, as any good one will have optimization features baked right in to prevent this very problem. Your goal is simple: make the feed enhance the user experience, not drag it down.
The Non-Negotiables: Lazy Loading and Caching
The single most important feature you should look for is lazy loading. It’s a clever technique that puts off loading images until a user actually scrolls down the page and they’re about to come into view. This means only the first few visible images are loaded initially, which can dramatically slash your page's initial load time.
Next up is caching. A solid plugin will cache the feed data, essentially storing a temporary copy so it doesn’t have to ping Instagram’s servers every single time someone loads the page. This cuts down on external requests and makes everything feel snappier. You can even double down on this by using a site-wide caching plugin like WP Rocket, which will work right alongside your feed plugin to serve a saved version of the page.
Pro Tip for Divi Users: For maximum performance on critical pages like your homepage, try placing your Instagram feed inside a Divi Area that's triggered by a button click. This keeps the feed's code completely off the initial page load; its assets only get loaded when a user explicitly chooses to see it.
Proper image compression is also a huge piece of the puzzle. To really get into the weeds on this topic, check out our comprehensive guide on image optimization in WordPress.
Navigating Privacy and Compliance
When you include an Instagram feed on your website, you're handling user data, and that immediately brings privacy regulations like the GDPR into the picture. If your feed is set up to showcase user-generated content (like from a hashtag), you absolutely must have their consent to feature their posts on your site.
Here are a few key points to keep in mind:
- Consent is Key: Always, always get permission before featuring someone else's post. This is especially true if it's from a private account or you're pulling from a public hashtag feed.
- Plugin Compliance: Stick to plugins that are GDPR-compliant. They often come with built-in features like a consent checkbox or are designed to avoid collecting unnecessary user data in the first place.
- Privacy Policy: Make sure you update your website's privacy policy. You need to disclose that you're embedding content from Instagram and mention what data might be collected by third-party services.
By balancing a sleek design with smart performance tactics and a thoughtful approach to privacy, you can create a feed that not only looks great but also contributes positively to your site’s health and builds trust with your audience.
Frequently Asked Questions About Instagram Feeds
When you’re trying to get an Instagram feed running on your website, a few common questions always seem to pop up. Getting the answers right from the start makes the difference between a smooth integration and a major headache.
Let’s walk through some of the most frequent sticking points I see people run into.
Do I Need an Instagram Business Account to Embed a Feed?
Yes, you almost certainly do. For any modern plugin that taps into the official Instagram API, a Business or Creator account is non-negotiable these days. Instagram has tightened the screws on API access for personal accounts, mostly for security and privacy reasons.
The good news? Switching your personal profile over is completely free. Plus, it unlocks a whole suite of analytics tools, which is a smart move anyway if you’re using Instagram for any kind of serious marketing.
Will an Instagram Feed Slow Down My Website?
It absolutely can if you’re not careful, but it doesn’t have to. The biggest drag on your site's speed comes from loading a ton of large, unoptimized images all at once.
A well-coded plugin is your best defense here. You’ll want to look for a couple of key performance features:
- Image Caching: This stores a temporary copy of your feed, so your site doesn’t have to fetch everything from Instagram’s servers every single time someone visits.
- Lazy Loading: This is a game-changer. It makes sure images only load when a user actually scrolls them into view, which makes the initial page load feel lightning-fast.
By far, the most common reason for a broken feed is an expired API connection. Instagram makes you re-authenticate every so often for security. Your first troubleshooting step should always be to pop into your plugin’s settings and hit the "Reconnect Account" button.
Can I Display Posts from a Specific Hashtag?
You bet, and this is where things get really interesting for building social proof. Many of the better Instagram feed plugins let you pull in posts based on public hashtags, not just from your own profile.
This is perfect for showing off user-generated content, running a marketing campaign, or creating a live community gallery right on your site. Just double-check that the plugin you're considering actually supports hashtag feeds—it’s often a feature that separates the free versions from the paid ones. Confirming this upfront will save you a lot of trouble later.
At Divimode, we build tools that help you create more engaging and effective websites. Our Divi Areas Pro plugin makes it easy to add dynamic popups, fly-ins, and other interactive elements that work perfectly with your new Instagram feed. Learn how Divimode can elevate your Divi site.
More Articles You Will Like