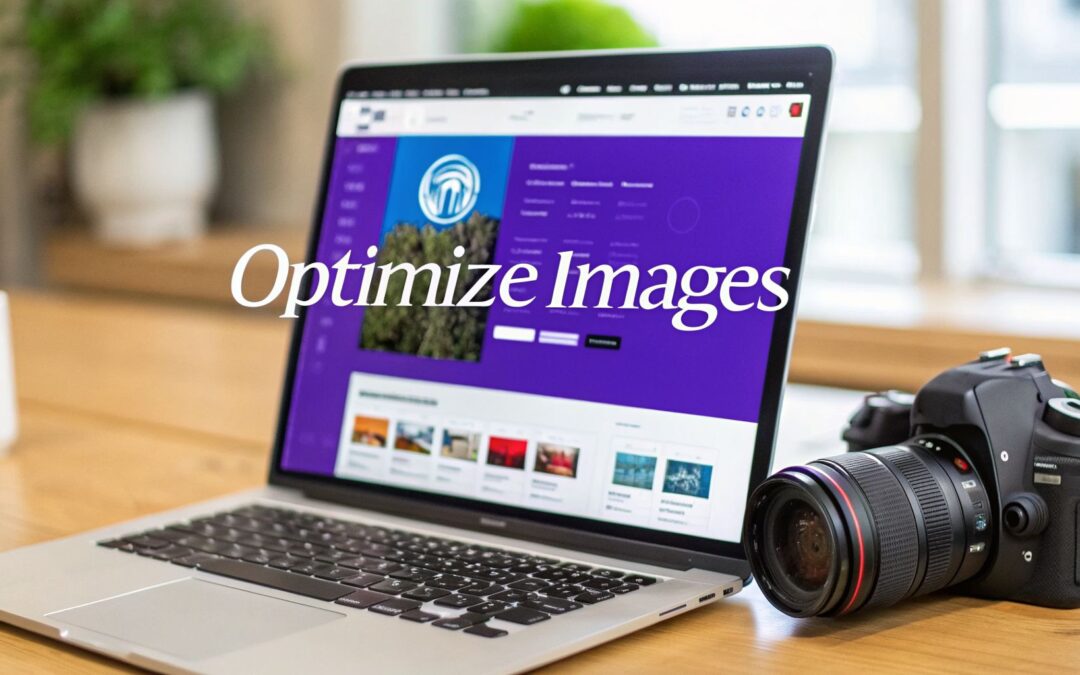
If your Divi site feels like it’s wading through mud, there's a good chance unoptimized images are the culprit. It's a classic performance bottleneck. The quickest, most effective fix is a solid WordPress image optimize plugin. This isn't just about shaving a few kilobytes; it's about fundamentally improving how your site performs, which directly impacts user experience and even your SEO.
How Unoptimized Images Are Slowing Down Your Divi Site
Every gorgeous, high-resolution image you drop into a Divi layout comes with a hidden cost: file size. When a visitor hits your page, their browser has to download every single one of those files. Bigger files mean longer download times. Longer download times mean a slower website. And that delay? It’s the number one reason people bounce.
This is a particularly sharp pain point for Divi users. The very nature of the Divi builder encourages us to create rich, visually-driven designs. Think full-width sliders, immersive background images, and detailed portfolio galleries. These are fantastic for engagement, but without proper management, they can quickly pile on megabytes to your page weight.
The Real-World Impact on Performance
Slow-loading images aren’t just a minor annoyance for your visitors; they actively damage your site's technical health. Search engines like Google are watching, and they use metrics called Core Web Vitals to judge performance. Oversized images are notorious for causing poor scores, especially for Largest Contentful Paint (LCP), which measures how long it takes for the main content to appear. A bad LCP score is a direct signal to Google that your page feels slow, and that can tank your search rankings.
For a WooCommerce store built with Divi, this performance hit translates directly into lost revenue. Slow product pages are a sales killer, leading to higher cart abandonment. When a customer is waiting for product images to load, their patience—and your potential profit—is draining away.
Across the web, images are the biggest bandwidth hog on most WordPress sites, often making up a staggering 60% of total page size. By tackling this with a good plugin, you can see an average 30% speed boost. It’s the difference between a sluggish, frustrating page and a snappy, professional experience.
Of course, unoptimized images are just one piece of the performance puzzle. For a broader look at improving your site's speed, it's worth exploring other ways to speed up your WordPress site.
Ultimately, a WordPress image optimization plugin does more than just shrink files. It’s a core part of a professional workflow that ensures your beautiful Divi designs load fast, keep visitors engaged, and rank well. To get the full picture, check out our complete guide on optimizing images for WordPress.
How to Choose the Right WordPress Image Optimize Plugin
Picking a WordPress image optimization plugin can feel like wading through a sea of options. They all promise a faster site, but the reality is, the right one for you comes down to your specific needs and workflow. Not all plugins are built the same, and figuring out the key differences upfront will save you a ton of headaches later.
The first big decision you'll face is the type of compression: lossless or lossy. Lossless is like a perfectly packed suitcase—it shrinks the file size without tossing out any visual information. Lossy compression is more aggressive. It strategically removes tiny bits of data, often invisible to the human eye, to achieve much, much smaller file sizes.
For most websites, especially those built with Divi or running WooCommerce, a smart lossy compression setting offers the best of both worlds. It delivers a serious speed boost while keeping your product photos and portfolio pieces looking sharp.
Key Features to Compare
When you start comparing plugins, you need to look beyond just the compression settings. A solid image optimization plugin is a full-on workflow tool, designed to automate the tedious stuff and improve your site's performance across the board.
Here’s what I always look for:
- Automatic WebP Conversion: WebP is a modern image format that provides way better compression than old-school JPEGs and PNGs. A good plugin will automatically create and serve WebP versions of your images to browsers that support it. This is one of the easiest performance wins you can get.
- CDN Integration: A Content Delivery Network (CDN) is a game-changer. It stores copies of your images on servers all over the world, delivering them from whatever location is closest to your visitor. This is a must-have for slashing load times for a global audience.
- Bulk Optimization: This one’s non-negotiable. If you have an existing site with a big media library, you need a way to optimize everything with a single click.
- Image Resizing: The plugin should be smart enough to automatically resize huge image uploads to a reasonable maximum width and height. This stops editors from accidentally uploading massive, unoptimized files straight from their camera.
This flowchart really drives the point home. If your site is slow, dealing with your images is often the most direct path to a fix.

As you can see, a dedicated plugin is the most straightforward solution for the "Unoptimized Images" problem, leading directly to a faster site.
Comparing the Top WordPress Image Optimization Plugins
To help you decide, I’ve put together a quick comparison of the most popular and reliable plugins I’ve used in my own projects. Each has its own strengths, so it really comes down to your budget and specific feature needs.
| Feature | Smush | Imagify | WP-Optimize |
|---|---|---|---|
| Compression Types | Lossless, Lossy (Pro) | Lossless, Lossy, Ultra | Lossless, Lossy |
| WebP Conversion | Yes (Pro) | Yes | Yes (Premium) |
| CDN Delivery | Yes (Pro) | Yes | No |
| Free Tier Limit | Unlimited (5MB max) | 20MB / month (~200 images) | Up to 5MB file size |
| Premium Pricing | Starts at $3/month | Starts at $5.99/month | Starts at $49/year |
This table gives you a snapshot, but let’s dig a little deeper.
Popular Plugins and Their Strengths
The WordPress plugin market is massive—it's projected to be worth $2.38 billion in 2025 and is on track to hit $4.6 billion by 2033. Image optimization tools are a huge piece of that pie.
For example, a plugin like Smush has over 1 million active installations, largely because its free version is so generous. You get unlimited optimizations for images under 5MB. For Divi and WooCommerce users who need more power, its Pro version unlocks unlimited file sizes, faster processing, and that all-important CDN.
Imagify is another one of my go-to recommendations. It’s known for its incredibly simple interface and its "Ultra" compression level, which can shrink file sizes down to almost nothing without totally destroying the quality. Its pricing is based on credits, which can be super cost-effective if you don't upload a ton of images every month.
Ultimately, the choice between them often comes down to your budget and which specific features you can't live without. If you want to really get into the nitty-gritty of how this all works, be sure to check out our detailed guide on how to compress images for the web.
Setting Up Your Plugin for Peak Performance

Simply installing a WordPress image optimization plugin is a good start, but it's not the whole story. The real magic happens when you dive into the settings and tailor them to your site's specific needs.
Think of it like this: you wouldn't drive a new car without adjusting the mirrors and seat, right? This initial setup is where you unlock the true power of automated optimization, turning a basic tool into a performance machine. The settings you choose will strike a balance between image quality and file size, and with a few key tweaks, you can get the best of both worlds.
Let’s walk through the essential configurations that will make a real difference for your Divi site.
Nailing the Compression Level
Your first big decision is the compression level. This single setting has the most significant impact on your file sizes, and most plugins give you at least two main options.
Lossless Compression: This approach shrinks file sizes without removing a single pixel of data. The quality stays 100% identical to the original, but the size reduction is pretty modest—usually around 10-25%. It's the go-to choice for photographers or e-commerce sites where crystal-clear detail is non-negotiable.
Lossy Compression: This is the real workhorse for web performance. Lossy compression smartly removes tiny bits of data that the human eye can't even see, leading to massive file size reductions. We're talking 50-80% or even more. For the vast majority of Divi websites, a well-tuned lossy setting is the perfect fit.
Pro Tip: Don't let the word "lossy" scare you. It sounds destructive, but modern algorithms are incredibly sophisticated. I always recommend starting with a medium lossy setting and then checking your images. You'll probably be shocked at how much smaller they get with no visible drop in quality.
Oh, and one more thing—most plugins offer an option to back up original images. Always, always turn this on. It's your safety net. If you overdo the compression, you can easily restore the originals and try again.
Enabling Smart Resizing and WebP
Beyond compression, a couple of other settings can massively improve both your workflow and your site speed.
First up is automatic resizing. This feature is a lifesaver. It stops you (or your clients) from uploading enormous 5000-pixel images straight from a camera. You can set a maximum width and height, like 1920px, and the plugin will automatically downsize any larger uploads before doing anything else. This one setting alone can prevent your media library from getting clogged with giant, unnecessary files.
Another game-changer is WebP conversion. WebP is a modern image format that delivers much smaller file sizes than JPEGs and PNGs at the same visual quality. When you activate this, the plugin serves these zippy WebP files to compatible browsers, giving you an instant speed bump.
For Divi users focused on nailing their Core Web Vitals, these settings aren't just nice to have; they're essential. A well-configured optimization plugin can slash page sizes, which has a huge positive impact on Largest Contentful Paint (LCP) and PageSpeed scores. One study even saw a site's LCP plummet from a painful 25.7s to just 5.6s after proper optimization.
You can find more details about these performance tests and their impressive results in this in-depth analysis. And if you want to learn more techniques, check out our guide on how to optimize your WordPress speed.
Automating Your Image Optimization Workflow
The best optimization strategy is the one you don’t even have to think about. Manually crunching every single image before you upload it? That’s a chore that’s easy to forget, especially when you’re on a deadline.
This is where the real magic of a WordPress image optimization plugin comes in. Its true power isn’t just compressing one or two images; it's creating a fully automated, ‘set it and forget it’ system that hums along quietly in the background. This setup ensures every image you upload is perfectly optimized the second it hits your server, keeping your site fast without adding a single extra step to your workflow. For anyone with a busy schedule, this isn't just a nice-to-have—it's essential for long-term performance.
Setting Up Automatic Optimization for New Uploads
First things first, let's get your plugin to handle all future images for you. Dive into your plugin's settings, and you'll find an option labeled something like "Automatically optimize new uploads." Go ahead and switch that on. This is non-negotiable.
Once that's active, any time you or a client drops an image into the WordPress Media Library, the plugin will jump into action and instantly:
- Resize the image to your pre-set maximum dimensions.
- Apply your chosen compression level.
- Whip up a WebP version, if you've enabled it.
This hands-off approach guarantees that no bloated, uncompressed image ever makes it to a live page. Imagine a team member uploads a 10MB photo straight from their phone—a common scenario. With automation, the plugin intercepts it, shrinks it down to a sensible 200KB, and dodges a major performance bullet before it can even cause a problem.
The goal is to build a system where best practices are the default. By automating optimization, you're creating a safety net that protects your site's speed, no matter who is uploading content.
Tackling Your Existing Media Library
Automation is fantastic for everything new, but what about the hundreds (or thousands) of images already chilling in your Media Library? This is where bulk optimization becomes your new best friend.
Every serious image optimization plugin comes with a tool to process your entire library in one fell swoop. You’ll usually find it under a tab named "Bulk Smush," "Bulk Optimize," or something similar. For any existing website, running this is a must. It combs through every image you’ve ever uploaded and applies your current optimization settings, effectively retrofitting your whole site for speed.
A quick heads-up: this process can be a bit heavy on your server. To avoid timeouts, especially on shared hosting, most plugins are smart enough to run it in the background, processing images in small batches. My advice? Kick it off and let it do its thing, even if it takes a while. The performance payoff is huge, turning a library full of digital speed bumps into a collection of lean, fast-loading assets. This one-time task can give your Core Web Vitals a significant boost across your entire site.
Optimizing Images in Divi and WooCommerce

Installing an image optimization plugin is a huge first step. But things get a little more interesting when you’re working with powerful tools like Divi and WooCommerce.
These platforms have their own quirks. To get the best results, you need to make sure your optimization plugin plays nicely with them. Otherwise, you risk running into visual glitches or leaving performance gains on the table.
For Divi users, the most common headache I see is with lazy loading. It's fantastic for initial page speed, but it can sometimes fight with dynamic elements like sliders, image galleries, or those big, beautiful full-width background images—especially if they’re at the top of the page.
An overly aggressive lazy load setting can make these crucial visuals "pop" into view awkwardly. This creates a jarring layout shift, which is terrible for your site's Cumulative Layout Shift (CLS) score and just feels unprofessional.
The fix is usually pretty simple. Dive into your plugin's settings and find the option to exclude specific images or CSS classes from lazy loading. For instance, if your hero image has a class like .home-hero-image, just add that to the exclusion list. Your most important, above-the-fold content will load instantly, while everything else is still deferred for maximum speed.
Tuning Performance for WooCommerce
With WooCommerce, we're not just talking about speed—we're talking about sales. Product images are your digital storefront, and slow-loading photos will absolutely tank your conversion rates.
Countless studies have confirmed that even a one-second delay in page load time can slash conversions by 7%. On an e-commerce site, that’s a direct hit to your bottom line.
Your main goal here is to find the perfect balance between compression and quality for your product shots. You need tiny file sizes so your category pages fly, but you can't sacrifice the detail customers need to feel confident enough to buy.
A smart approach is to use a slightly more aggressive lossy compression for thumbnail images, which can handle it. For the main, zoomable product images, dial it back a bit to preserve every last pixel of detail.
Here’s a practical workflow I use for WooCommerce sites:
- Compress Product Images: Use a smart lossy setting that shrinks file sizes without any noticeable blurriness. I always aim to get high-quality product shots under 200-250KB.
- Optimize Thumbnails: Make sure your plugin is hitting all the different thumbnail sizes WooCommerce creates. These little images load everywhere and their file sizes add up quickly.
- Go All-In on WebP: Convert every single product image to WebP. This serves smaller, next-gen files to modern browsers and is a game-changer for mobile shoppers.
- Test Your Lazy Loading: Double-check that lazy loading is working smoothly on category pages, loading new product images as the user scrolls down the page.
By fine-tuning your WordPress image optimization plugin for Divi’s layouts and WooCommerce's commercial needs, you turn a simple utility into a genuine business asset. You end up with a site that not only loads faster but delivers a smoother, more engaging experience that directly helps you achieve your goals.
Your Image Optimization Questions, Answered
As you dive in, it’s totally normal to have a few questions about how these WordPress image optimization plugins actually work. Let's clear up some of the most common ones so you can get started with confidence.
Will an Image Optimization Plugin Make My Images Look Blurry?
Not if you set it up correctly. The whole game is about finding the right balance with your compression level.
Think of it like this: "Lossless" compression trims the file size with zero change in visual quality, while "lossy" compression gets you much bigger savings by removing tiny bits of data your eyes will likely never miss.
For most websites, a smart lossy setting is the sweet spot. Plus, almost every top-tier plugin gives you the option to back up your original images. It’s a great safety net—you can always roll back if you feel the compression is a little too aggressive for your taste.
Can I Optimize Images Already on My Website?
Absolutely. This is honestly one of the most powerful features of any good image optimization plugin.
Keep an eye out for a "Bulk Optimization" or "Bulk Smush" setting. This feature scans your entire WordPress Media Library and applies your chosen settings to every single image you've ever uploaded.
It's a critical first step for any established website looking for a performance boost. Most plugins are smart enough to run this process in the background, tackling images in small batches so it won’t crash your server.
This bulk optimization feature is non-negotiable for anyone inheriting an older site or finally getting around to tackling performance. It’s a one-and-done task that can dramatically improve your site-wide Core Web Vitals scores.
What Is WebP and Why Is It Important?
WebP is a modern image format built by Google specifically for the web. It offers far superior compression, meaning WebP images are significantly smaller than the JPEGs or PNGs you're used to—often 25-35% smaller—while keeping the same (or even better) visual quality.
A quality optimization plugin will automatically create these next-gen WebP versions for you and serve them to browsers that can handle them (which is most of them these days). It's a huge speed advantage, and you don't have to do any extra work.
Do I Still Need an Image Optimization Plugin with Fast Hosting?
Yes, you definitely do. Here’s a good analogy: fast hosting is like having a wide, perfectly smooth highway. Image optimization is like making sure all your cars are lightweight and aerodynamic.
Even on the best highway in the world, a fleet of heavy trucks will always move slower than a fleet of race cars.
Fast hosting makes sure the data transfer is quick, but it doesn't reduce the amount of data that needs to be sent. Image optimization shrinks the actual file sizes, working together with your hosting to deliver the fastest possible experience—especially for visitors on slower mobile connections.
Ready to create high-performing, interactive websites? At Divimode, we build powerful plugins and provide expert guidance to help you succeed with Divi. Learn more at https://divimode.com.
More Articles You Will Like