Before we jump into the how of installing WordPress plugins, it's really important to get a handle on the why. What makes them so essential?
Think of plugins as apps for your website. They’re little bundles of code that snap into your WordPress site to add new features—like a contact form, a full-blown e-commerce store, or powerful SEO tools—all without you ever having to write a single line of code. This simple but powerful concept is exactly what makes WordPress so incredibly flexible.
Why WordPress Plugins Are Your Website's Secret Weapon
Plugins are the building blocks that let you transform a basic WordPress site into a custom, feature-rich platform tailored to your exact needs.
For instance, a blogger might install Yoast SEO to get a better handle on their Google rankings. A small business, on the other hand, could use WooCommerce to launch a complete online store. Each plugin has a specific job, letting you add new functionality piece by piece as your site grows and your needs change.
This modular approach is one of the biggest reasons for WordPress's global dominance. It has created a massive ecosystem of tools, giving you an option for just about any feature you can imagine.
What’s Possible with Plugins?
Honestly, the possibilities are almost endless. Once you know how to install plugins, you can:
- Add a contact form to start capturing leads.
- Create an e-commerce store to sell physical or digital products.
- Bolster your site's security with a firewall plugin.
- Optimize every page and post for search engines.
- Build stunning, custom page layouts with a drag-and-drop builder.
Understanding how these tools fit into your overall strategy is key. The right plugins are a huge part of how website design and development choices can boost your brand, tying everything together.
The true power of WordPress isn't just the core software itself; it's the ability to extend it infinitely with plugins. Mastering how to install them is your first real step toward unlocking all that potential. To get a better grasp of the fundamentals, check out our guide on what a WordPress plugin is and how to use it.
The sheer scale of the plugin library is mind-boggling. As of 2025, the official WordPress directory hosts over 60,000 free plugins. This incredible variety is a huge reason why WordPress now powers an estimated 43.4% of all websites on the internet. This ease of customization makes the platform approachable for everyone, from total beginners to seasoned developers. You can find more stats like this in this detailed WordPress report.
Choosing the Right Plugin Installation Method
Knowing how to install a WordPress plugin is one thing, but choosing the right method for your situation is a whole other ballgame. Not every installation path is created equal. The best approach really boils down to where you're getting the plugin from and how comfortable you are with the techy side of things.
For the most part, you'll be using one of three main methods.
The most common and straightforward way is to search the official WordPress directory right from your dashboard. This is perfect for beginners and anyone looking for the thousands of free, vetted plugins out there. It's my go-to for adding common features like a contact form or a caching tool because it's fast, safe, and simple.
Picking Your Installation Path
Of course, sometimes the plugin you need isn't in the official directory. This is almost always the case for premium plugins you've purchased from marketplaces or directly from a developer's website.
In these situations, you'll download a .zip file of the plugin. From there, you just use the uploader in your WordPress dashboard. It's a simple drag-and-drop process, but you obviously need to have the file on your computer first. A similar logic applies when you're working with premium themes, which you can see in our guide on how to update the Divi theme.
Finally, there's the old-school manual approach using FTP (File Transfer Protocol). This method is definitely for more advanced users or when you're in a troubleshooting jam. If a bad plugin ever locks you out of your dashboard or crashes your site, FTP is often the only way back in to manually add or remove the problematic files.
This handy little decision tree gives you a simple way to decide which plugin to choose based on its rating and compatibility.
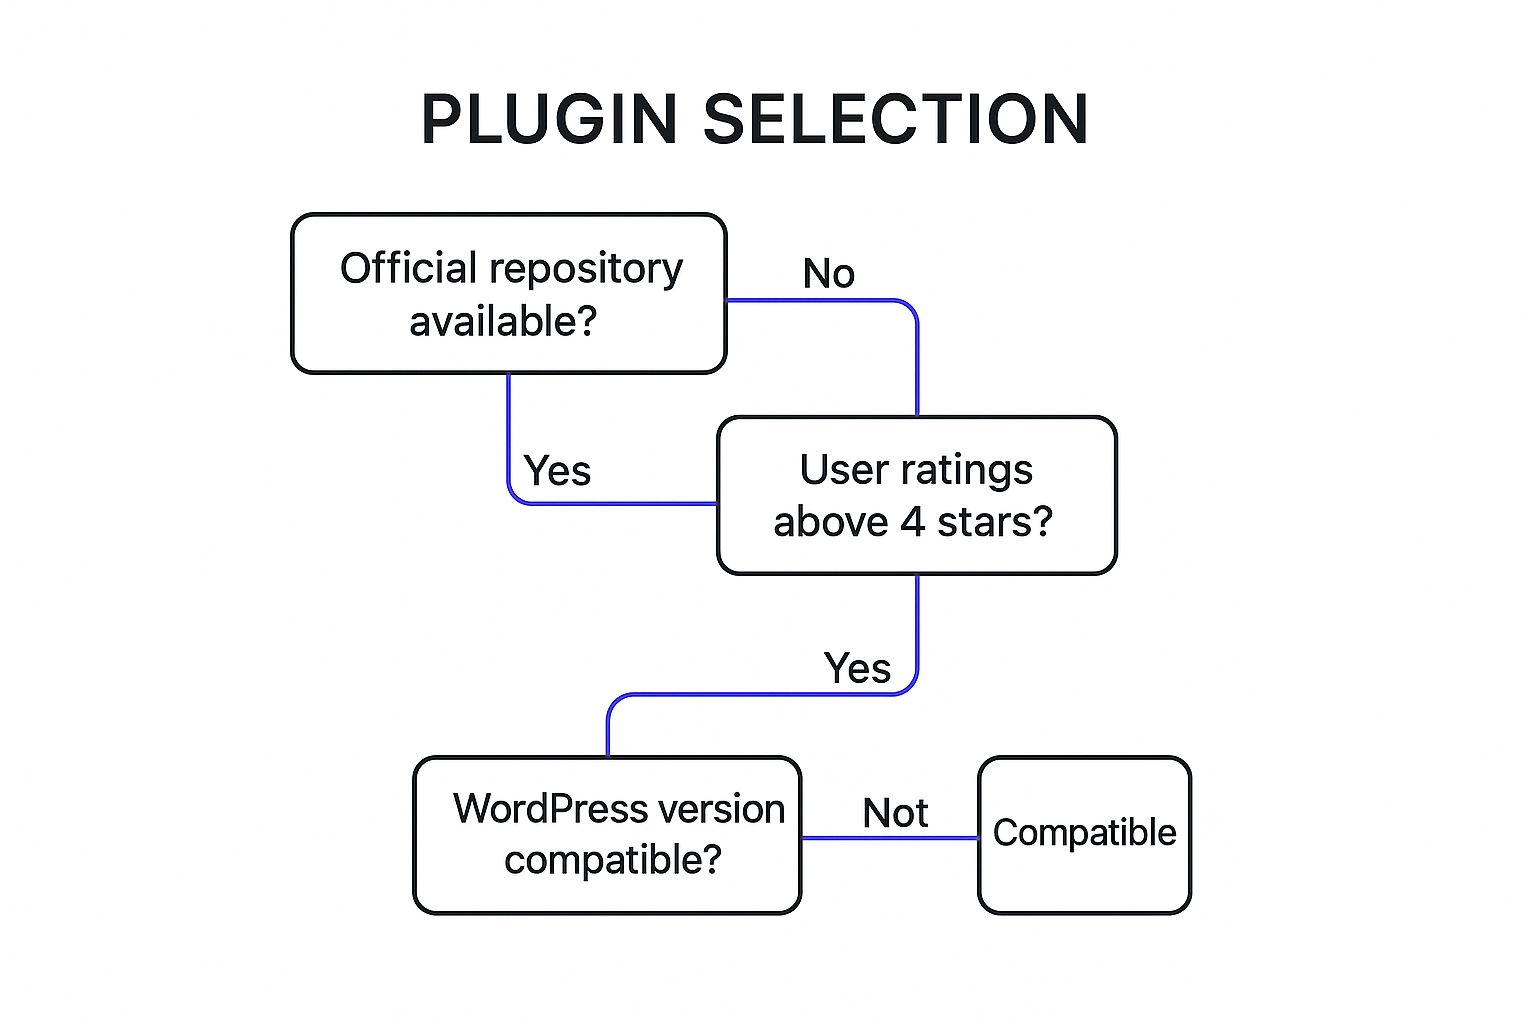
Following a visual guide like this can help you quickly filter out potentially problematic plugins before you even click "install."
To help you choose the best installation method for your needs and technical comfort level, I've put together a simple side-by-side comparison.
Comparing WordPress Plugin Installation Methods
This table should make it easy to see, at a glance, which approach is the right one for your current task.
| Method | Best For | Difficulty Level | When to Use It |
|---|---|---|---|
| Dashboard Search | Beginners & exploring free plugins from the official repository. | Easy | You need a trusted, free plugin like an SEO tool or a contact form. |
| ZIP File Upload | Installing premium plugins or custom-built plugins. | Easy | You've just purchased a plugin from a developer and have the .zip file. |
| FTP (File Transfer Protocol) | Advanced users, developers, and critical troubleshooting. | Medium | Your site is down, and you need to manually delete a broken plugin. |
At the end of the day, you'll likely use the dashboard search and ZIP upload methods 99% of the time. Think of FTP as your emergency toolkit—you might not need it often, but you'll be glad you know how to use it when things go wrong.
Using the WordPress Dashboard for Easy Installation
If you're just getting started with WordPress, the dashboard is absolutely the best place to begin your plugin journey. It’s the most straightforward and secure method because you’re pulling plugins directly from the official WordPress Plugin Directory—a massive library of thousands of free, pre-vetted tools.

From your WordPress admin area, just find Plugins in the left-hand menu and click Add New. This opens up a searchable library of every free plugin available. Let's walk through a real-world example: say you want to install a popular tool like Yoast SEO.
All you have to do is type "Yoast SEO" into the search bar on the top right. WordPress will instantly pull up the results, and Yoast will almost certainly be the first one you see. But hold on—don't just click "Install Now" quite yet. This is where a little bit of due diligence can save you a ton of headaches down the road.
Vetting a Plugin Before You Install
Before you add any new code to your website, it pays to take just a moment to check a few key details right on the plugin's listing. I've found this simple habit can prevent a lot of performance issues or security risks.
Here's what I always look for:
- Active Installations: This number tells you how many websites are currently using the plugin. A huge number (like 5+ million for Yoast) is a massive signal of trust and reliability in the community.
- Star Rating: Just like with any app, the user rating gives you a quick snapshot of overall satisfaction. I always aim for plugins with consistently high ratings from a large number of users.
- Last Updated: This one is critical. A plugin that was updated recently shows the developer is actively maintaining it, patching security holes, and keeping it compatible with the latest version of WordPress. If it hasn't been touched in over a year, I’d strongly recommend finding an alternative.
Once you’re confident in your choice, go ahead and click the Install Now button. WordPress handles all the backend work, downloading the plugin files to your server. When it’s finished, that button will change to say Activate. This final click is what actually turns the plugin on and makes its features available on your site.
After activation, you'll usually find the plugin's settings in a new spot on your main admin menu or tucked away under "Settings" or "Tools." This is where you'll go to start configuring everything. For instance, if you were setting up something more specialized like popups on a Divi site, you'd head to the plugin's new dashboard to build them out. You can learn more about that process in our guide on how to install popups for Divi.
Uploading a Plugin as a ZIP File
While searching the WordPress directory is great for freebies, the moment you buy a premium plugin from a developer or a marketplace like CodeCanyon, it'll almost always land in your downloads folder as a .zip file. This is the standard way to get your hands on more advanced tools.
Luckily, installing it is just about as easy as searching for one.
From your WordPress admin dashboard, head over to Plugins > Add New. Instead of typing in the search bar, look right at the top of the page for the Upload Plugin button. Go ahead and click it.
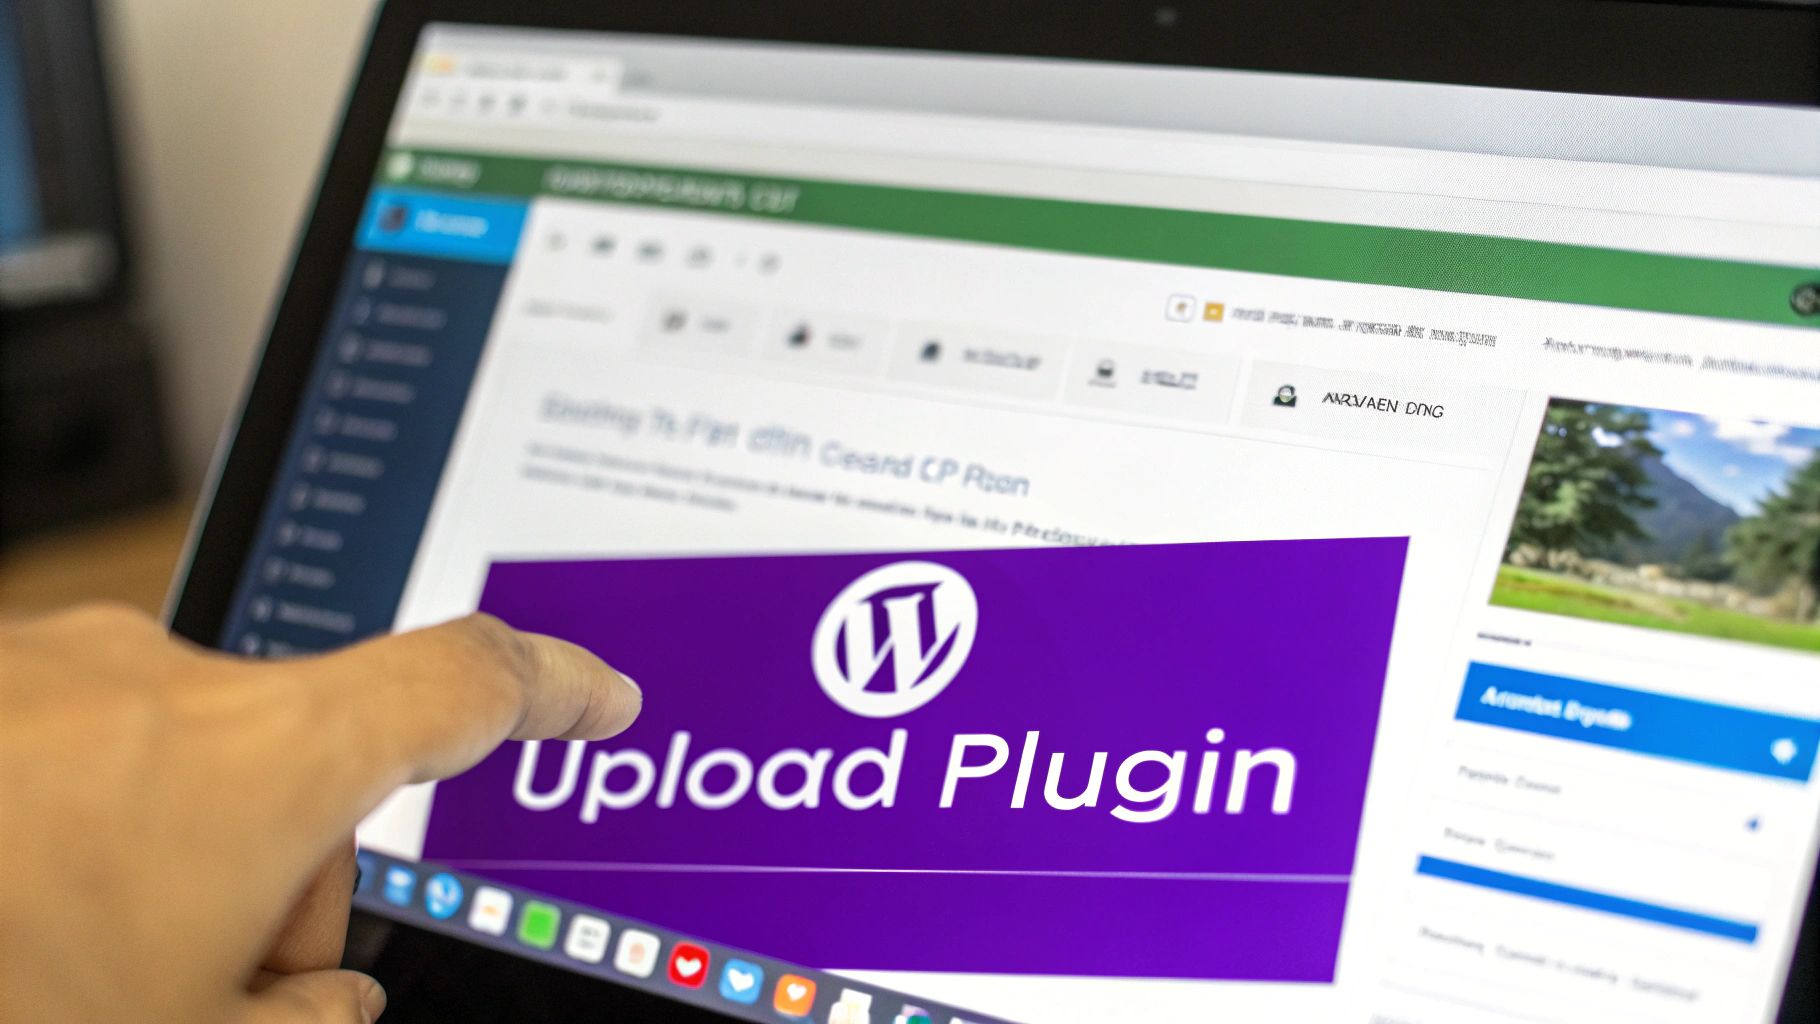
This will pop open a simple file uploader.
The Most Common Mistake to Avoid
Here’s a pro-tip that trips up so many people when they're starting out: do not unzip the file yourself.
I've seen it happen countless times. Your computer might be set up to automatically unzip archives when you download them, but WordPress needs that original, intact .zip package to work its magic. If you try to upload the unzipped folder, you'll just get a "no valid plugins found" error. It's frustrating, but an easy fix.
Always upload the exact
.zipfile you downloaded. Just click "Choose File," find that.zipon your computer, and hit "Install Now." WordPress handles the unpacking and installation for you. Once it's done, you'll see a success screen—just click "Activate Plugin" to switch it on.
This method of installing plugins is a massive part of the WordPress ecosystem, contributing to the staggering 2.4 billion total plugin installations worldwide as of 2025. This number really drives home how essential plugins are for building modern websites. If you're curious, you can dig into more WordPress statistics on sqmagazine.co.uk.
After you activate it, poke around your main admin menu or look under the Settings tab. That's usually where you'll find the new plugin's options, ready for you to configure.
Going Old School: Installing a Plugin with FTP
Sometimes, the easy way just isn’t an option. Maybe a rogue plugin locked you out of your WordPress dashboard, or you’re battling a server with strict file permissions that kill every upload attempt. When the dashboard fails you, it's time to go direct.
This is where knowing how to install a WordPress plugin via FTP (File Transfer Protocol) becomes a lifesaver. It’s a bit more hands-on, but it's a rock-solid method that bypasses the WordPress admin area completely.
You'll need an FTP client—FileZilla is a popular free choice—and your FTP login details from your web host. Once you’re connected to your server, you'll see a directory of all your website’s files. It’s time to find the right spot.
Finding the Plugins Folder
First, you need to navigate to the root folder of your WordPress installation, which often looks something like public_html. Inside, you'll find a folder named wp-content. This is the treasure chest where WordPress stores all your themes, uploads, and—you guessed it—plugins.
Crack open the wp-content folder, and right there you’ll see the plugins directory. This is your destination.
Now, for the important part. Before you do anything else, find the plugin’s .zip file on your computer and unzip it first. Then, just drag and drop the entire unzipped plugin folder from your desktop directly into the plugins directory in your FTP client.
Heads up: This is the complete opposite of the dashboard upload method. With FTP, you must upload the unzipped folder, not the
.zipfile. It's a small detail, but it’s the number one thing that trips people up.
Believe it or not, this manual FTP process used to be the only way to install plugins back in the day. The modern WordPress dashboard turned a technical chore into a few clicks, a user-friendly shift that helped it grow to power over 43% of all websites. You can find more cool tidbits about WordPress's history over at wpzoom.com.
For the developers out there managing multiple sites, there's an even faster way: WP-CLI (WordPress Command-Line Interface). It lets you manage everything from the terminal. A single command like wp plugin install regenerate-thumbnails --activate can download and activate a plugin in seconds. It’s a massive time-saver for anyone comfortable on the command line.
Got Plugin Questions? We've Got Answers
Even with the best instructions, you're bound to run into a few questions when you start installing WordPress plugins. It happens to everyone. Let's walk through some of the most common ones so you can handle any curveballs with confidence.
A lot of people's first worry is what to do when an installation goes sideways. The good news is, it's almost never a disaster.
What Should I Do If a Plugin Installation Fails?
First off, don't panic. Take a close look at the error message, as it usually tells you exactly what’s wrong. A classic one is the "destination folder already exists" error. This just means you need to pop into your site via FTP and manually delete the old plugin folder before trying again.
Other common culprits include:
- Server file permission issues: Sometimes your server is just a bit locked down and prevents WordPress from adding new files.
- Low memory limits: Your hosting plan might not have enough memory to handle the installation process.
- A plugin conflict: Another active plugin on your site might not be playing nicely with the new one.
If a quick retry doesn't solve it, falling back on the FTP method we covered earlier is your most reliable plan. It’s the go-to manual approach for a reason.
How Many Plugins Are Too Many?
Ah, the age-old WordPress question. The answer hasn't changed: it’s about quality, not quantity. I've seen a single, poorly coded plugin absolutely cripple a site's performance, while another site hums along perfectly with 20 well-built ones.
Your focus should always be on necessity and performance. Only install plugins you genuinely need from developers you trust. A great habit to get into is testing your website's speed before and after adding a new plugin—it’s the only way to measure its real impact.
Once you get the hang of installing plugins, the next logical question is which ones to install. If you're looking to boost your search engine visibility, for example, checking out the 12 best SEO plugins for WordPress is a great starting point. Just remember the golden rule: only add what brings real value to your site and your visitors.
At Divimode, we specialize in building high-quality plugins like Divi Areas Pro that add powerful features without bogging down your site. Check out our tools to create advanced popups, fly-ins, and more.
More Articles You Will Like