Want to show events, schedules, or your availability right on your website? One of the easiest and most effective ways is to integrate a Google Calendar. The simplest route is using Google's own embed code—a little snippet of HTML you grab from your calendar settings and drop right into your site. This method is incredibly fast and requires zero coding knowledge.
Why You Should Integrate Google Calendar With Your Website

Putting a Google Calendar on your site turns it from a static page into a dynamic, interactive hub. I’ve seen small business owners use this to brilliantly showcase upcoming workshops or appointments. Community managers can create a central, always-updated schedule for local events.
The real magic here is the automation. You update your calendar in one place, and it updates everywhere, instantly. This kills redundant data entry and guarantees your audience always sees the most current information. For a quick and reliable setup, the native iframe embed is the way to go.
Comparing Google Calendar Embedding Methods
To give you a quick lay of the land, let's look at the main ways to get a Google Calendar on your site. Each has its pros and cons, depending on what you need.
| Method | Technical Skill Required | Customization Level | Best For |
|---|---|---|---|
| Simple Iframe Embed | None (Copy & Paste) | Low | Quick, easy, and reliable display of public calendars. |
| Responsive Iframe | Basic (HTML/CSS) | Medium | Ensuring the calendar looks good on all devices, especially mobile. |
| API Integration | High (JavaScript/Backend) | High | Fully custom calendar designs and interactive features. |
| WordPress Plugins | Low to Medium | Varies by plugin | WordPress users who want a streamlined, integrated solution. |
As you can see, the simple iframe is the perfect starting point for most people. It's straightforward and gets the job done with minimal fuss.
The Power of the Iframe Method
Think of the iframe as a window on your webpage that looks directly into your Google Calendar. This method has been a web developer's staple since Google rolled it out back in 2009. It lets you display a single calendar or even overlay multiple, color-coded calendars into one consolidated view.
Because this method just shows Google’s own interface, you sidestep complex security headaches like managing OAuth tokens or event-write permissions on your site. That makes it a solid, secure choice for public displays. It's a time-tested approach used by a community of over 500 million monthly users.
My Takeaway: The iframe embed is the fastest path to getting a live, functional calendar on your website. It’s a secure, read-only solution that requires no programming skills, making it accessible to everyone.
Getting Started with the Basics
This guide will kick off by walking you through how to find that embed code and tweak the essential settings, like the default view (month, week, or agenda) and time zone. Getting these fundamentals down is crucial because they form the foundation for every other method. Once you master the simple embed, you'll have the confidence to tackle more advanced customizations down the road.
Beyond just embedding, having robust syncing is key to keeping your site's calendar fresh. For anyone managing more complex schedules, exploring different syncing options with Google Calendar can unlock even greater efficiency. We'll give you the core skills to get a calendar live, setting the stage for more powerful techniques.
Mastering the Standard Iframe Embed
The standard iframe embed is the fastest, most direct way to get a Google Calendar onto your website. Think of it as opening a simple, live window to your schedule right on your webpage. The best part? It requires absolutely no complex coding. If you can copy and paste, you can do this.
But before you can embed anything, you have to tell Google that it’s okay for the public to see your calendar. This is the single most common stumbling block I see people run into. Get this setting wrong, and your calendar will either fail to appear or just show "Busy" with no actual event details.
Making Your Calendar Public
First, head over to your Google Calendar. On the left side, under "My calendars," find the one you want to share. Hover over it, click the three-dot menu that appears, and select "Settings and sharing."
Once you’re in the settings, look for the "Access permissions for events" section. This is the crucial part. You must check the box that says Make available to public. Just below that, a dropdown menu will appear. For a public event calendar where you want people to see what's happening, you’ll want to select See all event details.
A Quick Privacy Tip: Be very careful about making a personal calendar public. To avoid accidentally sharing private appointments, I always recommend creating a brand new, dedicated calendar just for your website. This gives you a clean slate and ensures you only share what you intend to.
Finding and Customizing the Embed Code
With the permissions correctly set, scroll down to the "Integrate calendar" section in that same settings menu. You'll see a box labeled "Embed code." This is the HTML snippet you'll need. But don't just grab it yet—let’s make it your own first.
Click the Customize button. This opens a new window where you can fine-tune how your calendar will look and function on your site.
This tool is incredibly useful because it lets you match the calendar's appearance to your website's style without writing a single line of code.
Deconstructing the Customization Options
The customization panel gives you control over several key elements. Let's break down what each one does and why it matters for embedding a Google Calendar on your site.
- Title: You can give your calendar a title, which shows up at the top. Or, uncheck the box to hide it for a cleaner, more integrated look. I usually hide it.
- Show/Hide Elements: You get toggles for the navigation buttons, date, print icon, tabs, calendar list, and time zone. For a minimalist design, I often hide everything except the navigation buttons and the date.
- Default View: This one is a big deal. You can set the calendar to initially display in Month, Week, or Agenda view. The Agenda view is perfect for listing upcoming events in a simple, scannable format.
- Dimensions: You can set a fixed width and height here. Don't worry too much about this for now; we'll override it later with CSS to make the calendar fully responsive.
- Color Scheme: You can change the background color and add a border to better match your website's branding. It's a simple tweak that makes the embed feel less like a generic Google product and more like a part of your site.
As you make these adjustments, you'll see the embed code at the top of the page update in real-time. Once you're happy with how it looks, copy the entire <iframe> code.
Making Your Embedded Calendar Responsive
Here’s the catch: the default iframe code from Google is not perfectly responsive. On mobile devices, it can easily break your layout or cause frustrating horizontal scrolling. We can fix this with a tiny bit of CSS. The goal is to make the iframe scale proportionally with the screen size.
First, you'll need to wrap the iframe code you copied in a container <div>. Give this container a specific CSS class, something memorable like google-calendar-wrap.
Here’s what the HTML structure will look like:
Next, pop the following CSS into your website's stylesheet. This code targets our new wrapper and the iframe inside it, creating a responsive container that maintains its aspect ratio.
.google-calendar-wrap {
position: relative;
padding-bottom: 75%; /* 4:3 aspect ratio */
height: 0;
overflow: hidden;
}
.google-calendar-wrap iframe {
position: absolute;
top: 0;
left: 0;
width: 100%;
height: 100%;
}
This little CSS trick is a game-changer. It forces the iframe to fill its container while maintaining a 4:3 aspect ratio. You can adjust the padding-bottom percentage for different ratios if you need to. Now, your embedded Google Calendar will look great on any device, from a wide desktop monitor to a small smartphone screen.
Custom Integration With the Google Calendar API
The standard iframe method is fantastic for getting a calendar on your site quickly, but it’s essentially just a read-only window. If you want to build a truly interactive experience, you’ll need to step beyond the iframe and connect directly to the Google Calendar API. This approach opens up a world of possibilities that a simple embed just can’t touch.
I like to think of the iframe as a framed picture of your calendar hanging on your website's wall—you can look at it, but that's about it. The API, on the other hand, is like having a direct phone line to the calendar itself. You can read events, create new ones, update appointments, and even set up push notifications.
This is where you can build powerful, custom solutions. Imagine a booking system where a user fills out a form on your site, and the appointment is instantly created on your Google Calendar. Or picture a completely unique event display, styled with custom CSS and JavaScript to perfectly match your brand. That's the power of the API.
The infographic below shows the simple iframe process, which is a great starting point before you dive into the more advanced API integration.
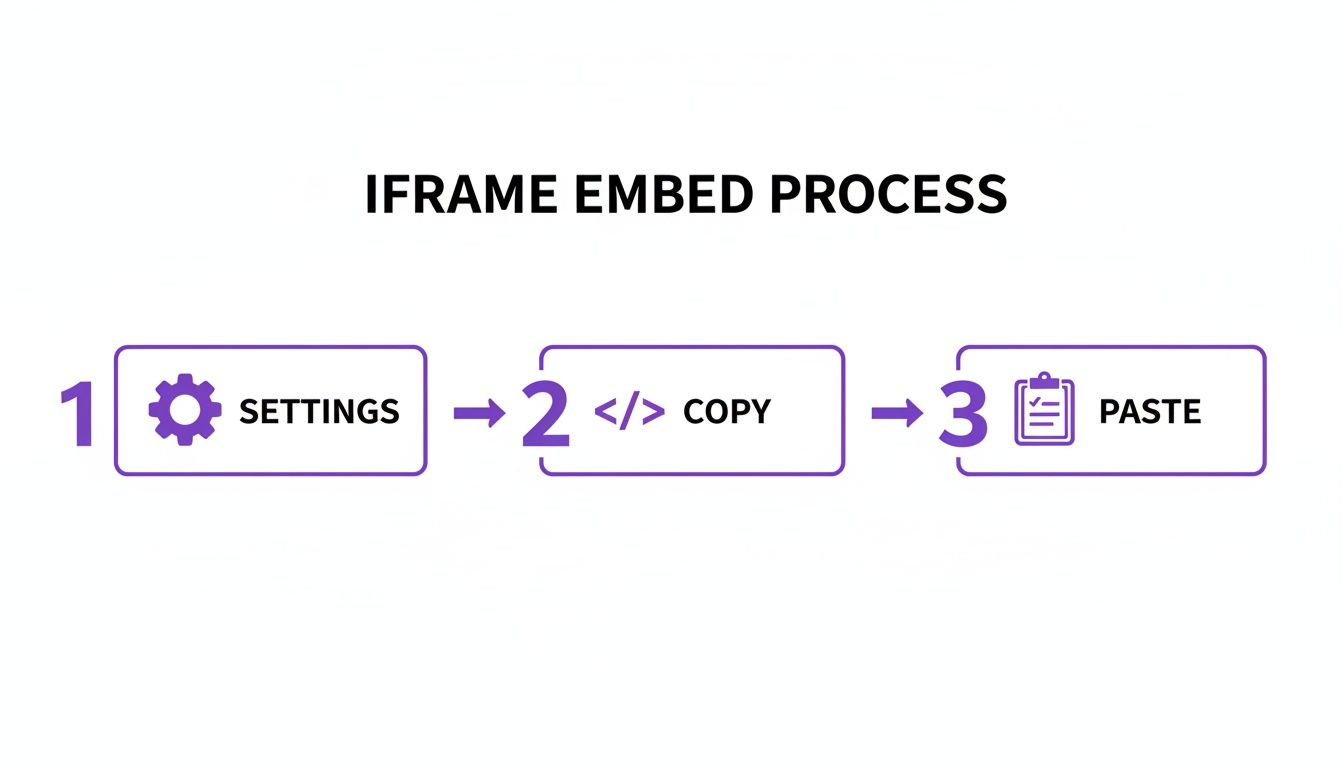
As you can see, the iframe is a straightforward copy-and-paste job. The API is a different beast entirely, but the payoff is well worth the effort.
Setting Up Your API Credentials
Before you can make your first API call, you need to set up a secure connection through the Google Cloud Platform (GCP). It sounds more intimidating than it really is. Your GCP project is just a central hub where you’ll manage API access, keep an eye on usage, and handle billing if you go beyond the free quotas.
First, you'll create a project and enable the Google Calendar API for it. Next, you need to create credentials. You have two main choices here:
- API Keys: These are simple encrypted strings, best for server-to-server requests where you only need to access public data (like reading events from a public calendar). They're easier to implement but less secure.
- OAuth 2.0 Credentials: This is the go-to method for accessing private user data. It uses a consent screen where the user explicitly grants your application permission to access their calendar. This is the industry standard for apps that let users manage their own calendars through your site.
Choosing the right credential type is a critical security decision. If you're only displaying public events, an API key is fine. But if users will be booking appointments or managing their schedules, you must use OAuth 2.0 to protect their data.
Navigating Security and Scopes
When you use OAuth 2.0, you have to define scopes, which are basically the permissions your app requests from the user. For instance, you might request a read-only scope to display their calendar or a read/write scope to let them create new events.
My rule of thumb is to always follow the principle of least privilege. Only request the permissions you absolutely need. If your app just needs to display events, don't ask for permission to delete them. This builds trust with your users and minimizes potential security risks.
Handling user data comes with serious responsibility. Mismanaging scopes or exposing your credentials can lead to privacy nightmares. Always store your API keys and client secrets securely on your server—never in your frontend code where they can be exposed. If you're new to this, it's worth exploring how to use the JS API to understand how client-side scripts should interact with server-side credentials securely.
Understanding API Limits and Quotas
The Google Calendar API isn't a free-for-all; Google enforces usage limits, known as quotas, to prevent abuse and ensure the service stays stable for everyone. The free tier is generous, but for high-traffic sites, you absolutely need to plan for it.
A busy booking site, for example, might make several API calls for a single appointment—one to check availability, another to create the event, and a third to send a confirmation. Being efficient with your requests is key. You can use strategies like:
- Caching: Store calendar data temporarily on your server to cut down on the number of times you need to fetch it from Google.
- Batching: Group multiple API requests into a single HTTP request to reduce overhead.
- Webhooks: Instead of constantly polling the API for updates, use push notifications to have Google tell you when an event changes.
Managing your API usage is crucial for a stable integration. A site serving 10,000 weekly booking attempts with five API calls each could generate roughly 2 million calls per month, making quota planning essential. From my experience, implementing smart strategies like caching can cut down on redundant API calls by 30–60%, which is vital for avoiding service interruptions and unexpected costs.
Platform-Specific Tips for WordPress and Divi
While the standard iframe method works on pretty much any website, WordPress users—and especially those building with Divi—have some more specialized tools in their back pocket. The WordPress ecosystem is packed with plugins designed to make embedding a Google Calendar a breeze, and a powerful theme builder like Divi gives you surgical control over placement and styling.
Let's dig into some platform-specific strategies, starting with plugins that can automate a lot of the heavy lifting. Then, for those who like a more hands-on approach, we'll explore how to use Divi's own modules for a completely custom and seamless integration.
Streamlining with WordPress Plugins
For many WordPress site owners, a dedicated plugin is the path of least resistance. These tools often do much more than just embed a calendar; they can offer event management right from your WordPress dashboard, advanced styling options, and automatic syncing.
A popular choice is Sugar Calendar, which enables a one-way sync from your Google Calendar. This is super handy—any event you add or update on Google just shows up on your website automatically.
Here’s a quick rundown of why a plugin might be the right call for you:
- Ease of Use: Most plugins have a simple setup. You often just need to paste a secure iCal URL and you're good to go.
- Enhanced Features: Many offer custom calendar views, event filtering, and extra details like locations or descriptions, all without writing a single line of code.
- Dashboard Integration: You can manage your calendar’s look and feel, and sometimes even the events themselves, directly inside your WordPress admin area.
Just keep in mind that the really powerful features, like the Google Calendar import, usually require a pro version of the plugin. This route is perfect if you want a feature-rich calendar without touching code and you're willing to invest in a premium tool.
Direct Embedding within the Divi Builder
If you're a Divi user who prefers to keep your plugin list lean, the Divi Builder has everything you need for a clean, responsive embed. This method gives you total control over the calendar's placement and lets you style it using the modules you already know and love. It's quick, lightweight, and leverages Divi's powerful design settings.
The key here is using Divi’s Code module. This is where you’ll pop in the iframe embed code you grabbed from your Google Calendar settings.
Here’s the best way to do it:
- Add a Code Module: Drop a Code module into any column, row, or section where you want the calendar to live.
- Paste the Iframe Code: Open the module's settings and paste the entire
<iframe>snippet from Google Calendar straight into the content box. - Apply Responsive CSS: Remember that CSS trick for making the iframe responsive? Divi makes this incredibly easy. Just navigate to the row settings, go to the Advanced tab, and add the responsive CSS to the Custom CSS fields for the Main Element. This keeps your custom code neatly organized right within the Divi layout.
This approach gives you pixel-perfect control. You can tuck the calendar into a narrow sidebar, stretch it across a full-width section, or even place it inside a tab or accordion module for a more compact look. To get the most out of Divi's modules and structure, checking out a comprehensive guide on the Divi page builder can offer deeper insights into creating sophisticated layouts.
Pro Tip: For an even more dynamic experience, try placing the Code module inside a Divi popup. This keeps your main page looking clean and uncluttered, making the full calendar available with a simple button click.
Creating an On-Demand Calendar with Divi Areas Pro
A fantastic trick for improving user experience is to hide the calendar by default and only show it when someone clicks a button like "View Our Events." This stops a bulky calendar from dominating your page layout. If you're using a tool like Divi Areas Pro, setting this up is incredibly simple.
You can create a Popup or an Inline Area that holds your calendar's Code module. From there, you can trigger this Area to appear when a user clicks a specific button, link, or image. It’s a professional touch that declutters your interface while keeping important information just a click away.
This technique is especially useful for:
- Booking Pages: Let users check availability in a popup without ever leaving the main booking form.
- Event-Heavy Sites: Keep the homepage tidy by hiding the full schedule behind a "View Full Calendar" button.
- Team Schedules: Display an internal team calendar in a fly-in area on a private dashboard page.
By combining the iframe with Divi's modules or specialized plugins like Divi Areas Pro, you can create a much more integrated and user-friendly experience than a standard embed alone. It’s all about picking the method that best fits your workflow and your website's goals.
Optimizing Your Calendar for Privacy and User Experience

Getting the Google Calendar embed code onto your website is really only half the battle. To make it a genuinely useful tool, you have to think about who’s seeing it and how they'll interact with it. Privacy settings and user experience (UX) aren't just minor tweaks; they're the foundation of a calendar that actually works without causing confusion or security headaches.
The most critical piece of this puzzle is getting your calendar's sharing permissions right inside Google's settings. One wrong click can either expose sensitive information or—more often than not—leave you with an embedded calendar that just shows "Busy" to everyone.
Fine-Tuning Calendar Permissions
Google Calendar gives you granular control over who sees what, which is great. Understanding these settings is the key to protecting your info while still delivering value to your site visitors. You'll need to make your calendar public for it to show up at all, but you get to decide just how much detail you share.
Here’s a breakdown of the main visibility options and when to use them:
- See all event details: This is the go-to setting for most public calendars. It's perfect for community events, workshop schedules, or content calendars where you want people to see titles, times, and descriptions for each entry.
- See only free/busy (hide details): This option is a game-changer for showing availability without revealing private details. It’s ideal for consultants, service providers, or internal teams who need to show when they’re booked without sharing confidential meeting info.
Key Takeaway: Always create a new, dedicated Google Calendar specifically for your website. Never, ever embed your personal or primary work calendar directly. This simple move prevents accidental oversharing and gives you a clean, professional-looking schedule to present to the public.
Don't underestimate the business impact of a well-structured calendar, either. Embedding a calendar for resource scheduling, often paired with two-way sync, can slash inefficiencies. Some workplace studies estimate that executives spend around 23 hours a week in meetings, and up to 45% of that time could be cut down with better scheduling. Adding a public availability view can boost completed bookings by an estimated 10–30% because potential clients can see open slots in real-time and act on them instantly.
Enhancing the User Experience
Once your privacy settings are locked down, it's time to shift your focus to the user experience. A confusing calendar is a useless calendar. Your goal is to make the information as clear and accessible as possible.
Start with the basics. Always set the correct time zone in the customization settings before you generate the embed code. There’s no faster way to cause missed appointments and frustrated users than by displaying event times in the wrong zone.
Next, pick a sensible default view. The "Month" view is great for a high-level overview, but the "Agenda" view is often far more practical for users. It lays out all upcoming events in a clean, scannable list—perfect for someone who just wants to see what's next.
It's also a smart move to add a short line of text near the calendar to guide people. Something as simple as, "Use the arrows to navigate months or click an event for more details," can make a huge difference in usability. And if your site handles any user data, it's wise to stay on top of compliance; our guide to Divi and GDPR has some valuable best practices.
After you've successfully embedded your calendar, you'll want to learn how to use Google Calendar for productivity to get the most out of it. By prioritizing these small UX details, you turn your embedded calendar from a simple widget into a genuinely helpful resource for your audience.
Common Questions About Embedding Google Calendars
When it comes to getting a Google Calendar on your website, a few common roadblocks tend to pop up. Nailing these details is the difference between a smooth integration and a headache for both you and your visitors. Let's walk through the most frequent challenges I see people run into and get them sorted out.
This section covers everything from wonky mobile layouts to frustrating permissions issues, making sure your calendar looks and works exactly the way you want it to.
How Can I Make My Embedded Google Calendar Responsive?
You’ve probably noticed Google’s default embed code isn’t exactly mobile-friendly. On smaller screens, it often breaks layouts and creates those ugly horizontal scrollbars. Nobody wants that.
The fix is a classic CSS trick: wrap the iframe in a responsive container. This forces the calendar to scale correctly, no matter the screen size.
It's a two-step process:
- First, wrap your
<iframe>code in a<div>and give it a class, something likecalendar-container. - Then, add a bit of CSS to that container to control its aspect ratio.
By setting the container's position to relative and using a padding-bottom percentage (like 75% for a 4:3 ratio), the container holds its shape. You then make the iframe inside fill that container by setting its position to absolute with a width and height of 100%. This tiny bit of code is a lifesaver for modern, mobile-first design.
How Do I Show Multiple Calendars in One View?
Absolutely. You can easily merge several calendars into a single, unified view—perfect for team schedules, event categories, or company-wide timelines. You don't need a separate embed for each one.
Google’s own customization tool handles this beautifully.
Head into your Google Calendar settings and find the "Integrate calendar" section. Click the "Customize" button, and you'll see a list of all your available calendars on the left. Just check the boxes for every calendar you want to show.
Google will instantly generate a single iframe code that overlays all your selected calendars. It even pulls the unique colors you’ve already assigned to each one, so visitors can quickly tell which events belong to which calendar.
Pro Tip: Color-coding is your best friend here. Assign distinct, high-contrast colors to each calendar (e.g., blue for meetings, green for deadlines) to make the combined view intuitive and easy to scan.
Why Does My Calendar Only Show "Busy"?
This is, by far, the most common snag people hit. If your embedded calendar just shows a bunch of "Busy" blocks instead of actual event details, it’s almost always a permissions issue.
The calendar’s public sharing setting is simply too restrictive.
To fix this, the calendar’s owner needs to go into the settings for that specific calendar. Under "Access permissions for events," the public setting must be changed from "See only free/busy (hide details)" to "See all event details." If you're not the owner, you’ll have to ask them to make this change for you.
Can Users Add Events Directly to My Embedded Calendar?
No, not with the standard iframe embed. Think of the iframe as a window—it provides a read-only view of your calendar. It’s designed for displaying information, not for interaction. Your visitors can see events, but they can't create, edit, or delete anything through the embed.
If you need to let users add events, you'll have to go beyond the basic embed. The most powerful way is to use the Google Calendar API to build a custom form on your website that creates events when submitted. For a simpler, ready-made solution, you could integrate a third-party scheduling tool like Calendly, which connects to your Google Calendar and gives users a polished interface for booking appointments.
Ready to create advanced, on-demand calendar displays without the headache? Divimode offers powerful tools like Divi Areas Pro, allowing you to embed your calendar in elegant popups, fly-ins, and more. Take control of your site's interactivity and user experience by visiting https://divimode.com.
More Articles You Will Like


