Out-of-the-box, WordPress gives you two main ways to organize your content: Posts and Pages. Think of it like a brand-new filing cabinet. You get one folder for your time-sensitive blog entries (Posts) and another for static stuff like your "About Us" or "Contact" page (Pages).
For a simple blog, that's often all you need. But what happens when your website gets more ambitious? What if you're not just writing articles but also listing real estate, showcasing portfolio projects, or posting recipes? This is where things can get messy, fast.
Going Beyond Posts and Pages with CPTs
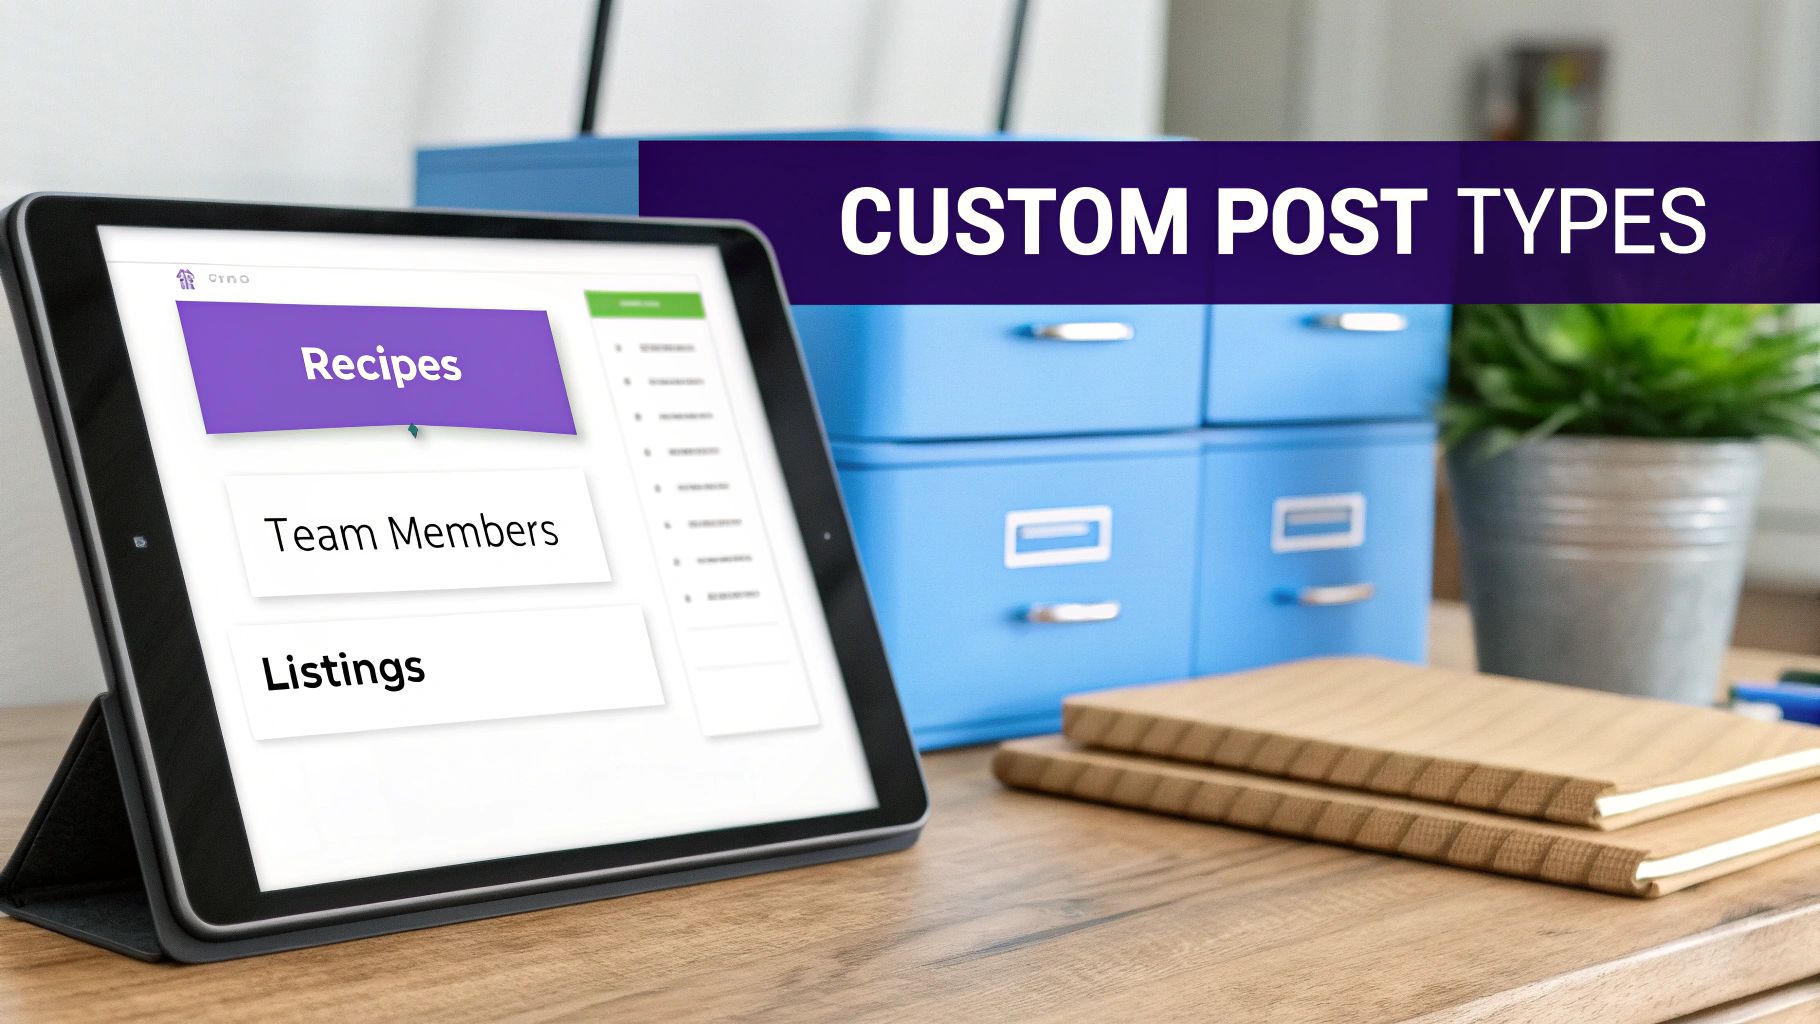
This is exactly where WordPress custom post types (or CPTs, as you'll often see them called) come into play. They let you add new, custom-built folders to your digital filing cabinet, each one designed specifically for the kind of content you need to manage.
So, instead of trying to cram everything into the generic "Posts" and "Pages" folders, you can create a clean, logical structure that actually makes sense. You can have separate, dedicated sections for 'Recipes', 'Real Estate Listings', or 'Team Members'. It’s the key to turning a basic WordPress blog into a powerful and truly custom Content Management System.
Why Structure Matters
Using CPTs isn't just about keeping your admin area tidy; it has real, tangible benefits for you and your visitors. A well-organized site is miles easier to manage, update, and grow over time. For your audience, it means a more intuitive user experience, helping them find what they're looking for without getting lost.
Let's look at a few real-world examples:
- A Real Estate Agency: Could create a 'Listings' CPT to manage properties. Each listing could have its own specific fields for price, square footage, and location, completely separate from their blog posts.
- A Restaurant: Might use a 'Menu Items' CPT to organize dishes. Each dish could have its own fields for ingredients, price, and dietary info.
- A Design Portfolio: Can have a 'Projects' CPT to showcase their work, keeping it distinct from their articles about design trends.
In essence, Custom Post Types are the architectural blueprints for your content. They provide the framework needed to build a site that is not only content-rich but also logically structured and easy to navigate.
Honestly, the introduction of CPTs was a game-changer for the platform. It's one of the key features that took WordPress from being a simple blogging tool to a full-blown content management system capable of powering almost any kind of website. This is what allows developers and businesses to build truly sophisticated sites tailored to their specific needs.
Ultimately, custom post types empower you to break free from the "one-size-fits-all" model of Posts and Pages. They give you the flexibility to build a content structure that perfectly matches your vision, leading to better organization, a slicker user experience, and even a nice boost in your SEO performance.
Choosing Your Method: Plugins vs. Code
When it's time to create custom post types in WordPress, you’ll find yourself at a fork in the road. Do you take the straightforward path and use a plugin, or do you roll up your sleeves and write the code yourself? Both get you to the same place, but the journey is completely different.
This isn't just a question of technical skill. It’s about control, portability, and what you envision for your project down the line. Let's walk through both of these powerful approaches so you can pick the right one for your workflow.
The Plugin Path: An Easy Start
For a lot of people, the quickest and most approachable way to get CPTs up and running is with a plugin. Tools like the ever-popular Custom Post Type UI (CPT UI) give you a graphical interface right inside your WordPress dashboard. Instead of messing with PHP, you're just filling out forms and checking boxes.
This route has some clear advantages:
- Speed: You can register a brand new CPT in a few minutes without ever leaving your WordPress admin area.
- Accessibility: It requires zero coding knowledge, which is perfect for beginners, designers, and anyone who prefers a visual process.
- Ease of Use: All the complicated settings and arguments for registering a post type are laid out as simple, easy-to-understand options.
Plugins are an excellent gateway into the world of CPTs. If you need a simple way to organize content and code isn't your thing, this is the way to go. If you want to better understand how plugins expand what your site can do, check out our guide on how to use plugins in WordPress.
The main trade-off here is convenience. Your CPT registrations are tied directly to the plugin. If you ever deactivate it, your post types will vanish.
The Code Method: Ultimate Control
The alternative is to register your custom post types by hand using PHP. This means adding code to your theme’s functions.php file or—even better—a site-specific custom plugin. You'll do this using WordPress's core register_post_type function.
While this approach definitely has a steeper learning curve, the benefits are huge for developers and long-term projects:
- Performance: Your code runs directly, without the extra overhead of a plugin's UI and its database calls. This leads to a leaner, slightly faster implementation.
- Portability: By putting the registration code in a custom plugin, your CPTs become theme-independent. You can switch themes without losing your entire content structure.
- Complete Control: You have direct access to every single argument and parameter, allowing for incredibly fine-tuned and complex setups that a plugin's UI might not offer.
The code method essentially makes your custom post types a core, foundational part of your website's architecture, rather than an add-on. It ensures stability and prevents the "what if the plugin is deactivated?" scenario.
When weighing your options, it's also smart to consider the broader ecosystem. For example, many pre-built solutions like WordPress membership plugins rely on their own CPTs to function, showing how integral this feature is.
A Head-to-Head Comparison
To make the choice a little clearer, it helps to see how the two methods stack up against each other. I've put together a simple table that breaks it down.
Plugin vs Code for Creating Custom Post Types
| Factor | Plugin Method (e.g., CPT UI) | Code Method (register_post_type) |
|---|---|---|
| Skill Level | Beginner-friendly; no coding required. | Intermediate/Advanced; requires PHP knowledge. |
| Speed & Setup | Very fast; can be done in minutes via the UI. | Slower; requires writing and deploying code. |
| Control | Good; provides access to most common options. | Absolute; every parameter is configurable. |
| Performance | Good; minimal overhead for most sites. | Excellent; the most direct and efficient method. |
| Portability | Tied to the plugin; CPTs vanish if deactivated. | Theme-independent when used in a custom plugin. |
At the end of the day, there's no single "best" answer here. The right method really depends on your comfort level with code, the specific needs of your project, and your long-term plan for maintaining the site.
Alright, we've covered the "why" behind custom post types. Now it's time to roll up our sleeves and get into the "how." We're going to move from theory to practice and build one of the most common and useful CPTs out there: a "Portfolio" to showcase your projects.
This hands-on example will make everything click and leave you with a tangible result you can actually use.
We’ll tackle this in two ways. First, we'll use the super popular Custom Post Type UI (CPT UI) plugin, which is perfect if you're just starting out. Then, for anyone who's comfortable with code, we'll dive into the PHP snippet that does the exact same thing.
Method 1: Creating Your Portfolio with CPT UI
The CPT UI plugin is fantastic because it swaps all the intimidating code for a simple, user-friendly form. It's hands-down the fastest way to get a custom post type up and running.
Once you install and activate the plugin, a new "CPT UI" item will pop up in your WordPress dashboard.
Head over to CPT UI > Add/Edit Post Types.
You'll see a form, but you only need to fill out three key fields to get started:
- Post Type Slug: This is the URL-friendly name. Let's go with
portfolio(all lowercase, no spaces). - Plural Label: This is what shows up in the admin menu. Type in
Portfolio. - Singular Label: This is for a single entry. Use
Portfolio Item.
- Post Type Slug: This is the URL-friendly name. Let's go with
Now, scroll down to the Supports section. This part is crucial. You're telling WordPress what features your portfolio items should have. Check the boxes for:
- Title: For the project's name.
- Editor: The main content area for project details.
- Featured Image: Your main project thumbnail.
- Excerpt: A quick summary of the project.
Hit "Add Post Type," and you're done! A new "Portfolio" menu will instantly appear in your admin sidebar, ready for you to start adding projects. It’s really that simple.
Method 2: Registering Your Portfolio with Code
If you prefer to have more direct control, you can skip the plugin and register your CPT with a bit of PHP. The best way to do this is by adding the code to a site-specific plugin. This is a huge advantage because your Portfolio CPT will keep working even if you decide to switch themes down the road.
If you're new to this concept, our guide on custom WordPress plugin development is a great place to start.
For now, you can add the snippet below to your theme's functions.php file for testing. Just remember, a custom plugin is the way to go for a live site.
// Register Portfolio Custom Post Type
function create_portfolio_post_type() {
$labels = array(
'name' => _x( 'Portfolio', 'Post Type General Name', 'text_domain' ),
'singular_name' => _x( 'Portfolio Item', 'Post Type Singular Name', 'text_domain' ),
'menu_name' => __( 'Portfolio', 'text_domain' ),
'name_admin_bar' => __( 'Portfolio Item', 'text_domain' ),
'archives' => __( 'Portfolio Archives', 'text_domain' ),
'attributes' => __( 'Portfolio Attributes', 'text_domain' ),
'parent_item_colon' => __( 'Parent Item:', 'text_domain' ),
'all_items' => __( 'All Portfolio Items', 'text_domain' ),
'add_new_item' => __( 'Add New Portfolio Item', 'text_domain' ),
'add_new' => __( 'Add New', 'text_domain' ),
'new_item' => __( 'New Portfolio Item', 'text_domain' ),
'edit_item' => __( 'Edit Portfolio Item', 'text_domain' ),
'update_item' => __( 'Update Portfolio Item', 'text_domain' ),
'view_item' => __( 'View Portfolio Item', 'text_domain' ),
'view_items' => __( 'View Portfolio Items', 'text_domain' ),
'search_items' => __( 'Search Portfolio Item', 'text_domain' ),
);
$args = array(
'label' => __( 'Portfolio Item', 'text_domain' ),
'description' => __( 'Portfolio projects and case studies', 'text_domain' ),
'labels' => $labels,
'supports' => array( 'title', 'editor', 'thumbnail', 'excerpt' ),
'hierarchical' => false,
'public' => true,
'show_ui' => true,
'show_in_menu' => true,
'menu_position' => 5,
'menu_icon' => 'dashicons-art',
'show_in_admin_bar' => true,
'show_in_nav_menus' => true,
'can_export' => true,
'has_archive' => true,
'exclude_from_search' => false,
'publicly_queryable' => true,
'capability_type' => 'page',
'rewrite' => array('slug' => 'portfolio'),
);
register_post_type( 'portfolio', $args );
}
add_action( 'init', 'create_portfolio_post_type', 0 );
This code snippet accomplishes the exact same thing as the CPT UI plugin, giving you a fully functional "Portfolio" section with all the same features.
Expanding Your Portfolio with More Data
Just creating the post type is step one. To make your portfolio truly powerful, you need a way to add specific, structured data to each project. This is where custom taxonomies and fields come in.
- Custom Taxonomies: Think of these as your own private categories or tags. For our portfolio, you could create a "Service Type" taxonomy to sort projects by "Web Design," "Branding," or "SEO."
- Custom Fields: These let you add specific pieces of information. Using a plugin like Advanced Custom Fields (ACF), you could add fields for "Client Name," "Project URL," and "Completion Date" to every single portfolio item.
The use of CPTs has exploded alongside WordPress's growth. With WordPress now powering between 43.2% and 43.4% of all websites, millions of sites are using CPTs to manage everything from products to real estate listings. And with an average of 661 new WordPress sites being built every day, many are using CPTs right from the start to build smarter, more organized websites. You can find more WordPress statistics at AIOSEO.
When you combine a CPT with custom taxonomies and fields, you're no longer just creating content—you're building a rich, organized, and powerful data system.
Displaying Your Custom Content
So you’ve created a custom post type. That’s a fantastic first step, but it’s only half the battle. Right now, your new ‘Portfolio’ content is tucked away inside the WordPress admin area, completely invisible to your site visitors. To bring your hard work to life, you need to tell WordPress how to actually display it on the front end.
This is where template files come in. Think of them as custom-designed blueprints for your content's layout. It’s like building a dedicated gallery space just for your portfolio—one for the main archive page that shows all your projects, and another for the detailed, single-project view.
The structure we've built so far can be visualized like this, showing how a main 'Portfolio' CPT can be organized by 'Service Type' and linked to a 'Client Name'.
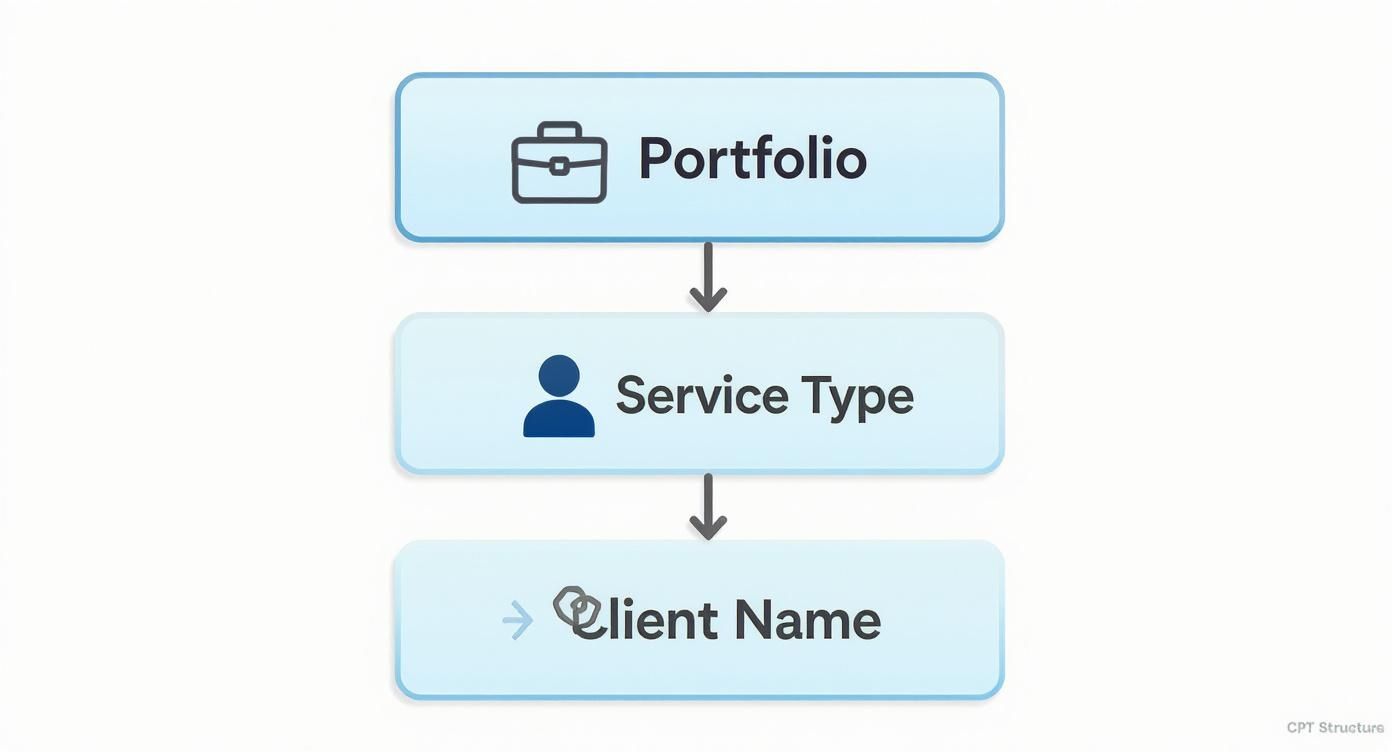
This hierarchy shows how CPTs, taxonomies, and custom fields all work together to create a powerful and organized content system. Now, let’s get that system onto the page.
Understanding the WordPress Template Hierarchy
WordPress has a predictable but incredibly powerful system called the template hierarchy. It’s basically a flowchart that WordPress follows to decide which theme file to use when displaying any piece of content on your site. When you create a CPT, you can tap directly into this system by creating specially named files.
For our 'Portfolio' CPT, we care about two key template files:
archive-portfolio.php: This file controls the main archive page, which lists all of your portfolio items. Think of it as the main gallery view.single-portfolio.php: This file dictates the layout for a single portfolio item. This is the template you see when you click to view one project in detail.
By creating files with these exact names (just replace 'portfolio' with your CPT's slug), you override the default WordPress templates and gain complete control over the design.
Building Templates with Code
If you're comfortable with a bit of code, creating these template files gives you pixel-perfect control. The typical workflow is to copy your theme's existing archive.php and single.php files, rename them accordingly, and then start modifying the WordPress Loop inside.
The WordPress Loop is the standard PHP code that WordPress uses to fetch and display posts. In your custom templates, you can tweak this loop to output not just the title and content, but all of your unique custom fields as well.
Here’s a simple example of what the loop inside archive-portfolio.php might look like to display project titles and their featured images:
<div class="portfolio-grid">
    <?php while ( have_posts() ) : the_post(); ?>
        <article id="post-<?php the_ID(); ?>" <?php post_class(); ?>>
            <?php if ( has_post_thumbnail() ) : ?>
                <a href="<?php the_permalink(); ?>">
                    <?php the_post_thumbnail('medium_large'); ?>
                </a>
            <?php endif; ?>
            <h2><a href="<?php the_permalink(); ?>"><?php the_title(); ?></a></h2>
        </article>
    <?php endwhile; ?>
</div>
<p>No portfolio items found.</p>
This snippet simply queries the database for your portfolio items and arranges them in a basic grid. From here, you could easily expand on it to pull in custom fields for client names, project URLs, or anything else you created, giving you total creative freedom.
Designing Templates Visually with a Theme Builder
Not a fan of coding? No problem. Modern page builders and themes like Divi come with powerful Theme Builder features that let you design these templates visually. Instead of writing PHP, you get to work in a familiar drag-and-drop interface.
This visual approach has completely opened up website design, allowing designers and site owners to create fully custom layouts for their wordpress custom post types without ever touching a line of code.
Inside a theme builder, you can create a new layout and assign it to your CPT's archive and single post views. Then, you can use dynamic content features to pull in the title, featured image, and any of your custom fields. It's an incredibly powerful way to manage complex layouts. For a deep dive into how this works, check out this guide on using Divi dynamic content to see just how flexible this method is.
Whether you choose to code it yourself or use a visual builder, creating these dedicated templates is the final, crucial step to making your custom content a beautifully integrated part of your website.
Advanced Strategies and Best Practices
So, you've got the hang of creating custom post types. That's a huge step! But there's a world of difference between just making a CPT and building one that’s robust, secure, and ready to scale with your site. Now it's time to shift from the basics to professional strategies that ensure your work is built to last.
This is about thinking beyond the initial setup. We'll get into portability, security, and how your custom content will play nice with other systems. Trust me, the small decisions you make now—like where you stick your registration code—can save you from massive headaches down the road.
Ensure Portability with a Custom Plugin
One of the most common rookie mistakes I see is dropping CPT registration code directly into a theme's functions.php file. Sure, it works. But it's a trap! Doing this ties your entire content structure to your theme. The moment you decide to switch themes, poof! Your 'Portfolio' or 'Events' post types—and all the content inside them—will vanish from the admin panel.
The professional-grade solution? Put your CPT code inside a site-specific custom plugin. This approach is a game-changer for a few reasons:
- Theme Independence: Your CPTs are no longer held hostage by your site's design. Redesign your site, swap themes, do whatever you want—your 'Portfolio', 'Events', or 'Products' content isn't going anywhere.
- Better Organization: This keeps your site’s core functionality separate from its presentation. It's a fundamental principle of good WordPress development that just makes sense.
- Easier Maintenance: When you need to tweak your CPT's logic, you'll know exactly where to find the code instead of scrolling through a potentially gigantic
functions.phpfile.
Creating a basic plugin is surprisingly simple, and it's easily the single best thing you can do to make your CPTs more resilient.
Prioritize Security with Data Sanitization
Whenever you're working with custom fields, you're essentially opening new doors for data to enter your website's database. Whether you're using a powerhouse plugin like Advanced Custom Fields (ACF) or rolling your own meta boxes, it is absolutely critical that you sanitize and validate all user-submitted data.
Sanitization is all about cleaning or filtering data before it's saved. Validation is about making sure that data is in the right format. Skipping this is like leaving your front door unlocked—it can open your site to nasty security holes like Cross-Site Scripting (XSS) attacks.
Thankfully, WordPress gives us a whole toolbox of functions for this. You've got sanitize_text_field() for plain text, sanitize_email() for email addresses, and esc_url() for links, among others. Always, always run data through these functions before saving it to the database and before displaying it on the front end.
Connect CPTs to the REST API
The WordPress REST API is what allows other applications—like a mobile app or a modern JavaScript front end—to talk to your website's content. By default, your brand-new custom post types are invisible to the API. To make your 'Portfolio' or 'Events' data available, you have to explicitly enable it during registration.
It's as simple as setting two arguments to true in your register_post_type function:
show_in_rest: This is the magic switch that makes the post type available through the REST API.rest_base: This lets you define the URL slug for the API endpoint (for example,wp-json/wp/v2/portfolio).
Flipping these switches turns your WordPress site into a powerful headless CMS, ready to serve content to just about any platform you can dream up.
Master SEO for Custom Post Types
Search engine optimization isn't just for your blog posts and pages. All that valuable custom content you're creating deserves to be found, too. SEO plugins like Yoast SEO or Rank Math are your best friends here, as they automatically hook their optimization meta boxes right into your CPT editor screens. This lets you craft custom titles, meta descriptions, and focus keywords for every single entry.
But don't stop there. For a real edge, you should implement Schema markup (also known as structured data). This gives search engines the context they need to truly understand your content. For an 'Event' CPT, you could add Schema that defines the event's name, date, and location, which can land you those eye-catching rich snippets in search results. The WordPress ecosystem is built for this; page builders and top-tier SEO plugins are designed to work seamlessly with CPTs, a trend highlighted in recent WordPress statistics from MageComp. By pairing your CPTs with smart SEO, you give your unique content its best shot at climbing the ranks.
Common Questions About Custom Post Types
As you get your hands dirty with WordPress custom post types, a few questions are bound to come up. It's a powerful feature, for sure, but it has its quirks and common "gotchas." To help you navigate them, I've pulled together some of the most frequent questions I hear and answered them in a straightforward, practical way.
Think of this as your CPT field guide. It’s here to clear up confusion and solidify your understanding so you can build with confidence.
CPTs vs. Custom Taxonomies: What's the Real Difference?
This is probably the number one point of confusion when people are starting out. Although they work hand-in-hand, custom post types and custom taxonomies do fundamentally different jobs. Nailing this distinction is the key to building a content structure that actually makes sense.
Here’s an easy way to think about it:
- A Custom Post Type (CPT) is the noun. It’s a specific thing. Think 'Book,' 'Movie,' or 'Portfolio Project.'
- A Custom Taxonomy is the adjective used to describe or group that noun. For our 'Book' CPT, a taxonomy could be 'Genre' (with terms like 'Fantasy' or 'Sci-Fi'). For the 'Movie' CPT, a taxonomy might be 'Director.'
In short: CPTs define what the content is. Taxonomies define how you organize it. You can't have a 'Genre' without a 'Book' to apply it to. They're a dynamic duo, but the CPT is always the main act.
This separation is what makes WordPress so flexible. A single 'Portfolio Project' CPT could be organized by multiple taxonomies at once, like 'Service Type,' 'Technology Stack,' and 'Industry.' This gives you incredible power to filter and display your work on the front end.
Can I Convert Existing Posts to a New CPT?
Yes, you absolutely can! This is a super common scenario. You’ve been blogging for years, and now you realize that a dozen of your old posts would be much better off as a new 'Case Studies' CPT. The good news is you don't have to manually copy and paste every single one.
The easiest way to do this is with a plugin like Post Type Switcher. Once it's installed, it adds a simple dropdown menu right in the post editor. This lets you reassign any post or page to a different post type with a single click. It just works.
If you're dealing with hundreds or thousands of posts, a more advanced approach using a direct database query might be faster. However, that's a job for an experienced developer, and you should always have a full site backup before even thinking about it. No matter which method you use, make sure your new CPT is registered and set up to support all the features (editor, featured images, custom fields, etc.) that the original posts were using.
Do Custom Post Types Slow Down My WordPress Site?
This is a fair question, but the short answer is no—not if they're implemented correctly. A properly registered CPT adds virtually zero noticeable overhead to your site. The registration code itself is tiny and runs only once when WordPress first loads.
Where performance issues can creep in is in how you query and display the CPT data on your website, not from the existence of the CPT itself.
Here are the usual suspects for performance bottlenecks:
- Complex Queries: Building pages with multiple, complicated
WP_Queryloops to fetch CPT data can be tough on your server. - Too Many Custom Fields: Piling on dozens of unindexed custom fields can make database lookups sluggish.
- Inefficient Code: Poorly written template files or functions that process CPT data in a roundabout way will always be slow.
Follow the best practices—write efficient queries, use a solid caching plugin, and invest in good hosting—and you can have a site with tons of CPTs that’s still lightning-fast.
What Happens If I Deactivate My CPT Plugin?
This is a critical point and reveals the main downside of using a plugin like CPT UI to register your post types. If you create a CPT with a plugin and then deactivate or delete that plugin, the PHP code that tells WordPress about your CPT is gone.
The immediate result? The CPT will vanish from your WordPress admin menu. All those 'Portfolio' or 'Event' entries you've carefully created will become invisible in the backend. Worse, their archive pages on the front end will most likely throw a 404 "page not found" error.
It’s crucial to understand that your data isn't gone. All your posts are still sitting safely in the database. WordPress just has amnesia—it no longer knows what they are or how to display them. To get everything back, you'd need to either reactivate the plugin or, the more stable long-term solution, register the CPT manually in a custom plugin or your theme's functions.php file using the exact same post type slug (like portfolio). This is why many developers prefer the code-based method from the start.
Ready to create dynamic, targeted content with your custom post types? Divimode offers powerful tools like Divi Areas Pro, allowing you to build advanced popups, fly-ins, and conditional content that integrates seamlessly with your CPTs. Explore how Divimode can elevate your Divi website.
More Articles You Will Like