
If you want to truly woocommerce customize product page designs, you need to look beyond the default layouts. The real magic happens when you use a theme builder like Divi to create a completely custom template. This lets you replace the standard WooCommerce structure with your own visually designed layout, giving you total control over everything from product images and descriptions to the all-important call-to-action buttons—no code required.
Why Default Product Pages Limit Your Sales Potential
Let's be honest. That standard WooCommerce product page? It’s functional, sure, but it’s probably costing you sales. The default, one-size-fits-all layout creates a generic shopping experience that just doesn't connect with buyers on a deeper level. A generic page can't tell a brand story or build the kind of trust that turns a hesitant shopper into a loyal customer.
This is a problem I see all the time with store owners. With WooCommerce powering over 6 million active online stores globally, just blending in is a recipe for being ignored. The platform's high retention rate—over 92% of stores are still active after a year—tells you something important: successful owners are finding ways to stand out. And custom product pages are one of their primary weapons.
The Problem with a Generic Approach
The main culprit here is the rigid structure. You're locked into predefined spots for key elements like the price, the 'Add to Cart' button, and those clunky product tabs. This completely stops you from arranging the page in a way that matches how your specific customers actually shop and make decisions.
Here's a look at the standard WooCommerce product page—it gets the job done, but it's not going to win any design awards or convince a skeptical buyer.
This default layout treats a $10 t-shirt the same as a $1,000 piece of equipment, and that's a huge roadblock to maximizing revenue.
The core limitations of the default setup really boil down to a few key things:
- Lack of Brand Identity: Your unique brand—the colors, fonts, and overall vibe—is nearly impossible to integrate. This makes your store feel less professional and far less memorable.
- Poor User Engagement: You can't easily add trust badges, dynamic offers, or compelling visuals where they'll have the most impact. You lose the ability to guide users effectively toward making a purchase.
- Missed Conversion Opportunities: A static page can't adapt to user behavior or highlight promotions dynamically. This is a critical failure when you're trying to improve ecommerce conversion rates.
The truth is, a default page does the bare minimum. A custom page, on the other hand, acts as your best salesperson, working 24/7 to persuade and convert visitors.
This is where tools like the Divi Builder and Divi Areas Pro come in. They give you the power to break free from these constraints and design a high-converting product showcase from the ground up. To learn more about the principles behind this, check out our guide on how to https://divimode.com/how-to-improve-website-conversion-rates/ by optimizing your most important pages.
Your Toolkit for No-Code Product Page Design
If you want to truly customize your WooCommerce product pages without ever touching a line of code, you need the right tools in your workshop. You wouldn't build a custom cabinet with just a hammer, right? For our project, the two power tools we absolutely need are the Divi Builder and Divi Areas Pro.
These two plugins are designed to work together perfectly. Think of Divi as providing the solid, structural foundation, while Divi Areas Pro comes in to add layers of smart, dynamic content right on top. This combination is what gives you a complete no-code system for creating gorgeous, high-converting product pages that adapt to what your customers need.
Let's quickly break down what each tool brings to the table and why both are essential.
The Foundation: Divi Theme Builder
The heart of our whole strategy is Divi’s built-in Theme Builder. This is your command center for completely taking over the default WooCommerce templates. Instead of being stuck with the rigid, standard product page layout, the Theme Builder lets you design your own global template from the ground up. You can apply it to every single product in your store or even create unique layouts for specific product categories.
Here's what the Theme Builder lets you do:
- Create a Global Product Template: Design one master layout that automatically styles all your products for a consistent, professional look.
- Visually Arrange Elements: Just drag and drop WooCommerce modules—like the product title, image gallery, price, and add-to-cart button—exactly where you want them.
- Apply Sitewide Styling: Lock in your brand's fonts, colors, and spacing across every product page effortlessly.
Essentially, the Theme Builder gives you complete architectural control. You're no longer just tweaking a pre-built house; you're designing the entire blueprint yourself.
The Secret Weapon: Divi Areas Pro
Once your foundational template is in place, Divi Areas Pro comes in as the secret weapon to make your pages dynamic and conversion-focused. While the Theme Builder handles the static layout, Divi Areas Pro injects smart content exactly where and when you need it most. It lets you build small, reusable content blocks—called "Areas"—and then display them based on a powerful set of rules.
Think of it this way: The Divi Theme Builder creates the beautiful, sturdy shelf for your products. Divi Areas Pro lets you place a spotlight on certain items, add a "Limited Time Offer!" sign that disappears after the weekend, or place a helpful guide next to a complex product.
For example, you could create an Area that shows a "Free Shipping Included" badge, but only for products in your "Heavy Goods" category. Or, maybe you want to display a special upsell banner that only appears when a customer is viewing a product from your "Bestsellers" collection. This is where you move beyond simple design and start creating a strategic, personalized shopping experience that actively drives sales.
Before we move on, make sure you have WooCommerce, the Divi theme, and Divi Areas Pro installed and ready to go.
Building a Custom Product Page Template in Divi
Alright, this is where the real fun begins. We're about to lay the groundwork for a completely new shopping experience by jumping into the Divi Theme Builder. The goal is to build a modern, flexible template from scratch that will replace the default layout for all your products. Think of this as the foundation upon which every other customization will be built.
We aren't just dragging and dropping a few elements onto a blank canvas here. We're going to strategically arrange the core components of a product page—the image gallery, title, price, and add-to-cart button—in a way that feels natural and guides the user toward making a purchase. The idea is to build a clean, professional foundation that elevates every single item in your store and creates a powerful sense of brand consistency.
Initializing Your New Product Template
First things first, you need to tell Divi you're taking the reins of your product pages. This all happens in the Divi Theme Builder, which you can find right in your WordPress dashboard under the "Divi" menu. This area is your central command for overriding default templates from WordPress and WooCommerce.
Once you're in, you'll see an option to "Add New Template." Clicking this pops up a dialog where you can tell Divi exactly where this new template should apply. This is a crucial step. You'll want to assign it to "All Products" to make sure every item in your shop inherits the beautiful new design you're about to create.
This simple assignment is what tells WooCommerce to step aside and let Divi handle how your product pages look from now on.
Assembling the Core WooCommerce Modules
With your new template created and assigned, it's time to start building. Click "Add Custom Body" and then "Build Custom Body" to launch the familiar Divi Builder interface. This is where you'll add and arrange the essential WooCommerce modules that pull in all your product data dynamically.
You’ll be working almost exclusively with Divi’s dedicated WooCommerce modules. These are special building blocks that automatically display the right information for whichever product is being viewed. You don’t have to manually type in a product's name or price; the modules take care of all that for you.
Here’s a quick visual overview of the general workflow you'll be following inside the Divi Theme Builder.
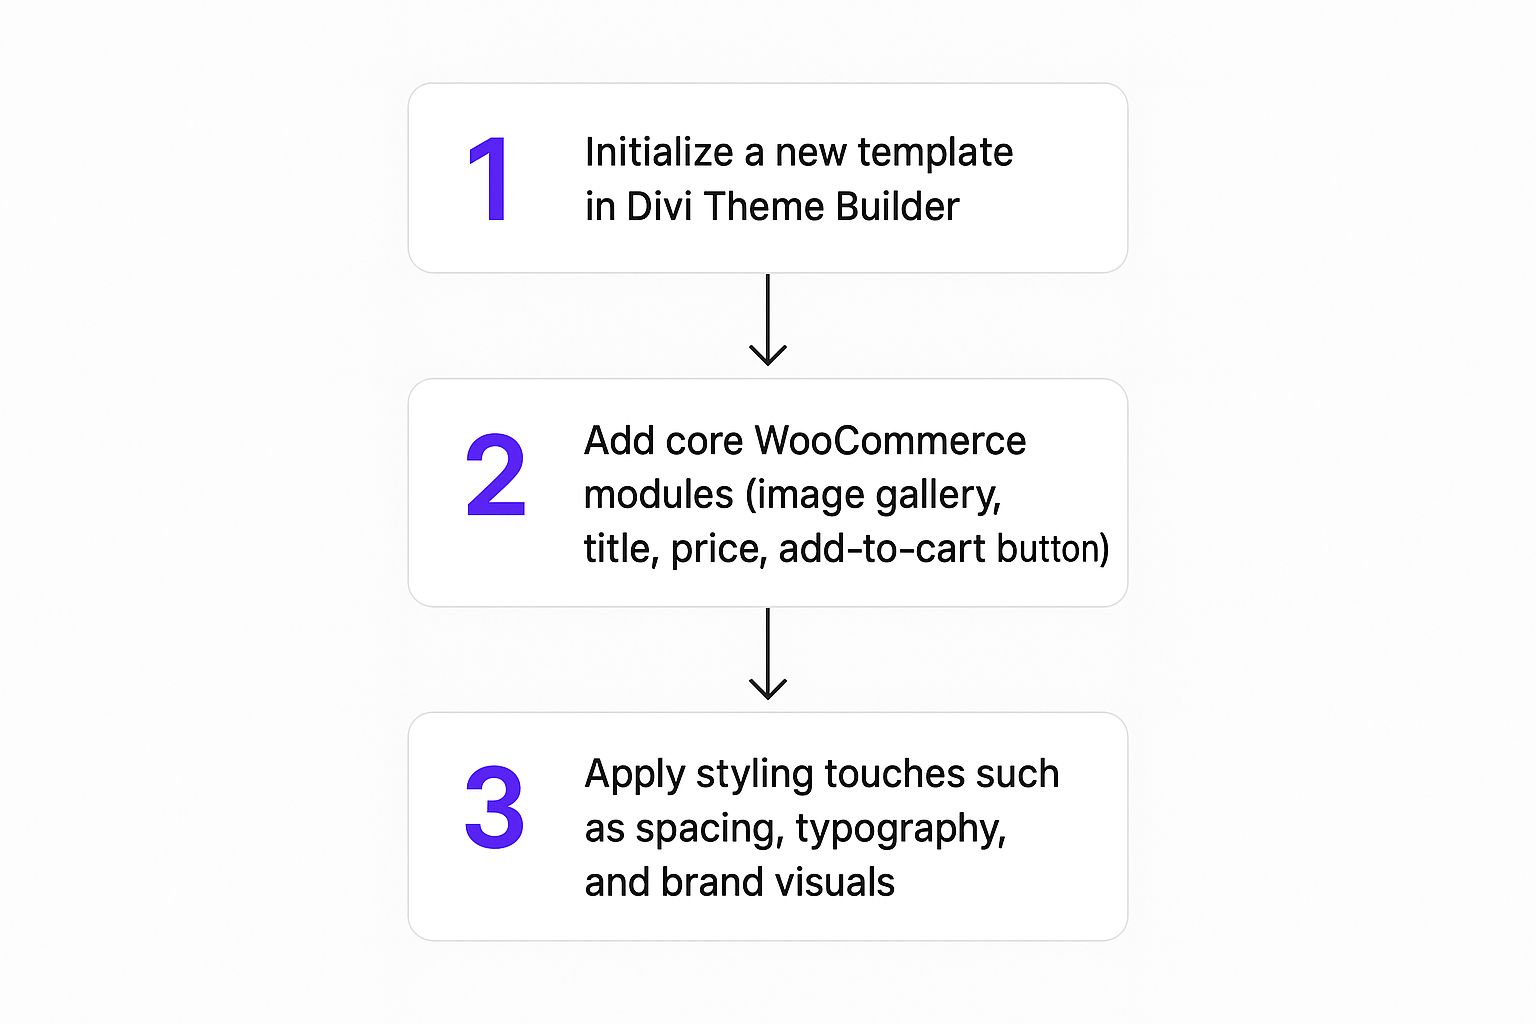
This flow really shows how creating the template, adding the core modules, and applying your styles all come together to create a polished final product.
The most critical modules you'll need to include are:
- Woo Product Title: This displays the name of the product.
- Woo Product Images: This shows the main product image and the gallery thumbnails.
- Woo Price: This pulls in the current price, including any sale pricing.
- Woo Add To Cart: The all-important button for making a purchase, which also includes the quantity selector.
- Woo Description: Perfect for displaying the detailed product description.
If you want to get more familiar with these essential elements, you can explore our complete guide to Divi WooCommerce key modules and features, which offers a much deeper dive into each component.
Arranging and Styling Your Layout
Just dropping the modules onto the page isn't enough; the real magic happens in the arrangement and styling. I almost always start with a classic two-column layout. I'll place the Woo Product Images module in the left column and then stack the Woo Product Title, Woo Price, and Woo Add To Cart modules in the right. It’s a clean, easy-to-scan layout that shoppers are instantly familiar with.
From there, it's all about using Divi's design settings to inject your brand's personality. Adjust the typography of the product title to match your brand's heading style. Change the color and size of the "Add to Cart" button to make it a clear, unmissable call-to-action. And don't be afraid to use spacing (margin and padding) to give your elements room to breathe. A cluttered page is a confusing page, and that's the last thing you want.
The key takeaway here is that consistency is king. The styles you define in this single template will cascade across your entire store. Taking a few extra minutes to perfect the spacing, fonts, and colors will pay massive dividends in professionalism and brand recognition down the road.
By building a solid template, you create the perfect canvas for adding more advanced, dynamic content later on—which is exactly what we'll be getting into next.
Using Divi Areas Pro to Add Dynamic Content
Okay, so you've built a beautiful product template with the Divi Theme Builder. That's a huge win. You now have a consistent, branded foundation for your entire store. But let's be honest, a great design is just the starting point.
To really move the needle and turn browsers into buyers, your product pages need to be more than just pretty—they need to be smart. This is where you graduate from static layouts to dynamic, conversion-focused experiences. And that is exactly what Divi Areas Pro was built for. It's the tool that lets you inject highly targeted content precisely where it will have the most impact.
Instead of shouting the same message to every single visitor, you can create specific content "Areas" that appear based on a seriously powerful set of conditional rules.
The Power of Conditional Logic in Ecommerce
Imagine this: you're running a sale. You could create a promotional banner that only appears on products within your "Sale" category. Or how about a "Free Shipping" notice that pops up right next to the "Add to Cart" button, but only when an item costs more than $50? This level of targeted messaging is what separates a decent product page from a truly great one.
Conditional logic is how you create these personalized shopping journeys that feel like they were made just for that specific customer. It's how you proactively guide shoppers, answer questions before they're asked, and highlight the most relevant information at the perfect moment.
Here’s a peek at the Divi Areas Pro interface. This is where the magic happens, letting you define the exact display conditions for your dynamic content.
As you can see, the rules engine gives you incredibly granular control. You can target content based on product categories, price points, stock status, and a whole lot more.
Creating Your First Dynamic Area
Let's walk through a real-world scenario. Say you want to add a special "2-Year Warranty Included" trust badge right below the "Add to Cart" button, but only for products in your "Electronics" category. Doing this manually for dozens of products would be a complete nightmare. With Divi Areas Pro, you set it up once, and it works everywhere automatically.
First, you'd head to Divi Areas in your WordPress dashboard and create a new Area. You can design this content block using the familiar Divi Builder, adding text, images, or whatever you need. In our case, a simple Text module with an icon for the warranty badge would be perfect.
The next step is the most critical: setting the display conditions. You would configure the Area to appear on "Products" and then layer on another rule specifying "Product Category is Electronics." Finally, you'll set the "Area Type" to Inline (Hook) and choose a location like woocommerce_after_add_to_cart_button to inject it exactly where you want it.
Just like that, your warranty badge will now automatically show up on every single electronics product—and nowhere else.
Practical Use Cases for Dynamic Content
The possibilities here are pretty much endless. The key is to think strategically about what piece of information would be most helpful or persuasive to a customer at a specific point in their journey.
Here are a few powerful ideas to get you started:
- Category-Specific Upsells: Display a small banner promoting a related accessory only on certain product types. For example, show a "Don't Forget the Case!" message on all smartphone pages.
- Price-Based Incentives: Encourage larger orders by showing a "Spend $25 more to unlock free shipping!" notice that only appears when the cart total is getting close to your shipping threshold.
- Low-Stock Urgency: Create a little FOMO by displaying an "Almost Gone! Only 3 left in stock" message that shows up automatically when a product's inventory drops below a certain number.
- Targeted Trust Seals: Show specific trust badges or certifications that are relevant to a product category. You could display an "Organic Certified" badge on food items and a "BPA-Free" badge on kitchenware.
The real power here is automation and relevance. You build these smart content blocks once, set the rules, and let Divi Areas Pro handle the rest, ensuring the right message always reaches the right customer.
For a deeper dive into the mechanics, you should definitely explore how to use Divi Areas Pro to design dynamic content in our detailed guide. It covers triggers, advanced settings, and much more.
The use of plugins to woocommerce customize product page designs has exploded, reflecting the growing demand for more personalized online shopping. By 2025, it's expected that most store owners will use tools to add custom fields for things like image uploads, gift wrapping, or personalized engravings. These plugins empower brands to cater to specific customer needs without having to hire a developer for every little tweak. You can find more insights on this trend over at WP Desk.
Divi Template vs Divi Areas Pro Use Cases
Understanding when to modify your core Divi template versus when to inject content with Divi Areas Pro is key to an efficient workflow. One is for permanent, site-wide structure, and the other is for targeted, conditional content.
This table breaks down the best tool for common customization tasks.
| Customization Task | Best Tool to Use | Why It's the Best Choice |
|---|---|---|
| Changing the global product image gallery layout | Divi Theme Builder | This is a foundational, structural change that should apply consistently to all products. |
| Displaying a limited-time sale banner | Divi Areas Pro | This is temporary, dynamic content that needs to be injected and easily removed later. |
| Restyling the "Add to Cart" button sitewide | Divi Theme Builder | This is a core branding element that should be consistent across your entire store. |
| Adding a size guide button for clothing products | Divi Areas Pro | This content is only relevant to a specific category and should be conditionally displayed. |
| Adjusting the default font for product titles | Divi Theme Builder | This is a fundamental style setting that defines the overall look and feel of your product pages. |
| Showing a 'New Arrival' badge for 30 days | Divi Areas Pro | This requires time-based rules, making it a perfect job for dynamic content injection. |
By combining a rock-solid template from the Divi Theme Builder with smart, dynamic injections from Divi Areas Pro, you create a product page that is not only beautifully designed but also works as a powerful, automated sales tool.
Pro Tips and Snippets for Next-Level Customization

Alright, you've got the basics down. Your new template is in place and dynamic content is pulling in all the standard WooCommerce data. Now it's time to add that extra layer of polish that really makes a product page shine.
We're moving beyond the standard modules here. This is where you can introduce bespoke details that solve very specific problems for your customers and set your store apart from the competition.
One of the most powerful, and frankly underused, features is tapping into Divi's dynamic content to show custom field data. Imagine you sell handmade art prints. You could use a free plugin like Advanced Custom Fields (ACF) to create unique fields for things like "Artist Name" or "Medium."
From there, you just drop a Divi Text module into your template and tell it to pull that specific information right onto the page. It’s the perfect solution for technical specs, artist bios, or origin information—all the important data that doesn't quite fit into the default WooCommerce fields.
Quick CSS Snippets for Common Fixes
Sometimes, you'll find that the Divi Builder can get you 95% of the way there, but a few minor styling quirks remain. That's when a few lines of custom CSS become your best friend. Just pop these into the Divi > Theme Options > Custom CSS box to make small but mighty changes.
- Adjust Spacing on Radio Buttons: Have you ever noticed how variation radio buttons can feel a bit cramped? A quick CSS rule is all it takes to give them some breathing room.
- Create Unique Sale Badges: Ditch the default circle badge. With a little CSS, you can create custom shapes, add brand-specific gradients, or change the font to make your sale badge pop.
- Fine-Tune Price Font Sizes: Want to make your sale price bigger and bolder than the original price? CSS lets you target and style them individually with total precision.
A slick-looking product page is a must, but it's only half the battle. While you're perfecting the visual design, don't forget that a smooth and secure checkout is absolutely critical for conversions. For a deep dive, check out this excellent WooCommerce payment gateway setup guide.
Combining Tools for a Bespoke Experience
The real magic happens when you start combining Divi and Divi Areas Pro with other specialized plugins. This is how you woocommerce customize product page functionality far beyond what comes out of the box, creating a truly interactive experience for your shoppers.
For example, what if you need to integrate a product configurator plugin? It's easier than you think. You can use the Divi Theme Builder to handle the overall page layout, then simply drop a shortcode from the configurator plugin into a Divi Code module. This setup lets customers build their own custom product—like a personalized computer or custom-engraved jewelry—all within your beautifully designed Divi layout.
To take it even further, you can use Divi Areas Pro to add conditional tooltips or help text that appears as users interact with the configurator. This guides them through complex choices and makes the process feel intuitive. This kind of combination transforms a standard product page into a dynamic, interactive sales tool, giving you a serious edge over competitors still using off-the-shelf solutions.
Common Questions About Customizing Product Pages
Whenever you start tinkering with your WooCommerce product pages, a few questions are bound to pop up. It's only natural. From worrying about site speed to wondering what happens if you switch things off, it’s smart to get ahead of any potential issues. Let's walk through some of the most common questions I hear from clients and users.
Will This Affect My Site Speed?
This is the big one, and the honest answer is: it depends entirely on how you customize things.
Using a well-coded foundation like Divi is a great start. The methods we've covered here—using Divi’s Theme Builder and Divi Areas Pro—are built to be efficient. The performance hit isn't coming from the tools themselves.
Where you can run into trouble is by overloading your template. If you cram it with dozens of complex modules or, more commonly, huge and unoptimized images, your page will absolutely slow down. The key is to be intentional and lean.
A good rule of thumb I always follow is to run speed tests after making significant changes. Tools like Google PageSpeed Insights or GTmetrix are your best friends for spotting performance killers before they become a real problem. Always, always compress your images and use a solid caching setup.
Can I Create Different Layouts for Different Categories?
Absolutely! This is precisely where using the Divi Theme Builder becomes a game-changer. You aren't stuck with a one-size-fits-all product page anymore.
Think about it: a layout for your "Clothing" category could feature a big, bold size guide, while a page for "Electronics" could have a section dedicated to tech specs. It just makes sense.
Inside the Divi Theme Builder, you can assign each template to:
- Specific product categories
- Specific product tags
- Even individual products
This level of control is how you create a shopping experience that feels tailored to what you're selling, and that’s a huge win for conversions.
What Happens if I Disable These Plugins?
It's crucial to understand what each tool is doing. If you were to disable the Divi theme (or your child theme), your whole site design goes with it. The custom product page template would break and revert to a default WordPress theme.
Now, if you only disable the Divi Areas Pro plugin, it's a different story.
Your main product page template, the one built with the Divi Theme Builder, will stay put. It'll work just fine. But all the dynamic content you injected with Divi Areas—like those slick promotional banners, trust seals, or conditional popups—will simply vanish. The core product info remains, but the smart, targeted extras will be gone.
Can I Customize the Checkout Page Too?
Yes, you can definitely use these same tools on your checkout page, but there are some boundaries.
The Divi Theme Builder lets you create a template for the checkout page, which is perfect for adding custom headers, footers, and other design elements around the core WooCommerce checkout form.
Divi Areas Pro works great here, too. You can easily inject content into specific spots, like adding a last-minute trust badge next to the payment fields or a reassuring message about your secure checkout process.
However, if you're looking to heavily modify the checkout form itself—rearranging fields, creating a multi-step process, etc.—that's a more complex beast. Because it deals with payment gateways and sensitive customer data, that kind of customization usually requires a specialized plugin built specifically for the WooCommerce checkout.
Ready to build smarter, higher-converting product pages? Divimode provides the tools and expert guidance you need. Get started with Divi Areas Pro today and transform your WooCommerce store. Learn more at https://divimode.com.
More Articles You Will Like