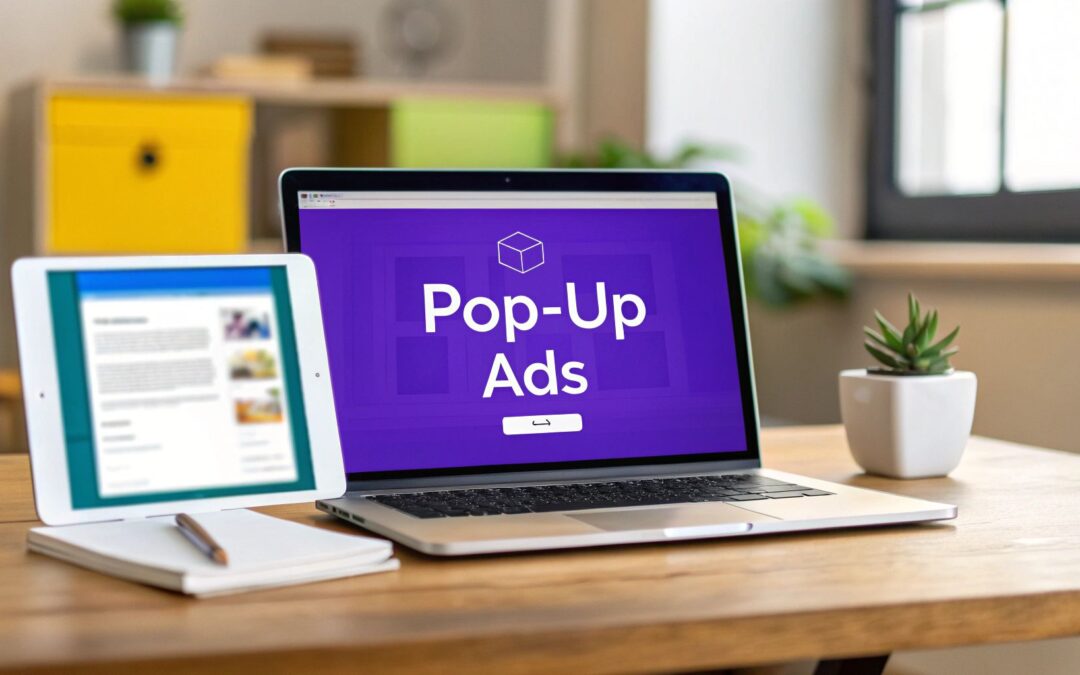
Pop-ups often get a bad rap, but when deployed with precision and user intent in mind, they transform from a nuisance into a high-impact conversion tool. The difference between an ad that gets instantly dismissed and one that generates a lead lies in the strategy. The key isn't just deciding to use a pop-up, but understanding which specific type to use for the right audience at the right moment.
This guide moves beyond the generic modal to provide a comprehensive catalog of the different types of pop up ads available to modern web designers and marketers. We will explore the specific triggers, formats, and psychological drivers that make each one effective. For every type, from the classic exit-intent to the subtle slide-in, we will provide a clear definition, practical use cases, and crucial pros and cons.
More importantly, this is a hands-on resource. We'll dive into actionable best practices for design and conversion, and provide concrete implementation steps for Divi users, leveraging the powerful features of Divimode's Divi Areas Pro and Popups for Divi. By mastering these formats, you can create targeted, user-friendly experiences that boost newsletter sign-ups, drive sales, and deepen user engagement without compromising the user experience. To maximize the impact of your high-converting pop-ups, consider integrating them with these actionable conversion rate optimization tips. This guide equips you with the knowledge to select and build the perfect pop-up for any goal.
1. Exit-Intent Pop-ups
Exit-intent pop-ups represent a strategic last-ditch effort to retain a visitor. This technology monitors a user's mouse cursor movements in real-time. When the cursor rapidly moves towards the top of the browser window, indicating an intent to close the tab, switch tabs, or use the back button, it triggers the pop-up. This makes it one of the least intrusive but most impactful types of pop up ads available.
Instead of interrupting a user’s browsing session, it engages them at the precise moment they are about to leave. This timing is critical for re-engaging users who might have found what they were looking for but didn't convert, or for those who are leaving due to simple distraction. The goal is to present a final, compelling reason to stay.
Use Cases and Best Practices
Exit-intent is incredibly versatile and powerful when used correctly. Its primary strength lies in capturing leads and sales that would otherwise be lost forever.
- E-commerce: A common tactic is offering a first-time purchase discount (e.g., "Leaving so soon? Get 10% off your first order!") to convert hesitant shoppers.
- SaaS & Blogs: Offering a valuable lead magnet like a free e-book, checklist, or webinar sign-up can capture an email address just before the visitor departs.
- Cart Abandonment: On checkout pages, an exit-intent pop-up can remind users of their items or offer free shipping to complete the purchase.
To implement this effectively, always ensure your offer is highly relevant to the page's content. A generic offer is far less effective than a specific one. For a more detailed guide, you can learn more about creating a powerful popup exit intent strategy.
Implementation with Divi Areas Pro
With Divi Areas Pro, setting up an exit-intent trigger is straightforward.
- Navigate to Divi > Divi Areas Pro and create or edit your pop-up Area.
- In the Display Settings, find the "Trigger" section.
- Select On Exit-Intent from the trigger options.
- You can adjust the sensitivity to control how aggressively the pop-up triggers, preventing it from appearing prematurely.
Pro Tip: Combine the exit-intent trigger with conditional logic. For instance, you can show a specific pop-up only to users who have items in their WooCommerce cart, creating a highly targeted and effective cart abandonment campaign.
2. Scroll-Triggered Pop-ups
Scroll-triggered pop-ups are activated when a user scrolls to a specific depth or percentage down a webpage. This timing-based approach is founded on the idea that deeper scrolling signals higher user engagement. By waiting for the user to demonstrate interest, these pop-ups can present an offer when it's most likely to be well-received.
Instead of appearing immediately and potentially annoying a new visitor, this method respects the user's initial browsing experience. It allows them to consume content first, triggering the pop-up only after they've invested time on the page. This makes it one of the more polite and effective types of pop up ads for nurturing interested prospects.

Use Cases and Best Practices
The primary advantage of scroll-triggered pop-ups is their ability to target engaged users without interrupting their initial journey. This makes them ideal for secondary calls-to-action and content-rich pages.
- Blog Posts & Articles: After a user reads 50% of an article, trigger a pop-up inviting them to subscribe to a newsletter for more content on that topic.
- Product Pages: When a visitor scrolls down to the customer reviews section, show a pop-up offering a discount or highlighting a key product benefit.
- Case Studies: Once a user reaches the end of a detailed case study, display a pop-up with a contact form or an invitation to book a demo.
For optimal performance, test different scroll percentages (e.g., 25%, 50%, 75%) to find the sweet spot for your audience. For a more in-depth look, you can explore the Divi scroll event trigger to see how it works in practice.
Implementation with Divi Areas Pro
Setting up a scroll-triggered pop-up in Divi Areas Pro is precise and user-friendly.
- Navigate to Divi > Divi Areas Pro and select the Area you want to use as a pop-up.
- Go to the Display Settings meta box and find the "Trigger" section.
- Choose On Scroll-Amount from the list of available triggers.
- Enter a percentage value (e.g., "50" for halfway down the page) to define when the pop-up should appear.
Pro Tip: Combine the scroll-amount trigger with a time delay. For example, trigger the pop-up after the user has scrolled 60% and has been on the page for at least 15 seconds. This adds another layer of engagement filtering, ensuring your pop-up only appears to the most interested visitors.
3. Time-Delay Pop-ups
Time-delay pop-ups are triggered after a user has spent a specific amount of time on a page. This could be 5, 15, or 60 seconds, allowing the visitor to first engage with the initial content before an offer is presented. This approach respects the user experience by avoiding immediate interruptions, making it one of the most balanced types of pop up ads.
By setting a time delay, you give visitors a chance to understand your page's value proposition. This ensures the pop-up is shown to a more engaged audience, rather than to someone who might bounce immediately. The timing can be strategically customized based on average time on page, content complexity, and the desired user action.
Use Cases and Best Practices
Time-delay pop-ups are excellent for presenting primary calls-to-action to users who have shown initial interest by staying on your site. The key is to match the delay to the user's likely journey.
- Newsletter Signups: On a blog post, a 30-45 second delay allows the user to start reading before you ask them to subscribe for more content.
- Lead Generation: For a features page, a 15-20 second delay can be enough time for a user to become interested in a demo or a free consultation.
- E-commerce Offers: A 10-second delay on a category page could present a limited-time discount code to encourage browsing and purchasing.
The optimal delay often requires A/B testing. Start with your page’s average engagement time and adjust from there. Shorter delays work for high-traffic, quick-decision pages, while longer delays are better for in-depth content where you need to build trust first.
Implementation with Divi Areas Pro
Setting a time-delay trigger in Divi Areas Pro is a core feature that gives you precise control.
- Open your chosen Area by going to Divi > Divi Areas Pro.
- Navigate to the Display Settings > Trigger section.
- Choose After some time from the trigger list.
- Enter the desired delay in milliseconds (e.g., 10000 for 10 seconds). You can also set it to trigger only once per browser session.
Pro Tip: Enhance the time-delay trigger by layering it with user role conditions. For example, you can set a pop-up to appear after 15 seconds, but only for users who are not logged in, asking them to create an account or subscribe.
4. Form Submission Pop-ups
Form submission pop-ups are triggered immediately after a user completes a key action, such as submitting a form or adding a product to their cart. Instead of interrupting a task, they appear as a direct response to a user's successful interaction. This makes them a powerful tool for guiding users through a conversion funnel and enhancing the post-conversion experience.
These types of pop up ads are fundamentally about acknowledging an action and then leveraging that moment of high engagement. By confirming the user's submission and immediately presenting a relevant next step or offer, you can build momentum, increase order value, and improve overall user satisfaction. The key is to make the user feel their action was received and valued.
Use Cases and Best Practices
The primary strength of form submission pop-ups is their contextual relevance. They appear at the exact moment a user is most engaged with your brand, making your follow-up offer feel like a natural next step rather than an interruption.
- Lead Magnet Delivery: After a user signs up for a newsletter or e-book, display a pop-up with a "Thank You" message and a direct download link for the promised resource.
- E-commerce Upsells: When a customer adds an item to their cart, trigger a pop-up showing a complementary product (e.g., "Customers also bought these batteries for their new camera!").
- Post-Purchase Offers: After a successful checkout, show a pop-up offering a limited-time discount on their next purchase to encourage repeat business.
For maximum effectiveness, always lead with a confirmation message ("Your message has been sent!") before presenting any secondary offer. Ensure the follow-up is directly related to the initial action to maintain relevance and provide a clear call to action.
Implementation with Divi Areas Pro
You can trigger a pop-up after a form submission using JavaScript events or by integrating with the form's API.
- Navigate to Divi > Divi Areas Pro and build your confirmation or upsell pop-up.
- In the Display Settings, go to the "Trigger" section.
- Select On Click and assign a unique CSS class or ID to the trigger, like
.show-upsell-popup. - In your form's settings (e.g., Divi's Contact Form module or Gravity Forms), configure it to trigger a JavaScript event or redirect to a URL with the trigger element upon successful submission.
Pro Tip: For advanced use cases, use the Divi Areas Pro API. You can write a small JavaScript snippet that listens for your form's specific 'submission successful' event and then programmatically calls the
DiviArea.show(AREA_ID)function to display your pop-up. This provides a more robust and reliable integration.
5. Click-Triggered Pop-ups
Click-triggered pop-ups are activated by a direct user action, such as clicking on a button, a link, an image, or a specific piece of text. Unlike their automatic counterparts that appear based on time or behavior, these pop-ups are entirely user-initiated. This makes them one of the most user-friendly and contextually relevant types of pop up ads.
Because the user explicitly requests the content, this method eliminates the intrusive nature associated with other pop-ups. It respects the user's browsing flow, offering additional information or functionality only when it's needed. The interaction feels less like an advertisement and more like a helpful, integrated feature of the website, leading to higher engagement rates and a more positive user experience.
Use Cases and Best Practices
The power of click-triggered pop-ups lies in their ability to deliver focused content without navigating the user away from the current page. They are perfect for layered information and secondary actions.
- Forms: Use a "Contact Us" or "Sign Up" button that opens a submission form in a pop-up, keeping the user on the original page.
- Galleries & Portfolios: Clicking a thumbnail image can launch a full-size image gallery or video player in a lightbox pop-up.
- Additional Information: An "i" or "?" icon next to a technical term or form field can trigger a pop-up with a detailed explanation or instructions.
- Menus: A hamburger icon can trigger a full-screen navigation menu, a common pattern in responsive design.
For best results, the clickable element must clearly indicate its function. Use descriptive button text like "View Details" or "Watch Video" to set clear expectations for what will happen when the user clicks.
Implementation with Divi Areas Pro
Implementing a click-triggered pop-up with Divi Areas Pro is simple and requires assigning a CSS class or ID to both the trigger and the pop-up.
- Navigate to Divi > Divi Areas Pro and create your pop-up Area.
- In the Display Settings, find the "Trigger" section.
- Select On Click from the trigger options.
- Define a unique CSS selector for your trigger (e.g.,
#open-contact-formor.product-gallery-trigger). Apply this same selector to the button or element on your page that you want to trigger the pop-up.
Pro Tip: Use click triggers to create multi-step forms or interactive guides. One button in a pop-up can close the current Area and trigger another, guiding the user through a process without a single page reload.
6. Page-Specific/Context-Based Pop-ups
Page-specific, or context-based, pop-ups are the chameleon of the marketing world, changing their message to perfectly match the user’s current location on your website. Instead of displaying a single generic offer across your entire site, this approach tailors the pop-up's content to the specific page, product category, or blog post the visitor is viewing. This makes it one of the most relevant and high-converting types of pop up ads.
The power of this strategy lies in its precision. By aligning the pop-up’s offer directly with the user’s immediate interest, you dramatically increase the likelihood of engagement. A user reading about email marketing is far more likely to download an e-book on that topic than a generic business guide. This relevance transforms the pop-up from a potential annoyance into a helpful, timely resource.
Use Cases and Best Practices
Contextual targeting is essential for any website with diverse content or product offerings. Its primary strength is delivering the right message to the right person at the right time.
- E-commerce: On a product category page for "running shoes," display a pop-up offering a "Guide to Choosing the Perfect Running Shoe." On a specific product page, offer a discount for that exact item.
- Blogs: If a user is reading an article about SEO, trigger a pop-up to sign up for an upcoming SEO webinar or download a keyword research checklist.
- Agency Sites: Show a pop-up with a web design portfolio only on your "Web Design Services" page, while a different pop-up about SEO case studies appears on the "SEO Services" page.
To maximize effectiveness, map out your key user journeys and create pop-ups that complement each step. For more on this, check out how to use Popups for Divi with conditional logic for precise targeting.
Implementation with Divi Areas Pro
Divi Areas Pro makes it simple to assign pop-ups to specific contexts using its powerful display conditions.
- Navigate to Divi > Divi Areas Pro and create or edit your pop-up Area.
- In the Display Settings, go to the "Placement" or "Conditions" tab.
- Click "Add Rule" and select a condition like Page, Post Type, or Post Category.
- Specify the exact page, category, or even user role where you want the pop-up to appear.
Pro Tip: Combine page-specific rules with other triggers. For example, show a time-delayed (e.g., after 30 seconds) pop-up offering a related article, but only on posts within your "Case Studies" category to keep users engaged with your most valuable content.
7. Geo-Location and Device-Based Pop-ups
Geo-location and device-based pop-ups are a form of highly targeted advertising that leverages user data to deliver personalized content. This technology identifies a visitor's physical location, device type (desktop, tablet, or mobile), operating system, or even browser. This allows for incredibly specific messaging, making it one of the most powerful types of pop up ads for creating a truly relevant user experience.
Instead of showing every visitor the same generic offer, you can tailor your pop-ups to their specific context. This level of personalization makes the user feel understood and significantly increases the likelihood of engagement and conversion. The goal is to present an offer that feels uniquely designed for that visitor at that exact moment.
Use Cases and Best Practices
The power of this pop-up lies in its ability to adapt. For businesses serving different regions or optimizing for various devices, this targeting is essential for relevance and performance. For pop-ups specifically designed to target users based on their physical location or device, a deep understanding of how to leverage powerful geographics in marketing is crucial for success.
- International E-commerce: Display prices in the local currency or show a pop-up in the visitor's native language based on their country.
- Local Businesses: Promote an in-store event or special offer only to users within a specific city or zip code.
- App Promotion: Show a pop-up prompting mobile users to download your app, while desktop users see a different offer.
- Regional Shipping: Notify visitors from specific regions about shipping costs or free shipping thresholds relevant to their location.
Always respect user privacy and adhere to data regulations like GDPR when using location data. It's also critical to design mobile-specific pop-ups with touch-friendly controls and a layout optimized for smaller screens.
Implementation with Divi Areas Pro
Setting up these conditional rules in Divi Areas Pro is simple.
- Navigate to Divi > Divi Areas Pro and create or edit your pop-up Area.
- In the Display Settings, go to the "Conditions" tab.
- Click Add Condition Group and then Add Condition.
- Choose your rule from the dropdown, such as Device > Device Type or Location > Country.
- Select the specific criteria (e.g., "Is" "Mobile" or "Is" "Canada"). You can add multiple conditions to create highly specific targeting.
Pro Tip: Combine device and location targeting for ultimate precision. For example, show a special offer for a store in London, but only display it to mobile users who are currently in the UK, encouraging immediate foot traffic.
8. User Role and Behavior-Based Pop-ups
User role and behavior-based pop-ups deliver a highly personalized experience by tailoring content to specific user segments. Instead of a one-size-fits-all approach, this technology displays unique messages based on a user's status, such as whether they are logged in, their membership level, or their past purchase history. This makes it one of the most effective types of pop up ads for building relationships and driving specific actions.
This method moves beyond generic engagement by recognizing who the user is and what they have done on your site. A first-time visitor receives a welcome offer, while a loyal, returning customer sees an exclusive discount. This level of relevance makes the pop-up feel less like an interruption and more like a helpful, personalized interaction.
Use Cases and Best Practices
The power of this pop-up lies in its ability to segment and target with precision, leading to higher engagement and conversion rates. It is ideal for sites with user accounts, memberships, or e-commerce functionality.
- Membership Sites: Greet logged-in members with exclusive content announcements or present non-members with a compelling reason to sign up.
- E-commerce Stores: Target first-time visitors with a "Welcome" discount, or show returning customers recommendations based on their previous purchases.
- Upselling & Cross-selling: Display an upgrade offer to users on a "Free" or "Basic" plan, or suggest a complementary product to a customer who recently bought a specific item.
For this strategy to succeed, you must track meaningful user signals like page views, purchase history, and login status. To dive deeper, you can explore the fundamentals of behavioral targeting and apply them to your campaigns.
Implementation with Divi Areas Pro
Divi Areas Pro makes it simple to create sophisticated, role-based pop-ups.
- Navigate to Divi > Divi Areas Pro and create or edit your pop-up Area.
- Go to the Display Settings > Conditions tab.
- Add a new rule and select User > Role. Choose the specific user roles you want to target (e.g., Subscriber, Customer, or a custom role).
- You can also set conditions based on login status (User > Logged-in).
Pro Tip: Combine user role conditions with other triggers. For example, create a pop-up that appears only to "Customers" (user role) who are about to leave your site (exit-intent trigger), offering them a loyalty discount to encourage a repeat purchase.
9. Lightbox and Image Pop-ups
Lightbox pop-ups, also known as modal windows, focus a user's attention on a specific piece of media like an image, gallery, or video. When triggered, the lightbox appears in an overlay that dims the background page content, effectively bringing the visual element to the forefront. This technique prevents distractions and provides a clean, immersive viewing experience.
These are among the most user-initiated types of pop up ads because they are typically triggered by a click. Rather than interrupting a user's flow, they enhance it by offering a closer look at content the user has already expressed interest in. This makes them perfect for presenting detailed visuals without navigating the user away from the current page.

Use Cases and Best Practices
The lightbox is a versatile tool for any website that relies on high-quality visuals to communicate its message or sell its products. Its strength lies in providing focus and detail on demand.
- E-commerce: Use lightboxes to display high-resolution product photo galleries, allowing customers to zoom in and inspect details from every angle.
- Portfolios: Creative professionals, photographers, and agencies can use lightboxes to showcase their work in a clean, professional gallery format.
- Testimonials & Tutorials: Embed a video testimonial or a short instructional guide in a lightbox to engage users without forcing them to a new page or platform like YouTube.
- Information Display: Display important documents like professional licenses, certificates, or detailed infographics in a readable, focused view.
For effective implementation, always optimize images for fast loading times. Ensure the lightbox is fully responsive with intuitive navigation (swiping on mobile, arrow keys on desktop) and includes a clear close button.
Implementation with Popups for Divi
Popups for Divi makes creating a click-triggered lightbox for an image gallery simple.
- Add a Divi Gallery Module to your page and configure your images. In the Advanced tab, assign it a unique CSS ID, for example,
my-gallery. - Create a new Popup. Inside the popup layout, add a second Divi Gallery Module. In this module's settings under Advanced > Dynamic Content, enable Gallery Lightbox.
- Go to the Popup Settings > Display Conditions and set the popup to appear on the specific page where your gallery is.
- In the Triggers tab, select On Click and enter
#my-gallery .et_pb_gallery_itemas the CSS Selector. This targets each individual image in your original gallery.
Pro Tip: Watch this detailed tutorial to see how you can use dynamic content to create a powerful gallery lightbox popup that loads the correct image when a thumbnail is clicked.
10. Fly-In and Slide-In Pop-ups
Fly-in or slide-in pop-ups offer a less intrusive alternative to traditional modal windows. Instead of abruptly appearing in the center of the screen, they animate smoothly from a screen edge, such as the bottom-right corner or the top. This directional movement feels more natural and less disruptive, drawing the user's attention without completely blocking their view of the main content.
This approach makes them one of the more polite types of pop up ads, ideal for secondary calls-to-action or notifications. Because they don't hijack the entire screen, they respect the user's browsing experience while still being prominent enough to be noticed. This balance makes them a favorite for chat widgets, cookie consents, and subtle subscription forms.
Use Cases and Best Practices
The gentle nature of fly-ins makes them suitable for a wide range of applications where a full-screen interruption would be excessive. Their effectiveness comes from their subtlety and strategic placement.
- Lead Generation: A common use is a newsletter sign-up form that slides in from the bottom after a user has scrolled partway down a blog post.
- User Support: Live chat widgets, famously used by services like Intercom and Drift, often slide in from the bottom-right to offer assistance.
- Notifications & Alerts: They can be used as banners that slide down from the top to announce a limited-time sale or important update.
- Social Proof: A small pop-up can slide in to show recent purchases or sign-ups, building trust and urgency.
For best results, always choose a position that doesn’t obscure critical navigation elements. On mobile, a bottom fly-in is often preferable to a side one to avoid covering content in a narrow viewport.
Implementation with Divi Areas Pro
Divi Areas Pro makes it easy to create these dynamic animations for your pop-ups.
- Create your pop-up content in a new Divi Area.
- Go to the Display Settings tab and find the Position section.
- Choose a position, such as Bottom Right.
- Next, go to the Animation settings and select a fly-in effect like Fly In Up or Fly In Right to match your chosen position.
- Set your desired Trigger, such as On-Scroll or Time-Delayed, to control when the animation occurs.
Pro Tip: Combine a fly-in animation with a scroll trigger. For example, set a "Related Articles" pop-up to slide in from the right only when a user scrolls 70% of the way down a blog post, offering relevant content at the perfect moment.
Comparison of 10 Pop-Up Ad Types
| Pop-up Type | 🔄 Implementation complexity | ⚡ Resource requirements | ⭐ Expected outcomes | 📊 Ideal use cases | 💡 Key advantages / tips |
|---|---|---|---|---|---|
| Exit-Intent Pop-ups | Moderate — cursor/back-button detection required; native in Divi Areas Pro | Low–Moderate — small UI + tracking logic | High ⭐ — effective at rescuing abandoning users | E‑commerce cart saves, email capture, last‑minute offers | Use frequency caps, compelling offer, test cursor sensitivity |
| Scroll-Triggered Pop-ups | Low — configure scroll depth triggers (native support) | Low — timing + content assets; works on mobile | Medium–High ⭐ — good engagement from interested readers | Blog signups, product pages, reviews section offers | Analyze behavior to pick optimal depth; combine with delays |
| Time-Delay Pop-ups | Low — simple timer settings, widely supported | Low — minimal assets; reliable across devices | Medium ⭐ — respects initial engagement, easy to A/B test | Homepages, landing pages, content gateways | Test multiple delays by page type; cap frequency per session |
| Form Submission Pop-ups | Moderate — integrate with form/WooCommerce events | Moderate — requires event tracking/API integration | High ⭐ — highly relevant, strong funnel impact | Thank‑you pages, upsells after add‑to‑cart/purchase | Show confirmation first, keep follow‑ups relevant and dismissible |
| Click-Triggered Pop-ups | Low — attach to clickable elements; very user‑initiated | Low — content assets only | Medium ⭐ — high engagement when user opts in | Product galleries, FAQs, menus, tooltips | Use clear visual cues; ideal for supplementary content |
| Page-Specific / Context-Based Pop-ups | High — setup conditional logic per page/context | Moderate–High — multiple variants and management overhead | High ⭐ — very relevant messaging boosts conversions | Product pages, category offers, role-specific content | Map contexts, reuse templates, regularly audit targeting |
| Geo-Location & Device-Based Pop-ups | High — geolocation/device detection + privacy handling | Moderate — geo data, responsive assets, legal notices | Medium–High ⭐ — strong regional/device relevance when accurate | International pricing, mobile-only promotions, local stores | Respect privacy regulations, test accuracy with VPNs/proxies |
| User Role & Behavior-Based Pop-ups | High — requires authentication & behavior tracking | Moderate–High — user data, segmentation, integrations | High ⭐ — personalized offers increase retention/conversion | Membership sites, upsells for past buyers, lifecycle messages | Segment clearly, obtain consent, combine with other triggers |
| Lightbox & Image Pop-ups | Low — built‑in modal/lightbox; media optimization needed | Moderate — high‑quality images/videos affect performance | Medium ⭐ — excellent for visual showcase and attention | Portfolios, product galleries, video testimonials | Optimize media, ensure mobile navigation and accessibility |
| Fly-In & Slide-In Pop-ups | Low — animation positioning settings (native support) | Low — small UI elements; test on small screens | Medium ⭐ — less intrusive, steady visibility for messages | Chat widgets, notifications, secondary CTAs | Choose non‑blocking position, use subtle animations, add caps |
Choosing Your Pop-up Strategy: The Right Tool for the Job
Navigating the diverse world of pop-up advertising can feel overwhelming, but as we've explored, the core principle is simple: match the tool to the task. This comprehensive guide has detailed the many types of pop up ads at your disposal, moving far beyond the stereotypical, intrusive modal. We've seen how each format, from the subtle slide-in to the precision-targeted exit-intent offer, serves a unique strategic purpose. The true power of these tools is unlocked not by their mere existence, but by their intelligent application.
The central takeaway is that a pop-up's success is directly proportional to its relevance and timeliness. An ill-timed, generic pop-up is an interruption; a well-timed, contextually relevant pop-up is a helpful guide. It’s the difference between a salesperson blocking the exit and a helpful concierge appearing exactly when you need directions. By understanding the nuances of scroll-triggered, time-delayed, and click-activated triggers, you can transform your pop-ups from a necessary evil into a welcome interaction that enhances the user journey.
From Theory to Actionable Implementation
For Divi users, this isn't just a theoretical exercise. The detailed implementation notes provided for tools like Popups for Divi and Divi Areas Pro offer a direct pathway from concept to execution. You have the technical means to create sophisticated, layered campaigns that respond dynamically to user behavior. The challenge, therefore, shifts from 'can I do this?' to 'what should I do?'
To bridge this gap, consider this actionable framework:
Define a Single, Clear Goal: Before you even open the Divi Builder, decide on one primary objective. Is it to reduce cart abandonment? Grow your email list? Announce a flash sale? Promote a specific piece of content? Trying to accomplish too much with a single pop-up will dilute its message and effectiveness.
Align Goal with Pop-up Type: Review the types of pop up ads we've covered and select the one best suited to your goal.
- Goal: Reduce Cart Abandonment -> Tool: An Exit-Intent Pop-up on the cart or checkout page offering a small discount or free shipping.
- Goal: Boost Engagement with Content -> Tool: A Scroll-Triggered Slide-In that appears after a user has read 70% of a blog post, suggesting related articles.
- Goal: Provide Non-Intrusive Support -> Tool: A Click-Triggered Pop-up attached to a "Need Help?" button that opens a contact form or FAQ lightbox.
Layer on Targeting Rules: Once you have your goal and pop-up type, use the advanced features in Divi Areas Pro to refine your audience. Target based on user role (e.g., show a special offer only to logged-in customers), device type, or even referral source. This level of granularity ensures your message is seen only by the most relevant visitors, dramatically increasing conversion rates and minimizing user friction.
A Mindset of Value Exchange
Ultimately, mastering the different types of pop up ads is about mastering the principle of value exchange. Your pop-up is asking for a moment of the user's attention. In return, you must offer something of genuine value, whether it's a discount, exclusive content, critical information, or a solution to their problem. When this exchange is fair and feels beneficial to the user, pop-ups become an integral and positive part of your site's conversion architecture.
Start small. Pick one high-impact page on your website, identify a clear conversion goal for it, and implement a single, well-crafted pop-up using the strategies outlined here. Test, measure, and iterate. The insights you gain from this first experiment will provide a powerful foundation for building a comprehensive, user-centric pop-up strategy that drives real business results without compromising the user experience.
Ready to move beyond basic pop-ups and build the dynamic, conversion-focused campaigns we've discussed? Divimode provides the ultimate toolkit for Divi professionals with plugins like Divi Areas Pro, giving you unparalleled control over triggers, targeting, and design. Elevate your Divi websites by visiting Divimode and discover the powerful features that turn your strategic vision into a reality.
More Articles You Will Like