To get the real story of what’s happening on your website, you have to look beyond simple pageviews. Tracking specific user actions—things like button clicks, form submissions, and video plays—is where the magic happens. This is how you discover what users are actually doing, giving you the data you need to improve their experience and boost your conversion rates.
Why Event Tracking Is Your Secret Weapon

Standard analytics reports tell you where users are going, but they're not great at explaining what those users do once they get there. Think of it this way: pageview data is like knowing a customer walked into your store. Event tracking is like knowing they picked up a specific product, read the label, and put it in their cart.
That granular insight is the key to understanding true user behavior.
When you set up event tracking, you turn Google Analytics from a passive reporting tool into a serious business intelligence engine. Suddenly, you can see the exact interactions that lead to a sale—or the friction points that cause people to leave your site.
Uncovering Deeper User Intent
Let's say you run an e-commerce site. A user lands on a product page. Without event tracking, all you know is that they visited. With it, you can see so much more:
- Did they play the product video?
- Did they click to zoom in on images?
- Did they open the "Specifications" tab?
- Did they add the item to their cart but not check out?
Each of these actions is an event, and together they paint a rich picture of what that user really wants. This level of detail is a goldmine for conversion rate optimization because it shows you exactly what's working and what isn't. Of course, to make the most of this, you need to follow established https://divimode.com/website-analytics-best-practices/ to keep your data clean and actionable.
Event tracking is the bridge between raw traffic data and meaningful user stories. It tells you not just that people visited, but what they cared enough about to interact with.
The Evolution Toward Actionable Data
The idea of tracking events isn't new; it's been around since Google first enabled it way back in 2005. But the game changed completely with Google Analytics 4 (GA4), which is built entirely around an event-driven model.
Since GA4's launch in 2020, the percentage of marketers using events to measure conversions has jumped from around 40% to over 65%. This shift highlights a major change in digital marketing: it’s no longer enough to just drive traffic. Success now depends on understanding and optimizing the specific actions that grow a business.
For a deeper dive into the strategic importance of data, this guide on analytics in advertising offers some great context. By mastering how to track events in Google Analytics, you’re setting yourself up to make smarter, data-backed decisions that will fuel real growth.
Getting Your Head Around the GA4 Event Model
If you’re making the jump from Universal Analytics, the first thing you need to do is let go of the old “Category,” “Action,” and “Label” structure. Google Analytics 4 didn’t just get a facelift; it was a complete teardown and rebuild. The new foundation is built on a simple, powerful idea: everything is an event.
This is a huge shift. A pageview isn’t its own special type of hit anymore—it's just an event called page_view. When a new session kicks off, that's the session_start event. This model makes data collection way more straightforward and gives you a much clearer, user-focused picture of what's actually happening on your website.
To really nail event tracking in GA4, you have to get comfortable with the four types of events you can work with. Picking the right one is the key to creating a clean, scalable, and genuinely useful analytics setup.
Automatically Collected Events
The moment you install the GA4 tracking code, it gets to work. Right out of the box, it starts logging a handful of essential events without you having to lift a finger. These are the core interactions GA4 needs to understand basic user sessions.
You can't turn them off, and you don't need to. They just work.
- first_visit: This fires only the very first time someone lands on your site.
- session_start: Triggers every time a new session begins, forming the basis for all your session-based metrics.
- user_engagement: A much smarter way to measure engagement than the old bounce rate. This event fires when a session lasts longer than 10 seconds, includes a key event, or has at least two pageviews.
These automatic events are the bedrock of your GA4 data, giving you a solid baseline from day one.
Enhanced Measurement Events
Here’s where GA4 starts to show its real power, all without you touching a line of code. Enhanced Measurement is a simple toggle in your data stream settings that automatically tracks a whole suite of common user interactions.
Think of Enhanced Measurement as a starter pack of pre-configured event tracking. Google identified the common actions most websites want to track and built an easy on/off switch for them.
By default, Enhanced Measurement is already on and tracking things like:
- Scrolls: Fires a
scrollevent when a user gets 90% of the way down a page. - Outbound Clicks: Logs an event whenever someone clicks a link that leads them away from your domain.
- File Downloads: Automatically tracks a
file_downloadevent when a user clicks a link to common file types like a PDF, DOCX, or XLSX. - Video Engagement: If you have embedded YouTube videos, it can track
video_start,video_progress, andvideo_completeevents automatically.
While this is incredibly handy, it's a bit of a blunt instrument. You can’t do much more than turn each option on or off. That’s why custom tracking is still absolutely essential for monitoring actions tied to your specific business goals.
Recommended and Custom Events
When the out-of-the-box events just don't cut it, you’ll turn to recommended and custom events. This is where you get to take the wheel.
Recommended Events are essentially a library of standardized event names Google has created for common scenarios. You still have to set up the tracking yourself (usually with Google Tag Manager), but using Google's suggested names helps GA4 interpret your data more effectively and might even unlock special reporting features down the line. For instance, instead of making up a name like user_signed_in, Google recommends using login.
Custom Events are for everything else. If there's no standard event that fits what you need to track, you can build your own from the ground up. Need to track clicks on a specific "Request a Quote" button? Go ahead and create a custom event named request_quote_click.
Here’s what a GA4 event you build actually consists of:
- Event Name: A simple, descriptive name for the interaction (e.g.,
video_play). - Parameters: Extra pieces of information that add context to the event. For that
video_playevent, you might want to include parameters likevideo_titleandvideo_duration.
This parameter-based model is what makes GA4 so much more flexible than Universal Analytics ever was. Instead of being stuck with just three rigid fields, you can attach up to 25 custom parameters to any single event. This lets you add rich, contextual layers to every action a user takes, giving you the detailed data you need to truly understand their behavior.
Setting Up Your First Custom Event with Google Tag Manager
This is where you graduate from the built-in tracking and take full command of your analytics. Using Google Tag Manager (GTM) lets you define exactly what actions matter to your business, rather than just relying on what Google thinks is important. We're going to build a custom event from the ground up to track a classic, high-value interaction: a click on an external "Book a Demo" link.
Sure, this is an outbound link, so GA4's Enhanced Measurement might see it. But building a dedicated custom event gives you so much more power. You can give it a precise name, attach custom data, and easily flag it as a key business action later on. It’s the difference between a blurry snapshot and a high-resolution photo.
The infographic below really clarifies the hierarchy. You've got the automated stuff as your base, the enhanced measurements adding a bit more detail, and then custom events at the top, giving you the most tailored insights.
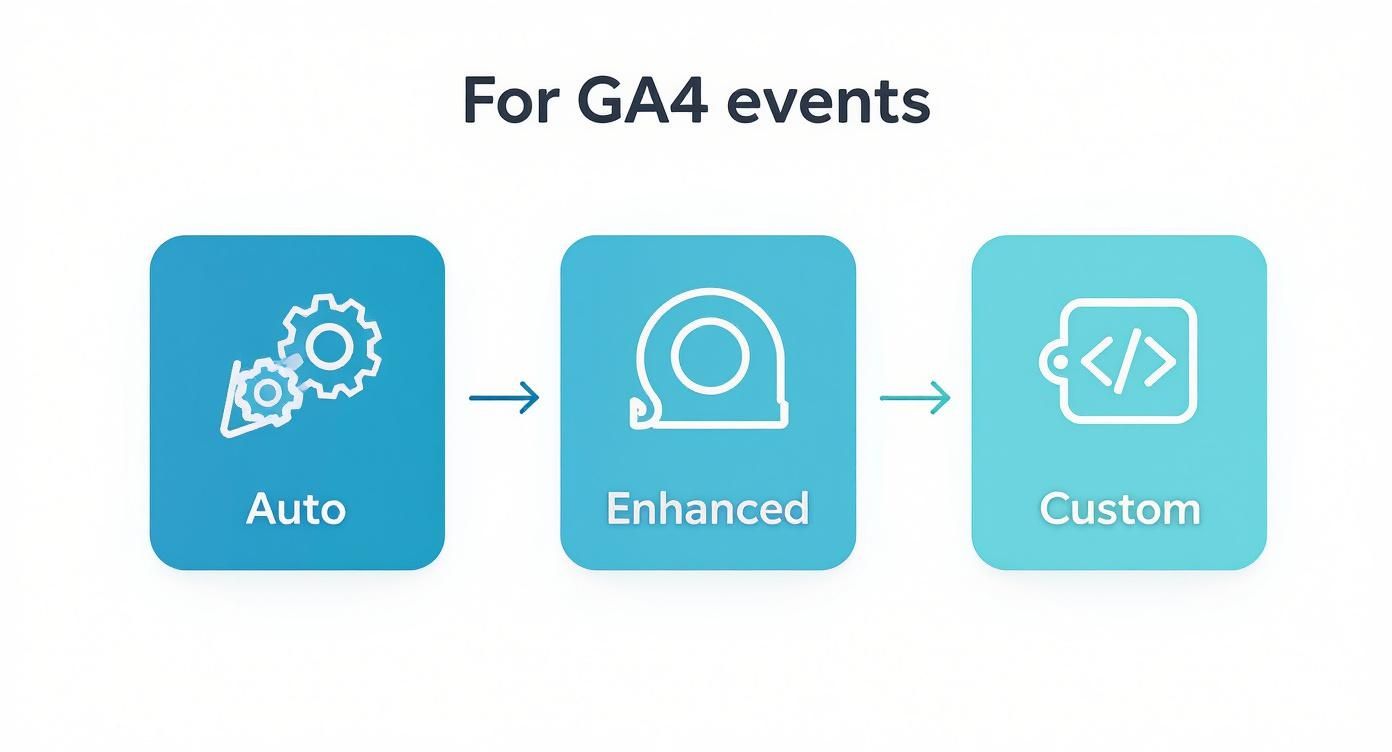
As you can see, while the first two layers provide a solid foundation, custom events are where you capture the unique interactions that truly drive your business forward.
Building the Trigger: GTM's Listening Device
First things first, we need to create a Trigger in GTM. Think of a trigger as GTM's ear to the ground; it's constantly listening for a specific thing to happen on your site. When it "hears" our demo link get clicked, it'll give the green light for our tag to fire.
To get started, pop into your GTM container, head over to the "Triggers" section on the left, and click "New."
For our "Book a Demo" link, the "Just Links" trigger type is the perfect tool for the job. This tells GTM we're only interested when someone clicks on a hyperlink.
Now, we need to tell the trigger which link click to listen for. To do this, you'll set specific conditions. An easy way to find a unique identifier is to use GTM's Preview mode, click the link on your site, and see what data pops up in the "Click" variables. Usually, the Click URL, Click Text, or Click ID will give you exactly what you need.
Let's imagine our demo link always points to "calendly.com/your-company". We can configure the trigger to fire only on "Some Link Clicks" where the Click URL contains calendly.com/your-company.
This simple rule makes our trigger incredibly precise. It won't fire on any other random outbound link, keeping our data clean.
Configuring the GA4 Event Tag: Sending the Signal
With our trigger ready and waiting, it's time to build the Tag. The tag is what actually bundles up the event information and shoots it over to Google Analytics.
Head to the "Tags" section in GTM and create a new tag, selecting "Google Analytics: GA4 Event" as the tag type.
Here’s a breakdown of what you'll fill in:
- Measurement ID: This is your unique GA4 property ID. The best way to handle this is to store it in a "Constant" variable in GTM. That way, you can just select the variable for every GA4 tag you create instead of pasting the ID over and over.
- Event Name: This is absolutely critical. Use a clear, descriptive name in snake_case (all lowercase with underscores). For our example,
book_demo_clickis perfect. Trust me, a consistent naming convention will save you massive headaches down the road. - Event Parameters: This is where you add valuable context. For instance, you could add a parameter named
link_textand set its value to the built-in{{Click Text}}variable. This would tell you if the button text was "Book a Demo" or maybe "Schedule Now," which is super useful for things like A/B testing.
Once the tag is configured, you just need to attach the trigger we built earlier. Now the logic is complete: when a user clicks the demo link (the Trigger's condition is met), this Tag will fire, sending a clean book_demo_click event straight to your GA4 property.
Pro Tip: Always name your GTM components with a clear convention. I like to use a
[Type] - [Platform] - [Description]format. Our tag, for example, would be namedGA4 Event - Book Demo Click. This makes your GTM container so much easier to navigate and troubleshoot as it grows.
Why Custom Key Events Are a Big Deal in GA4
One of the best changes in GA4 is the move from old-school "Goals" to flexible key events. This is how modern conversion tracking works. Instead of being stuck with a few rigid goal types, you can mark any event you create as a key event. It’s a complete game-changer.
This isn't just a niche feature; it's being widely adopted. Recent data shows that roughly 60% of GA4 properties have already set up at least one custom key event. The most common actions being tracked are lead form submissions (around 45% adoption), newsletter sign-ups (30%), and video plays (25%). This tells us that savvy businesses are actively using custom tracking to measure what actually moves the needle. You can dig into more GA4 key event trends to see how others are using this feature.
Don't Forget to Publish Your Work!
Finally, you have to push your changes live. GTM works with a draft-and-publish system, which is great because nothing you build can break your site until you explicitly publish it.
Before you even think about hitting that blue "Submit" button, use GTM’s Preview mode. This is non-negotiable. It lets you test your new tag and trigger in a safe environment to see if everything fires exactly as you planned, all without polluting your live data.
Once you’ve clicked around and confirmed it works perfectly, click "Submit." Give your version a descriptive name—something like "Added Book Demo Event Tracking"—and hit publish. Just like that, your new event tracking is live and collecting valuable data.
How To Know If Your Tracking Actually Works

Setting up a new event in Google Tag Manager feels great, but that’s only half the job. Pushing "Publish" without first confirming your setup is like launching a rocket with your eyes closed—you’re just hoping it goes in the right direction. The most important part of the whole process is validation, and luckily, Google gives us a couple of fantastic, purpose-built tools to make it easy.
Your two best friends for this are GTM's Preview mode and GA4's DebugView. These tools work in tandem to give you a live, behind-the-scenes look at what’s firing on your site. This is how you confirm that data is flowing from your website, through GTM, and into Google Analytics exactly as you planned. Honestly, skipping this is one of the most common reasons analytics data goes haywire.
Using GTM Preview Mode to Confirm Your Tag Fires
Before you even think about checking Google Analytics, your first stop should always be Google Tag Manager’s Preview mode. This feature essentially turns your own browser into a live testing environment. It shows you exactly which tags are firing (or not firing) as you click around your site.
Think of it as your first line of defense against tracking errors.
To get started, just click the "Preview" button in the top-right corner of your GTM workspace. Once you connect it to your site, navigate to the page with our "Book a Demo" button and give it a click. You’ll see a running log of events pop up on the left side of the Preview console.
The moment you click the demo button, look for a Link Click event to appear in that log. When you select it, the main window will show you which tags were fired by that specific action. You should see your "GA4 Event – Book Demo Click" tag sitting nicely in the "Tags Fired" section. If it’s there, congrats—your trigger is working perfectly.
Verifying Data Flow with GA4 DebugView
Okay, so the tag fired in GTM. That's a great start, but it doesn't prove the data actually made it to Google Analytics. For that final confirmation, we need DebugView. You can find this real-time report under the Admin section in GA4, and it shows you the raw data hitting your property from any device running in GTM Preview mode.
As you interact with your site, you should see your events appear in a chronological stream. When you click our demo button, the book_demo_click event should pop up almost instantly. Go ahead and click on that event in the stream—this is where you can see all the associated parameters, like the link_text we configured.
This is your definitive proof that the data has been successfully received by GA4.
While real-time reports and DebugView let marketers see events instantly, they're surprisingly underutilized. In fact, only about 35% of GA4 users regularly check DebugView data, with most relying on standard reports that have a data lag. This is a huge missed opportunity for catching issues early and getting faster insights.
Common Troubleshooting Scenarios
Of course, things don't always work on the first try. It happens. Here are a few common hiccups I've run into and how to fix them:
- The Tag Doesn't Fire at All: This almost always points back to a problem with your trigger. Head back to the Link Click event in GTM Preview, click the "Variables" tab, and carefully inspect the value of the variable you used (e.g.,
Click URL). A tiny typo is the usual suspect. - Parameters Are Missing in DebugView: If the event fires but the parameters are empty, the issue is likely in your GTM Tag configuration. Double-check that you've correctly assigned a GTM variable to each parameter's value field. For example, the
link_textparameter should be mapped to the{{Click Text}}built-in variable. - Data Looks Wrong or Inconsistent: The reliability of your event tracking hinges on the data it collects. If things just feel off, it might be time for a deeper dive. For a closer look at ensuring your analytics are trustworthy, you can explore strategies to improve data quality. Inconsistent data can completely skew your reports and lead to poor decisions.
By methodically using Preview mode and DebugView, you can confidently track every event in Google Analytics and build your strategy on a foundation of accurate data. Once you've validated that your tracking works, you can start thinking about what those metrics actually mean. For ideas on turning this data into action, check out our guide on how to measure your online business success.
Turning Raw Event Data Into Real Insights
Collecting data is just step one. The real win is turning those numbers into smart, data-driven decisions that actually grow your business. Now that you’ve got your custom events set up and firing correctly, it's time to dive into Google Analytics 4 and answer the big question: "So what?"
Raw event counts are basically just noise until you give them some context. Seeing a spike in file_download events is interesting, sure, but knowing that spike came from a specific blog post tells you your content strategy is kicking butt. This is where we start connecting the dots.
Finding Your Custom Event Data in GA4
Your first stop for a quick overview is the main Events report. You'll find it under Reports > Engagement > Events. This screen gives you a high-level list of every single event name your property has captured, along with the total counts and the number of users who triggered them.
This report is perfect for a quick sanity check. Are your new custom events, like book_demo_click, actually showing up? Are the numbers what you'd expect? It's a great starting point, but the real power comes from digging into the custom parameters you worked so hard to send along with those events.
Building Powerful Reports in the Explore Section
To get past simple counts and into the rich, contextual data you've collected, you need to get comfortable in the Explore section of GA4. Think of this as your data sandbox—a flexible, drag-and-drop report builder that lets you slice and dice your data in almost any way you can imagine. For anyone serious about how to track event google analytics data, mastering Explorations is a must.
Let's walk through building a simple but incredibly useful report to see how our menu_link_click event is performing:
- Start a Blank Slate: Head to the Explore section and choose the "Blank" template to start fresh.
- Import Your Building Blocks: In the "Variables" column, hit the "+" next to Dimensions and import
Event name,Link text, andLink URL. Then, do the same thing for Metrics and pull inEvent count. - Construct the Report: Now for the fun part. Drag
Link textandLink URLfrom your Variables over to the "Rows" box. Then, dragEvent countover to the "Values" box. - Filter Out the Noise: To make sure you're only looking at menu clicks, drag
Event nameover to the "Filters" section. Set the filter to "exactly matches" and type inmenu_link_click.
Just like that, you've got a custom report showing exactly which menu items are getting all the attention. This isn't just data; it's a direct insight you can use to rethink your site's navigation.
The Explore section is where raw data gets its MBA. It’s the tool that lets you graduate from asking "what happened?" to finally answering "why did it happen?" by blending your event data with user attributes, traffic sources, and more.
Tying Events to Marketing Campaigns and Funnels
The ultimate goal here is to connect those user actions directly back to your marketing efforts and business outcomes. How do you actually prove the ROI of that new ad campaign? You link it directly to the events it drives.
For instance, say you're running a Google Ads campaign for a new whitepaper. Because you're tracking file_download events, you can build an Exploration report that filters for that specific event and uses Session campaign as a dimension. Boom—now you can see exactly how many downloads that campaign generated, allowing you to calculate a precise cost per lead.
The same logic works for optimizing user journeys. By analyzing the sequence of events leading up to a key conversion like a purchase, you can spot where people are dropping off and find opportunities to improve the flow. Understanding your website's performance is fundamental, and a great starting point is learning more from a beginner's guide to analytics. This foundational knowledge will help you make even better sense of the powerful event data you're now collecting.
Common Questions About GA4 Event Tracking
Diving into a new analytics platform always brings a few head-scratchers, and Google Analytics 4 is no different. Once you get past the initial setup, a handful of common questions tend to pop up again and again.
Let's quickly tackle the most frequent ones to clear up some of the finer points of tracking events in GA4.
What Is the Difference Between an Event and a Key Event?
This is easily one of the most common points of confusion for anyone moving over from Universal Analytics. It's actually simpler than it sounds.
Think of it this way:
- An event is any interaction you decide to track. This could be a simple
page_view, ascroll, or our custombook_demo_clickfrom earlier. - A key event is just a regular event that you've flagged as being especially important to your business. This is what used to be called a "conversion."
Every key event starts as a regular event, but not every event deserves to be a key event. You might track dozens of interactions, but you'll only mark the most critical ones—like a form_submission or a purchase—as key events inside the GA4 interface. This gives them special treatment in your main performance reports.
How Long Until My Events Show Up in GA4 Reports?
Patience is a virtue here. While you can see your events fire instantly in DebugView and the real-time reports during testing, that data takes a while to be fully processed and baked into your standard GA4 reports.
You should typically expect a delay of 24-48 hours before new event data is fully populated in reports like the "Events" overview or your custom Explorations. This processing lag is completely normal, so don't panic if your shiny new events aren't visible right away.
Can I Track Events Without Google Tag Manager?
Technically, yes, it’s possible. You could add the GA4 tracking code (the gtag.js snippet) directly to your website's code and then write custom JavaScript to fire off events.
But honestly, this is rarely a good idea.
Using Google Tag Manager is the undisputed industry standard for a reason. It masterfully separates your tracking logic from your website’s code, which means you can add, edit, and troubleshoot tracking tags without needing to bother a developer for every little change.
GTM makes your entire analytics setup more efficient, more scalable, and far less prone to human error. For any serious attempt to track events in Google Analytics, GTM is the only way to go.
Ready to create powerful, behavior-driven popups and menus on your Divi site? With Divimode, you can build advanced interactive elements without touching a line of code. Check out Divi Areas Pro to see how you can create smarter user experiences today.
More Articles You Will Like