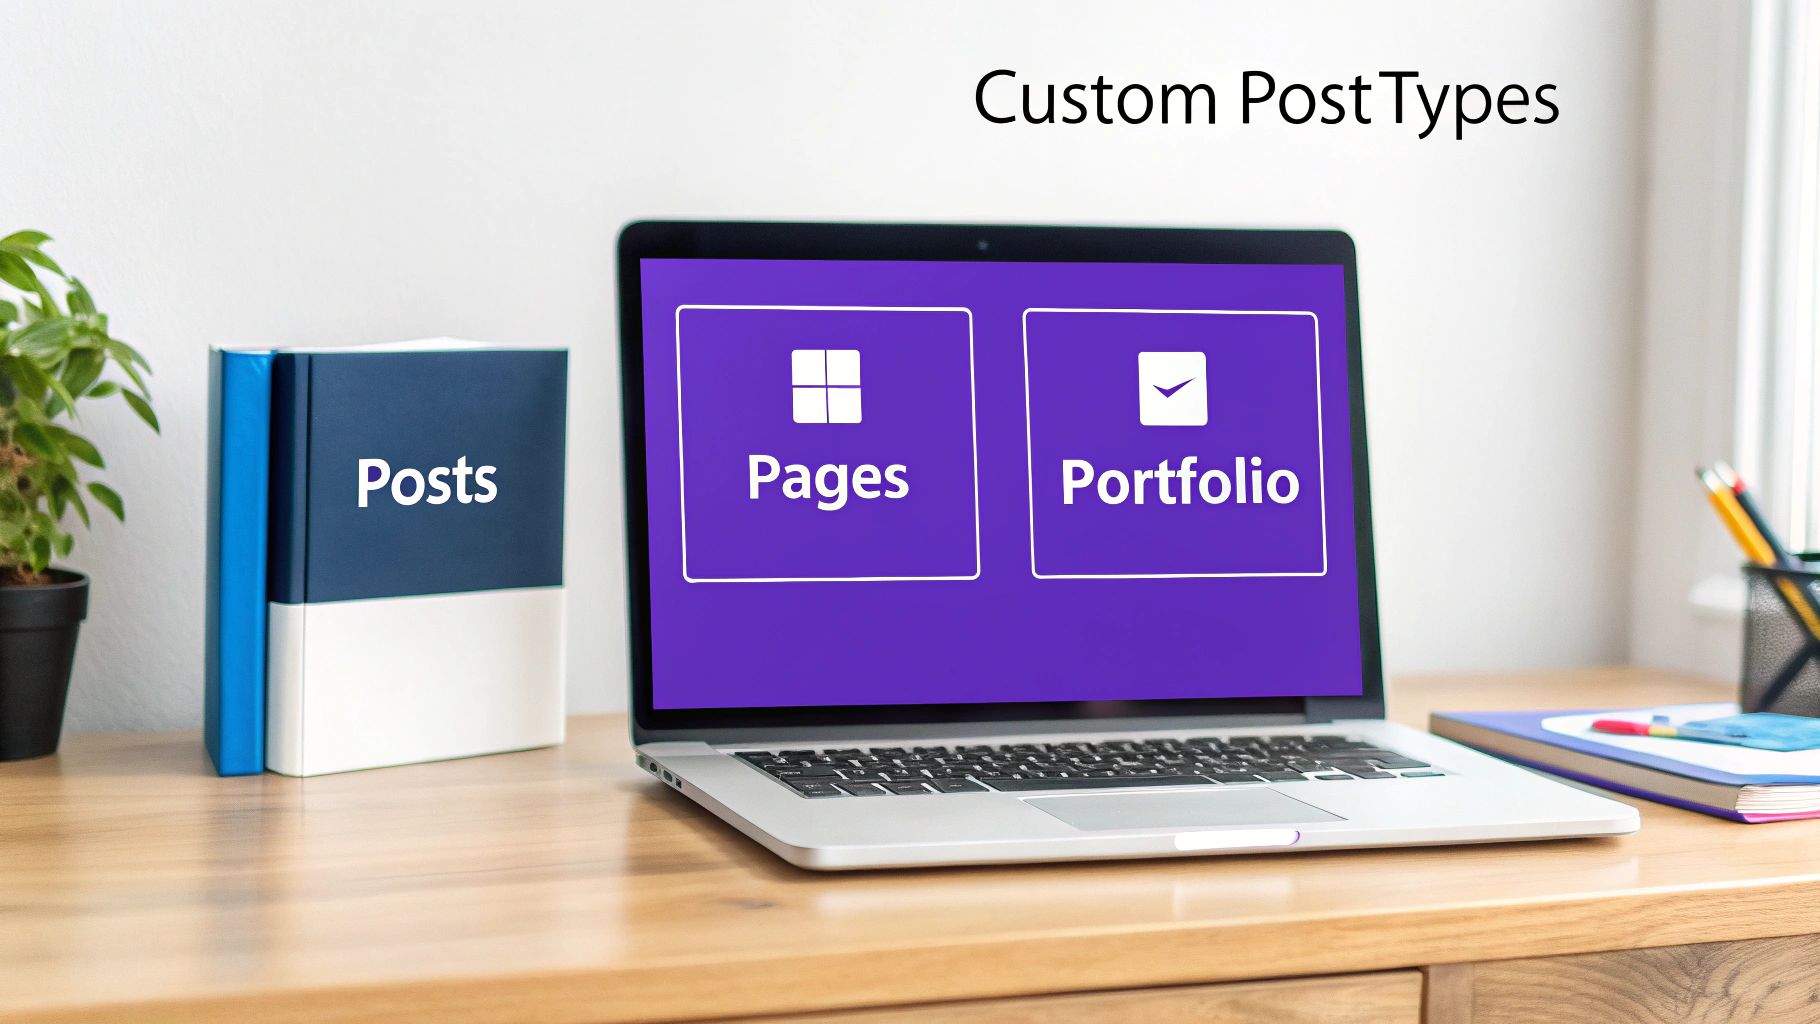
Think of your WordPress website like a digital library. Out of the box, it gives you two main sections: one for "Posts," which are like time-stamped articles in a journal, and another for "Pages," which are like the permanent reference books such as 'About Us' or 'Contact'.
But what happens when you need to catalog something entirely different, like a collection of recipes, a gallery of portfolio projects, or a directory of team members? This is where wp custom post types come into play. They let you create brand-new, perfectly organized sections for any kind of content you can dream up.
What Are Custom Post Types and Why Do They Matter
At their core, Custom Post Types (or CPTs) are what elevate WordPress from a simple blogging tool into a truly powerful Content Management System (CMS). They give you the power to define new, structured content that doesn't fit the mold of a standard blog post.
Instead of trying to shoehorn a "Team Member" profile into a blog post format, you can create a dedicated "Team Member" CPT. This new content type can have its own unique set of fields, like 'Job Title', 'Department', and 'Social Media Links'—fields that wouldn't make sense for a regular post.
This feature was an absolute game-changer for the platform when it was rolled out as a core feature in WordPress 3.0 way back in June 2010. That single update blew the doors open on what was possible, allowing developers to start building highly sophisticated, industry-specific websites.
The Power of Organization and Structure
The most immediate win you get from using wp custom post types is just plain better organization. When you separate your different content types, you're not just tidying up the backend for whoever manages the site; you're also creating a more logical and intuitive experience for your visitors.
Imagine trying to build a real estate website without them. You’d have property listings all jumbled up with your blog articles, making the admin dashboard a complete mess to navigate. By creating a "Property" CPT, all your listings are neatly filed away in their own dedicated spot.
By creating dedicated containers for your content, you’re not just tidying up your dashboard; you’re building a scalable foundation for your entire website. This structured approach makes your site easier to manage, update, and grow over time.
This structured data is also a huge plus for SEO. Search engines like Google are much better at understanding your content's context when it's organized logically. For instance, a "Recipe" CPT can be tagged with special schema that tells Google exactly what it is, which can lead to those eye-catching rich snippet results.
A quick comparison shows why default posts and pages fall short for specialized content and where CPTs provide essential flexibility.
| Feature | Default Posts & Pages | Custom Post Types (CPTs) |
|---|---|---|
| Content Purpose | General articles and static info | Specialized content (Products, Events, etc.) |
| Custom Fields | Limited; requires extra plugins | Fully customizable fields for structured data |
| Admin Menu | Mixed in with "Posts" and "Pages" | Separate, dedicated menu item for easy access |
| URL Structure | yourdomain.com/post-name/ |
Custom slugs like yourdomain.com/recipes/ |
| Scalability | Poor for managing large, diverse content | Excellent; keeps content types separate and manageable |
Essentially, while posts and pages are great starting points, CPTs give you the architectural freedom to build whatever you need.
Moving Beyond Simple Blogs
Honestly, if you're building any kind of website that isn't just a straightforward blog, custom post types are pretty much essential. They provide the architectural backbone needed for more complex and specialized sites.
Here are just a few common examples:
- E-commerce Sites: A "Product" CPT is the heart of any online store. It holds all the critical data like price, SKU, inventory levels, and product dimensions.
- Portfolio Websites: A "Portfolio" or "Project" CPT lets creative professionals and agencies showcase their work in a dedicated gallery, keeping it separate from their blog or company news.
- Business Directories: A "Listing" CPT is perfect for managing business information like addresses, phone numbers, operating hours, and service categories.
- Event Calendars: An "Event" CPT can store all the key details like dates, times, venues, and ticketing links in a structured way.
Beyond just keeping things neat, CPTs are fundamental to Mastering Site Information Architecture. They allow you to create a logical, user-friendly structure for your entire site, making it easy for people to find what they're looking for—a critical factor for engagement and conversions.
Alright, you've grasped the "why" behind wp custom post types; now it's time to roll up our sleeves and tackle the "how." Bringing your first custom post type to life is an exciting step, and you've got two main paths to get there. The route you choose really just depends on your comfort level with code and what your project demands.
You can either get your hands dirty with a little bit of PHP for ultimate control and performance, or you can opt for a user-friendly plugin for a fast, no-code solution. We'll walk through both so you can confidently pick the approach that fits you best.
Method 1: The Manual Code Approach
For anyone who wants complete control and prefers to keep their site lean by avoiding yet another plugin, creating a CPT by hand is the way to go. This method involves adding a code snippet to your theme's functions.php file or—even better—into a site-specific plugin. From a performance standpoint, this is often the superior choice because it doesn't load the extra baggage a plugin might.
Let's say we want to register a "Portfolio" post type. Here's a well-commented PHP snippet you can use as a starting point.
// Function to create our "Portfolio" Custom Post Type
function create_portfolio_post_type() {
// Set UI labels for the CPT
$labels = array(
    'name'                => _x( 'Portfolio', 'Post Type General Name' ),
    'singular_name'       => _x( 'Portfolio Item', 'Post Type Singular Name' ),
    'menu_name'           => __( 'Portfolio' ),
    'all_items'           => __( 'All Portfolio Items' ),
    'view_item'           => __( 'View Portfolio Item' ),
    'add_new_item'        => __( 'Add New Portfolio Item' ),
    'add_new'             => __( 'Add New' ),
    'edit_item'           => __( 'Edit Portfolio Item' ),
    'update_item'         => __( 'Update Portfolio Item' ),
    'search_items'        => __( 'Search Portfolio Item' ),
    'not_found'           => __( 'Not Found' ),
    'not_found_in_trash'  => __( 'Not found in Trash' ),
);

// Set other options for the CPT
$args = array(
    'label'               => __( 'portfolio' ),
    'description'         => __( 'Portfolio projects and case studies' ),
    'labels'              => $labels,
    // Features this CPT supports in Post Editor
    'supports'            => array( 'title', 'editor', 'thumbnail', 'revisions' ),
    'hierarchical'        => false,
    'public'              => true,
    'show_ui'             => true,
    'show_in_menu'        => true,
    'show_in_nav_menus'   => true,
    'show_in_admin_bar'   => true,
    'menu_position'       => 5,
    'menu_icon'           => 'dashicons-portfolio',
    'can_export'          => true,
    'has_archive'         => true,
    'exclude_from_search' => false,
    'publicly_queryable'  => true,
    'capability_type'     => 'post',
    'show_in_rest'        => true, // Important for Gutenberg
);

// Registering your Custom Post Type
register_post_type( 'portfolio', $args );
}
/* Hook into the 'init' action so that the function is executed at the right time. */
add_action( 'init', 'create_portfolio_post_type', 0 );
Key Insight: The
register_post_type()function is the heart of this entire process. That$argsarray is where you define every little detail about your CPT, from its visibility (public) to the editor features it supports (supports). And a pro tip: setting'show_in_rest' => true,is crucial for making it play nice with the modern Gutenberg block editor.
Placing your CPT code in a site-specific plugin ensures it's a permanent part of your site's functionality, completely independent of your theme. If you're building out a complex site, looking into custom WordPress plugin development is a fantastic way to keep all your custom code organized and portable.
Method 2: Using a Plugin for Simplicity
If you're not comfortable editing PHP files—or you just need to get a CPT up and running in a hurry—a plugin is the perfect solution. One of the most popular and straightforward options out there is Custom Post Type UI (CPT UI). It gives you a simple graphical interface to register and manage post types without ever touching a single line of code.
Here's how easy it is:
- Install and activate the "Custom Post Type UI" plugin from the WordPress repository.
- In your dashboard, navigate to CPT UI > Add/Edit Post Types.
- Fill out the basic settings:
- Post Type Slug: This is the unique, lowercase identifier for your CPT (e.g.,
portfolio). - Plural Label: How it will show up in the admin menu (e.g.,
Portfolio). - Singular Label: The name for a single item (e.g.,
Portfolio Item).
- Post Type Slug: This is the unique, lowercase identifier for your CPT (e.g.,
The interface lays out all the essential fields clearly, making the setup process a breeze.
After you've got the basics down, you can scroll further to configure additional settings, like which editor features to enable (title, editor, featured image) and what icon to use in the admin menu. Once you're happy with it, just click "Add Post Type," and your new CPT will pop up in your dashboard menu instantly.
So, Which Method Should You Choose?
Deciding between code and a plugin really just boils down to a trade-off: control versus convenience. Neither one is universally "better," but one will definitely be right for your situation.
- Choose the Code Method if: You're comfortable with PHP, want to squeeze out every bit of performance, and need fine-grained control over every argument. This is the professional's choice for serious, long-term projects.
- Choose the Plugin Method if: You prefer a visual interface, want to stay away from code, or just need to create a CPT quickly. It’s perfect for rapid prototyping or for users who aren't developers.
Whichever path you take, you now have the power to create a perfectly tailored content structure for any kind of website.
Adding Custom Fields and Taxonomies to Your Content
Setting up a new custom post type is a bit like building an empty filing cabinet. You've created a new home for your information, which is a great first step, but the cabinet itself isn't all that useful yet. The real magic of wp custom post types kicks in when you start adding unique, structured data. This is where custom fields and custom taxonomies enter the picture, transforming your CPT from a simple container into a powerhouse for dynamic content.
Think about it this way: a standard blog "Post" already has organizational tools baked in, like Categories and Tags. Custom taxonomies let you invent your own sorting systems, perfectly suited for your custom content.
Let's go back to our "Portfolio" example. A default category like "Uncategorized" is completely useless here. What you actually need is a way to group projects by the type of work you did. That's a perfect job for a custom taxonomy.
Organizing Content with Custom Taxonomies
A custom taxonomy is just a fancy name for a custom classification system. For our "Portfolio" CPT, we could create a taxonomy called "Service Category." This would let us file projects under terms like "Web Design," "Branding," or "SEO," making it dead simple for visitors to filter your work and find exactly what they're looking for.
You can register these yourself using the register_taxonomy() function in your code, which works a lot like registering the post type itself. Or, if you're not a coder, a plugin like Custom Post Type UI gives you a simple interface to create new taxonomies and link them to your CPTs in just a few clicks.
The real magic happens when you pair a custom post type with custom fields. While taxonomies help you sort and group your content, custom fields let you attach specific, structured data to each individual entry.
This combination of CPTs, taxonomies, and custom fields has been a huge factor in WordPress's evolution from a simple blogging tool into a serious platform for business. By 2025, it's estimated that 20,000 new WordPress sites are launched daily, and you can bet a massive number of them are using CPTs to manage specialized data.
Adding Specific Data with Custom Fields
While taxonomies are for grouping, custom fields are for storing specific little nuggets of information. For a single "Portfolio" item, you'd probably want to save data like:
- Client Name: The name of the client you did the work for.
- Project URL: A direct link to the live site or case study.
- Completion Date: The date the project went live.
Trying to cram all this into the main content editor would be a disaster—messy, inconsistent, and hard to manage. Instead, we can use a plugin like Advanced Custom Fields (ACF) to build a clean, organized input form for this data right on the post editing screen.
ACF has a super intuitive interface for creating "Field Groups" and assigning them to your "Portfolio" CPT. This means every time you add a new portfolio piece, you’ll see dedicated input boxes for "Client Name," "Project URL," and so on. It guarantees your data stays perfectly structured.
Displaying Custom Field Data in Your Theme
Once you've got all that great data saved in the backend, the final piece of the puzzle is showing it on the front end. This usually involves a tiny bit of PHP inside your theme's template files (like a single-portfolio.php file, for example).
ACF makes this incredibly straightforward with functions like the_field(). For instance, to show the client's name and a link to their project, your code might look something like this:
This little snippet grabs the data from your custom fields and prints it right into your HTML. It's how you bridge the gap between the structured data in your WordPress admin and the dynamic, useful content your visitors see. Once you get the hang of this, you can start exploring more advanced techniques, like using plugins such as Divi Areas Pro to design dynamic content popups that pull in this custom field information automatically.
Displaying Custom Post Types on Your Website
Alright, you've done the hard work of registering your custom post types and loading them up with structured, meaningful data. But here's the catch: right now, all that great content is just hanging out in your WordPress dashboard. The final, and most important, step is to actually get it onto the front end of your website for everyone to see.
This is where the WordPress template hierarchy comes into the picture. Think of it as a set of rules, or a decision-making flowchart, that WordPress follows to decide which theme file it should use to display any given piece of content. When someone lands on a URL, WordPress searches for the most specific template file it can find before falling back on more generic ones.
This system is incredibly powerful. It's what allows us to design completely custom layouts for our CPTs. We can dictate exactly how a single portfolio item looks and how the main portfolio archive page is laid out, giving us total control over the user experience.
Understanding the Template Hierarchy
To get our "Portfolio" CPT showing up, we really only need to worry about two key template files. WordPress will automatically look for these files inside your active theme's folder and use them if they exist:
single-{post_type}.php: This file controls the layout for a single entry of your custom post type. For our portfolio, the file needs to be namedsingle-portfolio.php.archive-{post_type}.php: This is for the main listing page that shows all the entries of your CPT. In our case, that would bearchive-portfolio.php.
If you don't create these files, WordPress just falls back to generic templates like single.php or archive.php. This usually means your beautiful, custom portfolio item ends up looking just like a standard blog post—which is definitely not what we're going for.
This diagram helps visualize how our "Portfolio" CPT is structured alongside its taxonomies and custom fields.
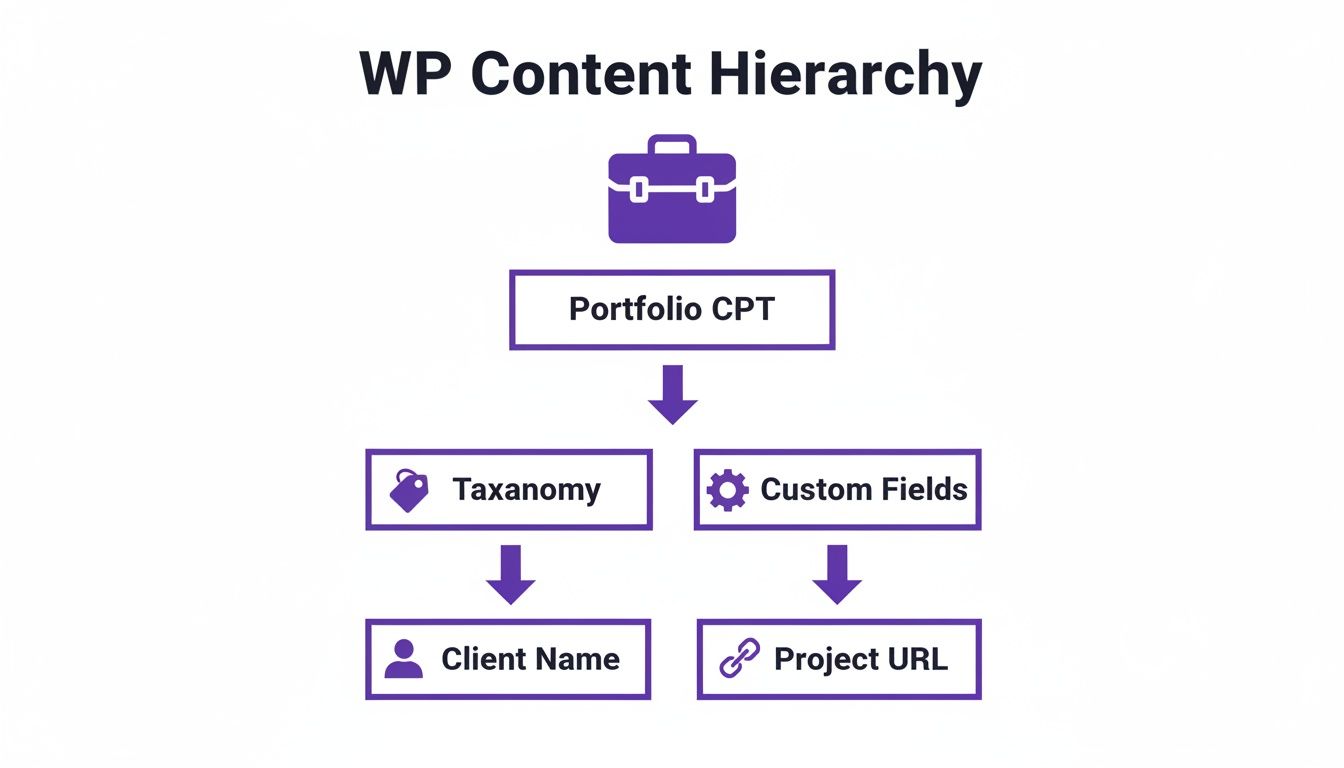
As you can see, our display templates need to do more than just show the title and content. They have to pull in data from those custom fields we created, like "Client Name" and "Project URL".
Creating the Single Portfolio Template
Let's start by building the template for a single portfolio item. In your theme's directory, create a new file and name it single-portfolio.php. A great shortcut is to copy the code from your theme's single.php file and paste it in. That gives you a solid foundation to build on.
Our goal is to tweak the standard WordPress Loop so it displays our custom field data in addition to the usual title and content.
By creating a
single-{post_type}.phpfile, you gain complete control over the layout of individual entries. This is where you can showcase the unique custom field data you've worked so hard to structure, transforming a generic page into a rich, informative display.
Here’s a simple, commented code example for single-portfolio.php. This snippet assumes you're using a plugin like Advanced Custom Fields (ACF) to handle your custom fields.
<?php
// Start the WordPress Loop
while ( have_posts() ) :
    the_post();
?>

    <article id="post-<?php the_ID(); ?>" <?php post_class(); ?>>
        <header class="entry-header">
            <!-- Display the portfolio item title -->
            <?php the_title( '<h1 class="entry-title">', '</h1>' ); ?>
        </header>

        <div class="entry-content">
            <!-- Display the featured image -->
            <?php if ( has_post_thumbnail() ) : ?>
                <div class="portfolio-featured-image">
                    <?php the_post_thumbnail( 'large' ); ?>
                </div>
            <?php endif; ?>

            <!-- Display the main content from the editor -->
            <?php the_content(); ?>

            <!-- Display our custom fields -->
            <div class="portfolio-meta">
                <h3>Project Details</h3>
                <ul>
                    <li><strong>Client:</strong> <?php the_field('client_name'); ?></li>
                    <li><strong>Website:</strong> <a href="<?php the_field('project_url'); ?>" target="_blank">View Live Project</a></li>
                </ul>
            </div>
        </div>

    </article>

<?php endwhile; // End of the loop. ?>

</main>
See how this code uses the_field() functions? It pulls the "Client Name" and "Project URL" right into the HTML, creating a dedicated "Project Details" section that wouldn't exist otherwise.
Building the Portfolio Archive Template
Next up, we need a page to showcase all of our portfolio pieces together. Create another new file in your theme directory and name this one archive-portfolio.php. Again, you can grab the code from your theme's archive.php file to get started.
The whole point of this template is to loop through every "Portfolio" post and display a little summary of each one, probably in a grid or a list. Each summary should, of course, link off to its own single portfolio page.
This archive page is absolutely critical for usability. It lets potential clients or employers browse your entire body of work at a glance. By crafting a custom archive, you're not just listing posts—you're creating a branded, professional gallery for your projects.
Using Custom Post Types with Divi and Page Builders
While manually coding theme templates gives you the ultimate control, it’s certainly not the only way to get your custom content onto the page. Millions of WordPress users lean on page builders like Divi to design their sites, and the great news is that these tools play beautifully with wp custom post types. You can build absolutely stunning layouts without ever touching a line of code.
This combination is a seriously powerful workflow for creating complex, dynamic websites. You get the best of both worlds: a structured, organized backend for your content (your CPT) and a completely flexible, visual front-end builder (Divi).
The magic behind this integration is the Divi Theme Builder. It’s the part of Divi that lets you design global templates for your entire site, including dedicated templates just for your CPTs. This means you can create one design for all your "Portfolio" item pages and a completely different one for the main portfolio archive page.
Designing Your CPT Templates in Divi
Getting started with the Divi Theme Builder is a pretty straightforward process. You just create a new template, tell it to apply to your custom post type, and from that point on, any new content you add will automatically inherit the layout you design.
Here’s a quick rundown of the steps:
- Head over to Divi > Theme Builder in your WordPress dashboard.
- Click “Add New Template” and assign it to your CPT (for example, “All Portfolio Posts”).
- Jump in and design the template body using the Divi Builder. This is where you'll visually map out how you want a single post page to look.
This process completely takes the place of having to create single-portfolio.php or archive-portfolio.php files by hand. You’re essentially building those exact same templates, just with a much friendlier drag-and-drop interface.
Pulling in Dynamic Content
Now for the real power move: using Divi’s dynamic content feature. This is what lets any Divi module pull data directly from the post it’s being displayed on. For instance, instead of typing a headline into a Text module, you can link it to the “Post Title,” and it will automatically show the title of whatever portfolio item is being viewed.
You can connect modules to all the standard WordPress fields you’d expect:
- Post Title: For your main headline.
- Featured Image: To show off the project’s hero image.
- Post Content: To pull in the main description from the classic editor.
But here’s the crucial part: you can also pull in data from your custom fields, like the ones you made with ACF. When you're editing a module, you’ll find an option to connect it to an ACF field, like your "Client Name" or "Project URL." This is exactly how you display all that unique, structured information you set up earlier. If you want to go deeper, we've got a complete guide that covers every detail of working with Divi dynamic content.
By linking Divi modules to your custom fields, you bridge the gap between your structured data and your visual design. Each element on the page becomes a dynamic placeholder, automatically populated with the correct information for every single entry in your CPT.
The growth of the WordPress ecosystem shows just how vital this functionality is. With over 59,000 plugins and 13,000 themes available, many of the most popular tools are built around CPTs to manage specialized content. For example, themes designed to handle custom post types well, like Elementor’s Hello theme, are used on 1.8% of the top million websites, which points to a huge demand for this kind of flexibility.
Ultimately, pairing wp custom post types with a page builder like Divi gives you a modern, efficient, and incredibly accessible way to build professional, data-driven websites.
Frequently Asked Questions About Custom Post Types
Even after you get the hang of wp custom post types, a few questions always seem to surface once you start building with them. Let's tackle some of the most common head-scratchers so you can move forward with confidence.
What Is the Difference Between a CPT and a Category?
This is probably the number one question I get, and the distinction is mission-critical. A custom post type creates a completely new type of content, while a category is simply a way to group existing content.
Here’s an analogy: think of your website as a library. A custom post type for "Events" is like building a whole new wing just for event listings. Categories, on the other hand, are the signs on the shelves inside that new wing—like "Concerts," "Webinars," and "Workshops." They organize the content within that dedicated space.
Will I Lose My Content If I Delete a CPT Plugin?
If you've used a plugin like CPT UI to register your post types and then you deactivate it, don't panic! Your content isn't gone forever. It's all still safe in the database, but it effectively becomes invisible because WordPress no longer knows what it is or how to show it.
Important Takeaway: Your data is safe, just hidden. To bring it back, you simply need to re-register the CPT with the exact same name (the "slug"). You can do this by reactivating the plugin or by adding the equivalent registration code yourself.
Can You Add Custom Fields to Any Post Type?
Yes, one hundred percent. While custom fields and wp custom post types go together like peanut butter and jelly, you can add them to any post type in WordPress. That includes your standard Posts and Pages.
Tools like Advanced Custom Fields (ACF) are brilliant for this. You can create groups of fields and tell them to show up on any content type you want, giving you granular control over your data everywhere on your site.
Do I Need to Code to Use Custom Post Types?
Not in the slightest. While getting your hands dirty with code gives you the ultimate level of control, it's definitely not a requirement anymore.
Plugins like Custom Post Type UI offer a completely code-free way to manage CPTs. You can create, tweak, and manage even complex post types from a simple dashboard interface, making this powerful WordPress feature accessible to everyone, regardless of their technical skill.
Ready to unlock the full potential of your dynamic content? Divimode offers powerful tools like Divi Areas Pro, allowing you to create stunning popups and injected content using the data from your custom post types. Explore Divimode's plugins today.
More Articles You Will Like