That gorgeous, high-resolution hero image you’ve picked for your Divi site? It might be the very thing chasing your visitors away. An image optimization plugin for WordPress is the secret weapon that fixes this, automatically shrinking your image files and serving up modern formats. It's the single most effective way to solve the slow-loading visuals problem without sacrificing an ounce of quality.
How Unoptimized Images Are Killing Your Site Speed
Every beautiful, high-quality image you upload to your WordPress site adds "weight" to the page. And while stunning visuals are non-negotiable for engagement—especially in portfolio-heavy Divi layouts or detailed WooCommerce product pages—their raw, unoptimized file sizes create a massive performance bottleneck. This isn't just a minor hiccup; it's a direct threat to your site's success.
When someone lands on your page, their browser has to download every single element. Large image files are almost always the heaviest and slowest part of that download. This process bloats your loading times, creating a frustrating experience that often ends with a visitor clicking the "back" button before your page even finishes rendering.
The Real Cost of Slow Visuals
The damage from heavy images goes way beyond a slow loading bar. It triggers a domino effect that poisons your most important metrics.
Slow-loading pages are a leading cause of high bounce rates. Let's be real, visitors just won't wait more than a few seconds for content to appear. For a WooCommerce store, that delay can be the difference between a completed sale and an abandoned cart.
This performance drag also directly tanks your search engine rankings. Google's Core Web Vitals, specifically the Largest Contentful Paint (LCP) metric, are heavily influenced by how quickly your main images load.
A slow LCP score tells search engines that your site delivers a poor user experience. That can torpedo your position in search results and slash your organic traffic. Ignoring image optimization is basically telling Google not to bother ranking your site.
The Automatic Solution
This is exactly where a dedicated image optimization plugin for WordPress becomes a game-changer. These tools work tirelessly in the background to fix these problems for you. Here’s what they do:
- Compressing files: They intelligently shrink the file size of every image without any noticeable loss in visual quality.
- Converting formats: They serve up next-gen formats like WebP, which offer far superior compression compared to old-school JPEGs and PNGs.
- Implementing lazy loading: They stop off-screen images from loading until a user actually scrolls down to them, which dramatically speeds up that critical initial page load.
The impact is both measurable and immediate. In one benchmark, optimizing a single 693KB image down to 165KB boosted a site's mobile PageSpeed score from 47 to 69. Even better, the Largest Contentful Paint plummeted from a painful 25.7 seconds to a respectable 5.6 seconds.
This is a critical first step, and you can dive deeper into image optimization for WordPress in our detailed guide.
What to Look for in a High-Performance Image Plugin
Picking the right image optimization plugin for WordPress can feel like wading through a sea of options, but it really just boils down to a handful of core features that will actually move the needle on your site's speed. I've seen too many people get bogged down by bells and whistles they don't need. Let's cut through the noise.
It's about going beyond basic compression and arming your site with a full suite of performance tools that work together.
Lossy vs. Lossless Compression
Your first big decision is the type of compression: lossy or lossless. It sounds technical, but the concept is simple.
Think of lossless like putting files in a ZIP folder. It makes the file smaller without changing a single pixel of the original data. This is great for technical diagrams or screenshots where absolute clarity is non-negotiable, but the file size reduction is usually pretty modest.
Lossy compression, on the other hand, is much smarter for most websites. It intelligently removes tiny bits of data the human eye is unlikely to notice, resulting in huge file size savings. For the vast majority of images you'll use—from hero images in Divi to product shots in WooCommerce—a well-tuned lossy setting is the undisputed champion. You get the speed without any noticeable drop in quality.
Failing to get this right has some pretty serious knock-on effects.
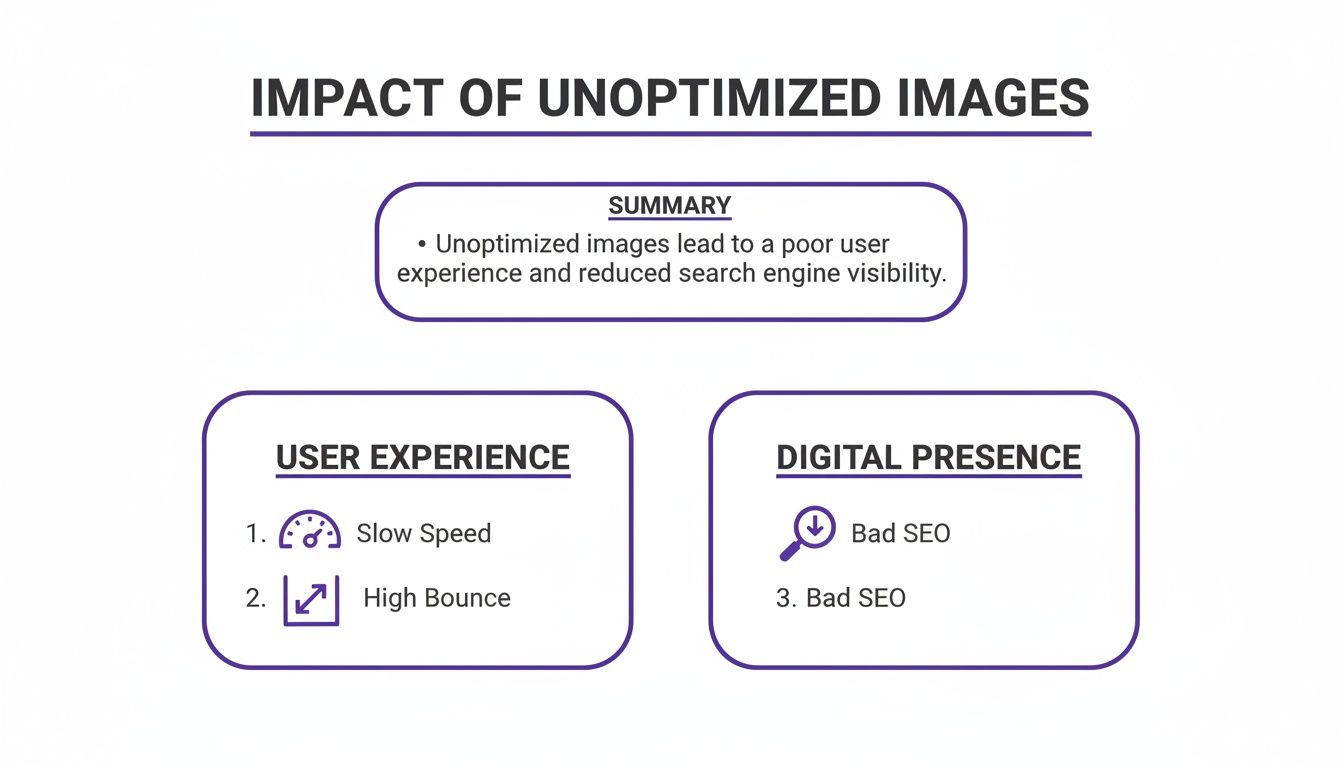
As you can see, slow speeds, high bounce rates, and poor SEO are all tangled together. Unoptimized images are often the root cause, creating a trifecta of problems that can seriously stunt your site's growth.
Next-Gen Formats and Intelligent Loading
Modern browsers are built to handle incredibly efficient image formats like WebP and AVIF. These can shrink your JPEGs and PNGs by an extra 25-50% without sacrificing visual quality. A top-tier plugin absolutely must be able to automatically convert your images to these formats and serve them to compatible browsers. This is a massive, hands-off speed boost.
Another non-negotiable feature is lazy loading. It’s a clever trick that tells the browser not to load an image until it’s about to scroll into view. This is a game-changer for long Divi landing pages or WooCommerce category pages packed with products. Your initial page load becomes dramatically faster, which is fantastic for both user experience and your Core Web Vitals scores.
The best plugins handle this intelligently, allowing you to exclude specific images, such as your logo or an above-the-fold banner, to prevent layout shifts and ensure a smooth user experience.
Automation and Content Delivery
To help you decide, here's a quick rundown of the key features to look for when choosing a plugin for your project.
Key Features in an Image Optimization Plugin
| Feature | What It Does | Why It Matters for Divi and WooCommerce |
|---|---|---|
| Lossy/Lossless Options | Compresses images to reduce file size. | Lossy is essential for dramatically speeding up visual-heavy pages like galleries and product listings. |
| WebP & AVIF Conversion | Converts images to modern formats for better compression. | These formats provide significant speed boosts over traditional JPEGs/PNGs with zero extra effort. |
| Lazy Loading | Defers loading of off-screen images until they are needed. | A must-have for improving initial load times on long pages, directly impacting Core Web Vitals. |
| Bulk Optimization | Processes your entire existing media library at once. | Saves you from having to manually optimize hundreds or thousands of old images. |
| Automatic Optimization | Optimizes new images as you upload them. | A "set it and forget it" feature that ensures your site stays fast as you add new content. |
| CDN Integration | Serves images from a global network of servers. | Reduces latency for international visitors, ensuring a fast experience for everyone, everywhere. |
Ultimately, the best image optimization plugin for WordPress is one that works behind the scenes without creating more work for you. Some plugins take this a step further. Optimole, for example, uses a built-in CDN to create device-specific images in real time, while the server-side approach of a plugin like EWWW Image Optimizer gives developers granular control.
This level of performance is especially critical for Divi sites using tools like Divi Areas Pro for popups and fly-ins, where every millisecond counts toward hitting Google's LCP target of under 2.5 seconds.
Getting a handle on these features is the foundation of a faster website. If you're curious about doing some of this manually, be sure to check out our guide on how to compress images for the web.
Choosing and Installing Your Image Optimization Plugin
Now that you know what to look for, it's time to pick and install an image optimization plugin for WordPress that actually fits your website's needs. The process is pretty straightforward, but a few smart checks will ensure you end up with a reliable partner for your site's performance journey.
The official WordPress plugin repository is the best place to start. It’s a trusted source with thousands of options, but you'll want to cut through the noise and look for real signs of quality. A high number of active installations—over 100,000 is a great benchmark—and a solid average star rating usually mean a plugin is both popular and effective.
Evaluating Your Options
Don't just stop at the numbers, though. Dive into the user reviews and support forums. I always look for recent feedback and pay close attention to how the developers respond to issues. A responsive and helpful support team is an absolute lifesaver if you ever hit a snag.
Another critical thing to check is the "Last updated" date. A plugin that hasn't been touched in over six months could be a compatibility or security risk. Things change fast, and you need a tool that keeps up with WordPress core updates and security standards. It also helps to be familiar with general image optimization for WordPress strategies to understand the bigger picture of what these plugins are trying to achieve.
For those of us working with Divi and WooCommerce, this vetting process is even more important.
- Check for known Divi conflicts: Run a quick search in the plugin's support forum for the term "Divi." This simple step can uncover any known compatibility headaches before you even install it.
- WooCommerce gallery support: Make sure the plugin can properly handle the complex image galleries on WooCommerce product pages without breaking layouts or causing visual glitches.
The real goal here is to find a plugin that not only works well but also slots seamlessly into your workflow. A tool with a clean interface and logical settings will save you a ton of time and frustration down the road.
The Installation Process
Once you've settled on a winner, the installation itself is a breeze. You can do it right from your WordPress dashboard. Just head over to Plugins > Add New, search for the plugin by name, and click "Install Now," then "Activate."
If this is your first time adding a plugin to your site, no worries at all. We have a complete walkthrough you can follow in our detailed guide on how to install plugins on WordPress.
After you activate it, most plugins will either launch a setup wizard or take you straight to a settings page. This is where the real fun begins. In the next section, we’ll dive into configuring your new plugin to get the absolute best performance for your Divi or WooCommerce site.
Configuring Your Plugin for Divi and WooCommerce
Installing a new image optimization plugin is a solid first step, but just leaving it on the default settings is like buying a race car and never taking it out of first gear. To really make your site fly—especially if it’s built with Divi or running a WooCommerce store—you need to pop the hood and dial in the settings for your specific setup. This is where you go from a basic install to a true performance powerhouse.
The first, and maybe the most impactful, setting to flip on is WebP conversion. This modern format works magic on file sizes, often shrinking them by 25-50% more than even a good JPEG compression, all with no noticeable drop in quality. Most quality plugins have a simple toggle for this, letting your site automatically serve these zippy images to any browser that can handle them.
Next up, you have to get your compression level right. You'll usually see two main options: "Lossy" and "Lossless." For pretty much any Divi or WooCommerce site I've ever worked on, a smart lossy setting is the way to go. It offers the biggest bang for your buck in file size reduction. Don't let the name scare you; a good plugin's lossy compression is so well-tuned you'd never spot the difference with the naked eye.
Fine-Tuning for Divi's Layouts
Divi sites are famous for their beautiful, image-heavy designs, especially above the fold. This is also where a clumsy approach to optimization, particularly with lazy loading, can trip you up. While lazy loading is a game-changer for performance, you have to be smart about it.
A classic mistake is letting it defer critical images like your logo or the main hero banner. This causes that ugly "pop-in" effect or, worse, layout shifts as the page loads. It’s a bad look for visitors and a red flag for your Core Web Vitals score.
To get around this, your plugin needs to have exclusion settings. Most let you exclude images in a few ways:
- By Filename: This is perfect for your logo (e.g.,
logo.png). - By CSS Class: Divi makes it super easy to add a custom class, like
no-lazy, to any module you want to load right away. - By Image Count: Some plugins let you skip lazy loading for the first 1-3 images on the page, which usually takes care of everything above the fold.
Pro Tip: Always, always exclude your main hero image and logo from lazy loading. A snappy first impression of what's visible on the screen is worth way more than deferring those couple of key assets.
Optimizing WooCommerce Product Galleries
For any e-commerce store, image quality isn't just a detail—it's directly tied to sales. Nobody trusts a pixelated or fuzzy product photo. This means you have to find that sweet spot between aggressive compression for speed and crystal-clear quality for conversions.
My advice? Start with a conservative lossy setting and then go look at your product images. Zoom in. Do they still look sharp? Beyond just plugin settings, understanding essential e-commerce image editing techniques helps ensure your visuals are perfectly prepped before they even get to WooCommerce.
Good plugins often have specific WooCommerce integrations that know how to handle the main product image and its gallery thumbnails differently, applying the right settings to each without you having to mess with it. This is a huge help.
The right tool can make all the difference here. For instance, some platforms can crush a huge 2MB image down to an average of just 179KB while running quietly in the background. If you’re a freelancer juggling multiple client sites with big product catalogs, that kind of automation is a lifesaver. Being able to auto-convert to WebP on upload and run bulk optimizations on old images is what separates the pros from the amateurs.
Measuring the Impact of Your Image Optimization
You’ve installed and configured your new image optimization plugin for WordPress, but here comes the real question: how do you know it’s actually working? Trusting the settings is one thing, but seeing the real-world impact with hard data is what really matters. This is where a simple “before and after” test comes in, using powerful and free tools to prove your efforts paid off.
Before you even touch the plugin, you need to establish a baseline. Pick a few key pages—your homepage is a must, but also grab a popular blog post or a heavy WooCommerce product page—and run them through a tool like Google PageSpeed Insights or GTmetrix. Save those reports.
The goal isn't just to chase a higher vanity score; it's about seeing tangible improvements in the metrics that count.
Key Metrics to Watch
When you get your reports back, it’s easy to get lost in a sea of data. Cut through the noise and focus on the metrics that directly reflect your image optimization work.
- Total Page Size: This is the most direct measurement of your plugin's success. A significant drop in megabytes (MB) is a clear win, showing your images are now much, much lighter.
- Largest Contentful Paint (LCP): As a core Google metric, LCP is a big deal. A lower time (the goal is under 2.5 seconds) proves that your main content—which is often an image—is loading way faster for your visitors.
- Image-related Opportunities: PageSpeed Insights will call you out on specific problems like "Properly size images" or "Serve images in next-gen formats." After you run your plugin, these warnings should be gone.
Once you’ve configured your plugin and let it work its magic on your media library, run the exact same tests on the exact same pages. Now you can compare your new results directly against that baseline you saved. The numbers should tell a clear story of a healthier, faster website.
Your "after" report is your proof. Seeing your LCP drop from a sluggish four seconds to a snappy 1.8 seconds is concrete evidence that the image optimization plugin for WordPress is delivering real value and a much better user experience.
Interpreting Your Results
What happens if a tool still flags an image as a problem? Don't panic. This isn't a failure; it's valuable feedback. It might mean you need to tweak your compression level to be a bit more aggressive, or maybe you need to double-check that WebP conversion is enabled and working as expected.
This final verification step is crucial. It closes the loop, turning your optimization efforts from a hopeful guess into a measured and confirmed performance win. By following this simple process, you can confidently say your site isn't just faster—it's providing a better, smoother experience for every single visitor.
Common Image Optimization Questions
Diving into image optimization can feel like opening a can of worms. You’ve got a powerful plugin, but now you have to make it play nice with your Divi layout or WooCommerce store. It’s natural to have questions.
Let’s clear up some of the most common sticking points I see people run into. Getting these details right is what separates a decent setup from a truly fast, high-performing website. Think of this as your cheat sheet to configuring your image optimization plugin for WordPress like a pro.
Will An Image Optimization Plugin Make My Images Look Blurry?
This is easily the biggest fear I hear, but the answer is a firm no—as long as you set things up correctly. Any good plugin gives you granular control over the compression, so you’re always in the driver’s seat.
You’ll generally come across two main compression methods:
- Lossless Compression: This shrinks file sizes without sacrificing a single pixel of quality. It’s perfect for things like logos or technical screenshots where absolute precision is key. The trade-off? The file size reduction is fairly modest.
- Lossy Compression: This is the real workhorse for most websites. It cleverly removes tiny bits of data that the human eye won’t miss, leading to massive file size savings. For almost everything—from blog post images to product photos—a smart lossy setting delivers huge speed gains with virtually no visible difference.
My advice is to start with a conservative lossy setting. Then, do a quick visual check on your most important images, like your homepage hero banner or key product shots. You can always dial the compression up or down. Most plugins even let you exclude specific images from being touched at all.
Can I Use a Plugin With Divi’s Built-In Performance Options?
Yes, you can, but you have to be smart about it. The golden rule here is to avoid overlap. When two different tools try to do the same job, you’re just asking for trouble.
For instance, if your image plugin and Divi’s performance settings both offer lazy loading, you must only enable it in one place. Turning it on in both can cause images to break or not load at all. It’s a classic case of too many cooks in the kitchen.
I’ve found the best practice is to let your specialized image optimization plugin for WordPress handle everything image-related—that means compression, WebP conversion, and lazy loading. Then, reserve Divi's built-in performance toggles for other tasks like minifying CSS or deferring JavaScript.
And remember, after you make a change in either tool, always clear your cache and do a quick front-end test.
Should I Optimize Images Before Uploading to WordPress?
While a good plugin handles optimization automatically on upload, adding a quick pre-optimization step to your workflow is a fantastic habit. The single most important thing you can do is resize your images to the correct dimensions before they ever hit your media library.
Think about it: if your Divi blog’s content area is only 800px wide, there’s absolutely no reason to upload a monstrous 4000px wide image. All that extra data just makes your server and the plugin work overtime to scale it down.
Uploading properly sized images reduces server load and makes the plugin’s job—compressing and converting the file—much faster and more efficient. I see it as a simple two-step process: resize your images to fit their container on your computer, then let the plugin handle the heavy lifting of advanced compression and format conversion on your site. It’s a simple routine that pays off big time.
At Divimode, we build tools that empower you to create high-performing, interactive websites with Divi. Elevate your user experience with advanced popups, fly-ins, and more using our powerful plugins. Learn more at https://divimode.com.
More Articles You Will Like